Search Knowledge Base
How to Create SMS Activities
SMS Outreach Activities
A key benefit of the platform is the ability to manage a variety of outreach activities for your contacts, one of these being SMS broadcasts. There is a one time setup activity to enable the SMS activity feature for an organization. If not completed, and if you are an administrator for your organizational domain, please contact NetFore Support for further assistance.
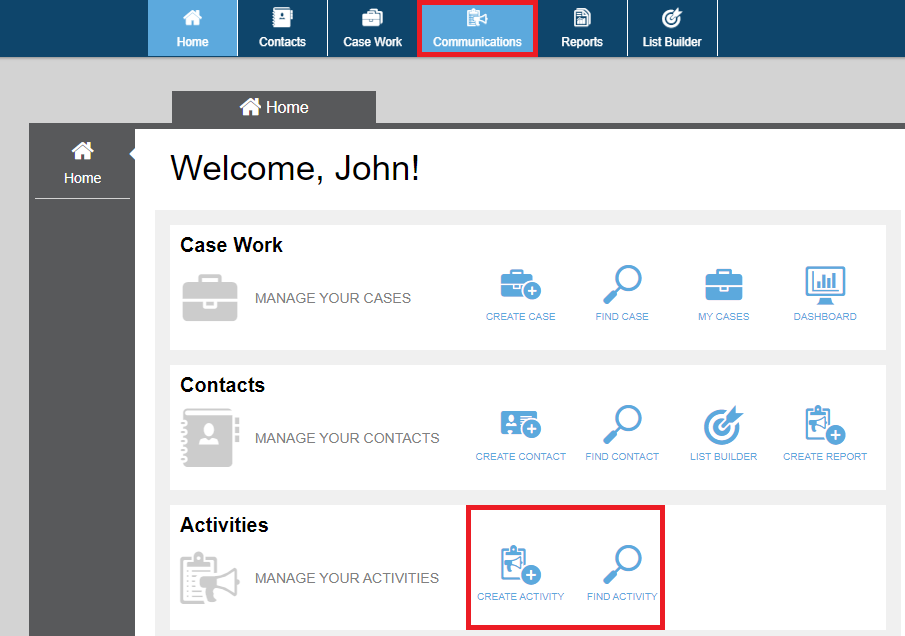
Navigating to the Communications Application
You create new SMS outreach activities using the SMS Broadcast wizard, which is located in the Communications application. There are two ways to navigate to the Communications application:
- You can select one of the Activities quick links on the foreAction home screen
- You can select Communications from the menu at the top of the page.
Creating a New SMS Activity Using the SMS Broadcast Wizard
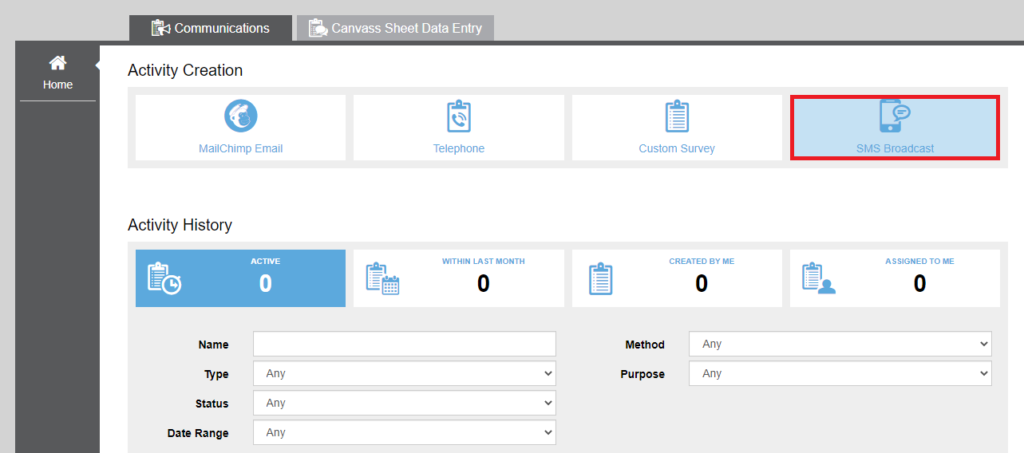
To create a new SMS Activity, select the SMS Broadcast option. The SMS Broadcast Wizard is displayed.
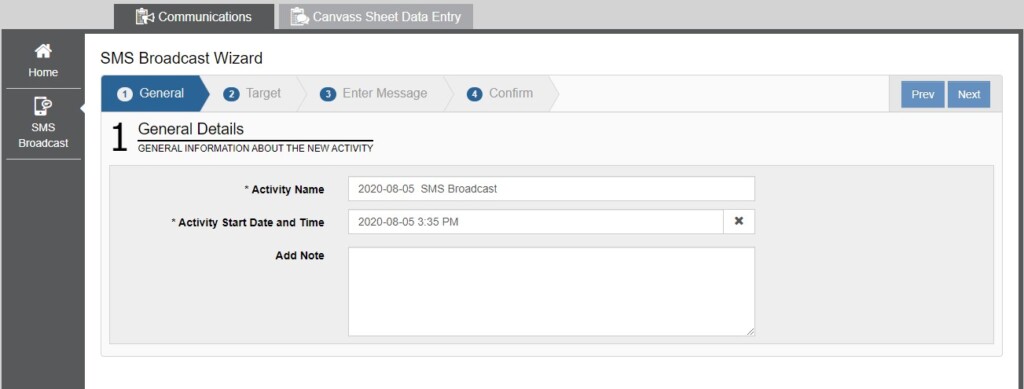
The steps in the Wizard are:
- General – Provide a name for the SMS activity for tracking purposes. This is also where you’ll want to indicate the date and time you would like the activity to start.
- Target – Choose a target list of contacts who will receive the SMS message.
- Enter Message – This is where you will enter the SMS message.
- Confirm – Displays the options chosen in the previous steps for confirmation prior to launching the SMS activity.
Step 1: Naming the Activity
In Step 1 of the wizard, provide a name for the activity. Choose a descriptive name so you can easily distinguish it from other activities in the system, for instance when you want to review statistics for the SMS broadcast.
This is also where you’ll select the date and time the SMS message will be sent. If you do not choose a date and time, the current date and time will be used meaning that the message will be sent right away.
A note can also be added the activity during this step to include additional information.
Once this is complete, click next.
Step 2: Choosing a Targeted List of Contacts
Your organization’s contacts are stored in the application database, and these can be grouped in a different ways for targeting purposes. Step 2 of the SMS wizard asks you to choose who the recipients of the message should be (the target audience).

There are four options for doing this:
- Existing Target Criteria – You can select target criteria that have previously been created using the List Builder.
- Custom Target Criteria – You can target contacts based on a variety of custom criteria. It will give you many options that will help to group contacts based on their shared characteristics.
- Contact Group –You can target all contacts that are assigned to one of the contact groups that exists for your organization.
- Existing Activity – You can select a previously executed outreach activity from the list of stored list of pre-existing activities to target the same set of contacts again.
Choose the target type from these options, then choose a specific target from the choices available to you. If the choices are numerous, it is useful to type the name of the target of interest in the search box.
Click next to continue to Step 3 of the Wizard.
Step 3: Enter Your SMS Message
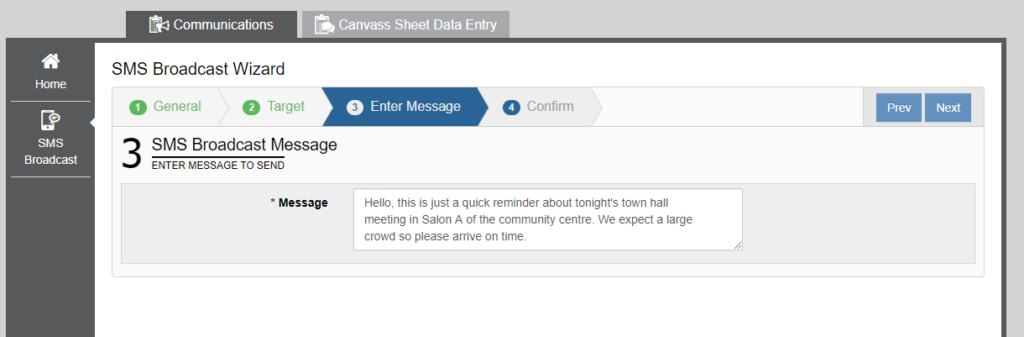
Type the message in the space provided, then click next to continue to Step 4 of the wizard.
Step 4: Reviewing and Launching your Activity
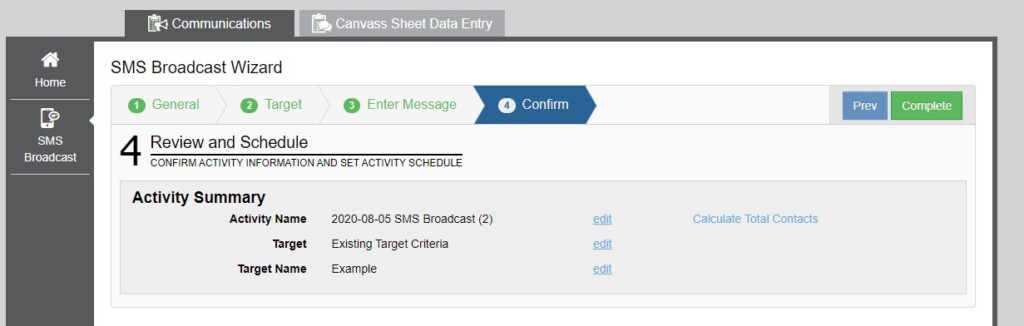
This page allows you to review all the basic information for your SMS Activity before you launch.
Some tips:
- You can view the number of contacts that will received the SMS message by clicking the ‘Calculate Total Contacts’ option on the top-right.
- You can click edit next to any configuration you wish to go back and change.
When ready, click the Complete button to finish creating your SMS Activity.
Depending on the number of contacts being added, this process can take a bit of time. Once the activity has been created, you will be re-directed to a page where you monitoring your activity.
Monitoring the SMS Outreach Activity
Finding your SMS Activity
Once you are in the Communications application, scroll down to the Activity History section of the application to view a list of activities. The activities you can see are based on your system role and the contact group you are associated with.
To find activities of interest, provide distinguishing information in the search fields provided and click search. The type field can be used if you only want to see SMS Activities.
Viewing Activity Details
To view further details about an SMS activity, select the activity from the table of activities. This will display a summary dashboard of the activity. The information provided incudes the following:
- Start date and time
- End date and time
- Total number of contacts
- The number of contacts that received the message
- The number of contacts that could not be reached
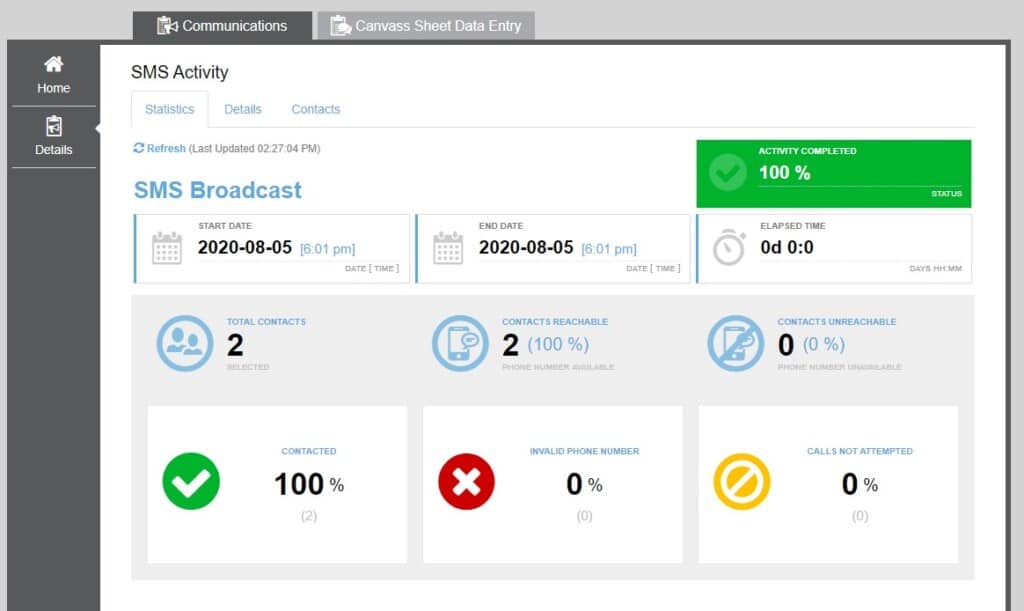
Select the Contacts tab if you want to see the details for all contacts included in the activity, and whether they could be reached or not.
Reviewing or Changing SMS Activity Details
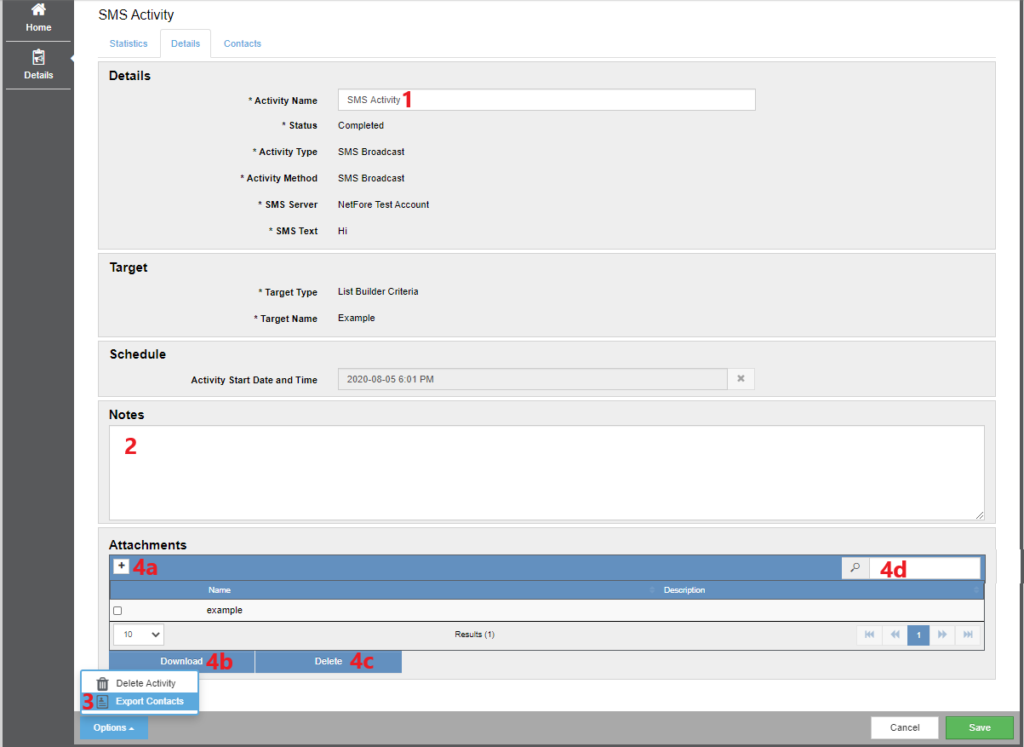
- If you want to rename an SMS Activity, enter the new name into the Activity Name text box.
- If you want to add notes to an activity, enter it in the text box under Notes.
- If you want to get a list of all the contacts associated with the activity, select Export Contacts from the Options pop-up menu at the bottom left of the screen. Then, in the pop-up, select if you want a list of single contacts or if you want a list by household. To view the report, navigate to the Reports application by clicking on the Reports button from the menu at top of the page. Then Select the Report History tab in the menu at the left of the screen. To download a report select it from the table and click the download icon (to view the icon, hover over the report row) on the right side of the report row.
- a) If you want to add an attachment to the SMS activity, click on the + under Attachments. Then select the file you want to attach by clicking on browse in the pop-up. If you want, you can add a description for the attachment in the Description text box in the pop-up. Then when you are done, click Save at the bottom right corner of the pop-up to attach the file.
b) If you want to download an attachment, select the check-box at the right of the attachment line, then click download on the bottom left of the Attachments table. If you want to download multiple attachments at once, select all the check-boxes of the files you want to download.
c) If you want to delete an attachment, select the check-box at the right of the attachment line, then click delete on the bottom left of the Attachments table. If you want to delete multiple attachments at once, select all the check-boxes of the files you want to delete.
d) If you have multiple attachments attached to the SMS activity, you can search for one using the search box at the top right corner of the Attachments table.
Deleting an SMS Outreach Activity
Users who have the required system permissions can delete outreach activities from the Activities/Details view. To do so, Select the activity you wish to delete from the table of activities with which you are associated.
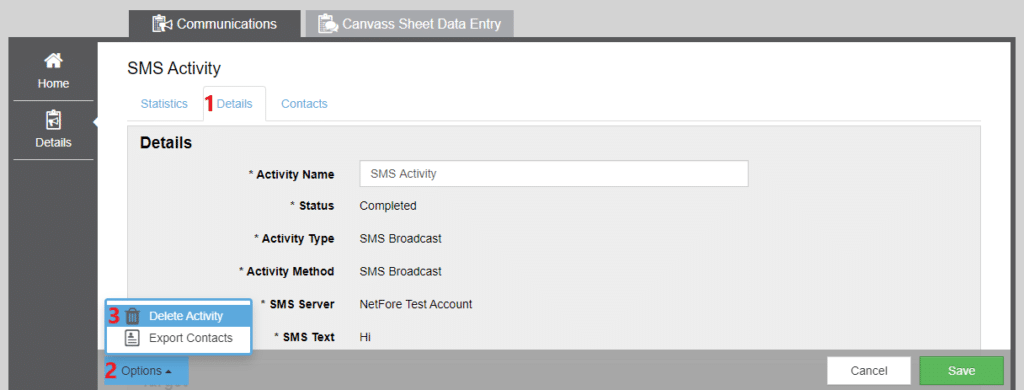
Then follow the following instructions:
- Select the Details tab under SMS Activity.
- Click on the Options button at the bottom left of the screen.
- Select Delete Activity from the Options pop-up menu. Then click Confirm Delete when asked to confirm your intentions. Note that this results in all data associated with the activity being permanently deleted from the database.