Search Knowledge Base
How To Customize Case Intake Using Custom Fields
Custom fields are a valuable tool that allow you to completely customize your case intake process by defining options your municipality requires while submitting cases. Utilizing these fields ensures that information specific to your municipality is captured with every case, and able to be viewed, filtered, and reported on later. Custom fields are separate from the standard fields included in AccessE11, but are treated in a similar way. AccessE11 is designed for any organization to be usable out of the box. But with powerful configuration tools like these, your municipality can adapt the software to match your specific needs.
Creating a Custom Field
Your first step is to head to your Case Office Administration page. Scrolling down on this tab, you will find the Custom Fields section which will allow you to create, edit, and delete custom fields.
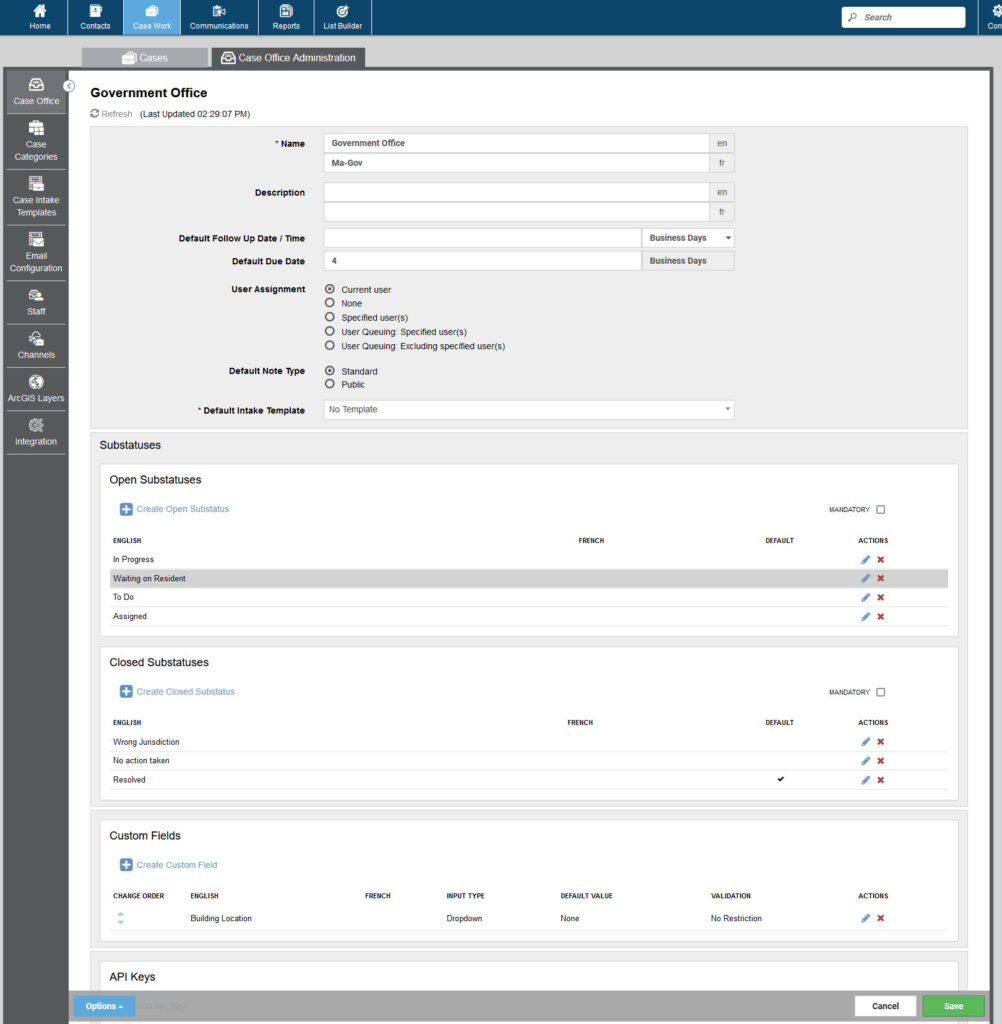
To define a new Custom Field, click on the + Create Custom Field button. Some options related to this custom field will pop-up on your screen.
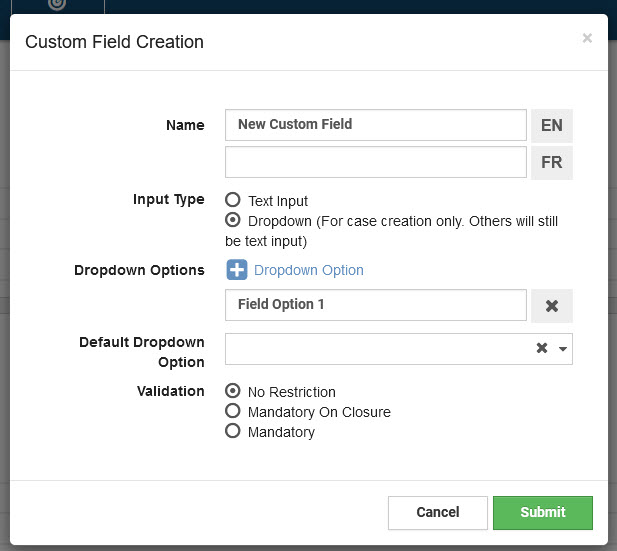
First, specify the name to be used for the custom field.
Next, you must choose the input type for this field. There are two options. Text input allows users to put in whatever information they choose, while dropdown only allows users to choose one of the associated options that are defined by an administrator. You may also decide if one of the dropdown options are the default selection when users interact with this custom field.
Please note that dropdown options are only added on create, and cannot be changed after the custom field is created. Editing a custom field will not allow you to change dropdown options.
From there, select the validation option for this field. No restriction means that the custom field is completely optional. Mandatory on closure means that you do not need this field to be specified immediately, but it must be done before closing the case. And finally, mandatory means that all users are required to fill out this custom field.
Once you have defined these options, click the submit button in the bottom right corner. This will bring you back to the case office administration tab. To finalize your changes, you must click Save at the bottom right of the page.
Editing and Deleting Custom Fields
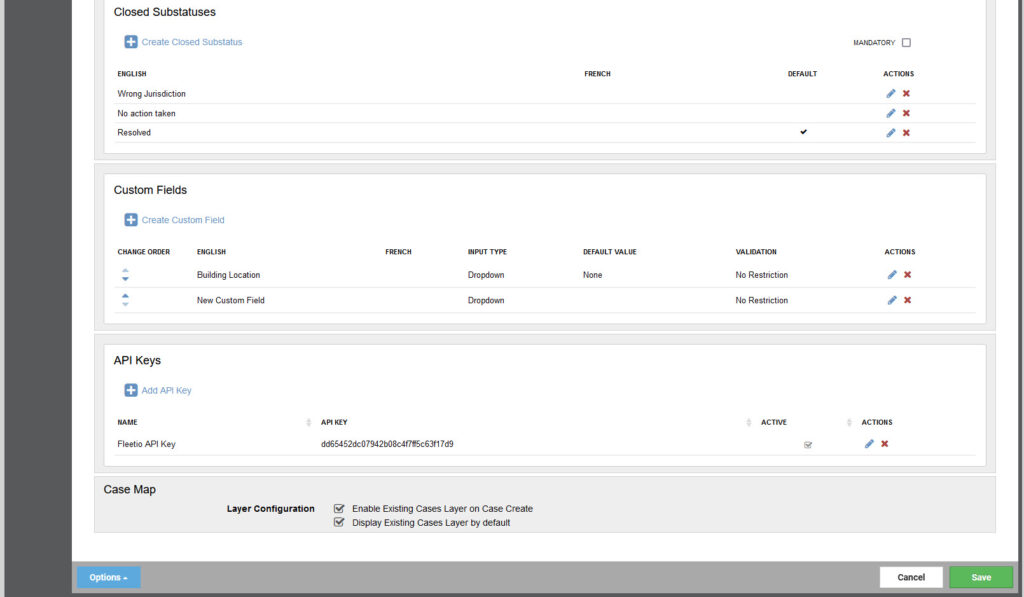
To edit a custom field, on the main case office page you just click the pencil on the row of the custom field you wish to edit. This will bring the creation popup menu back up again, allowing you to edit the fields mentioned above. Once you are done, hit submit, and then save.
Please note that dropdown options are only added on create, and cannot be changed after the custom field is created. Editing a custom field will not allow you to change dropdown options.
To delete a custom field, just click the red x corresponding with the field you wish to delete.
Where to Interact with Custom Fields
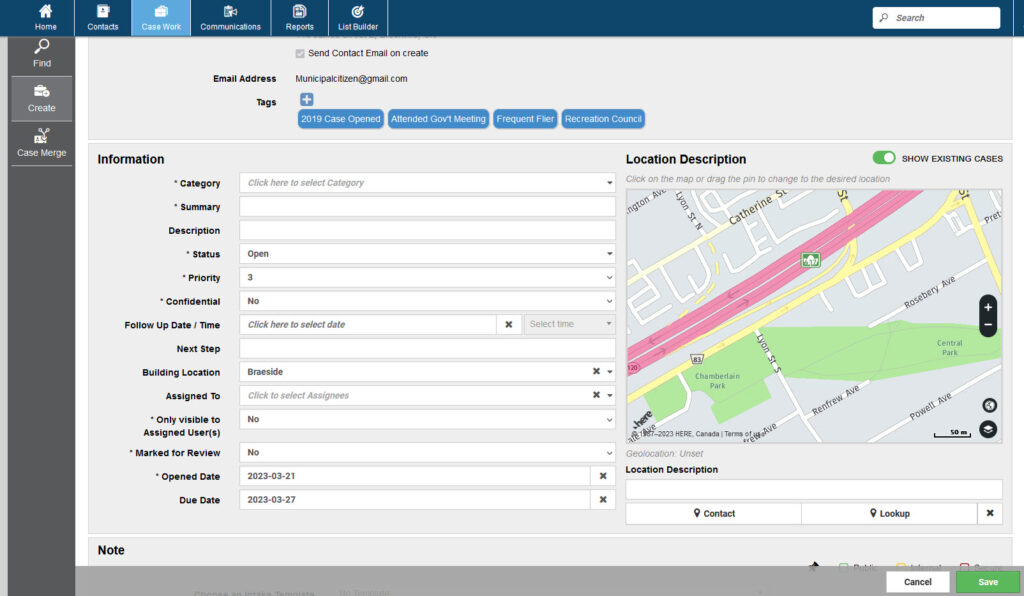
Custom fields can be seen while creating a case among all the default fields that come with AccessE11. Just begin creation of a new case, and as can be seen in our example below, Building Location is a custom field that has been added, and can be selected with a dropdown menu.
You can also edit custom field results on the case cards.
Viewing Custom Fields
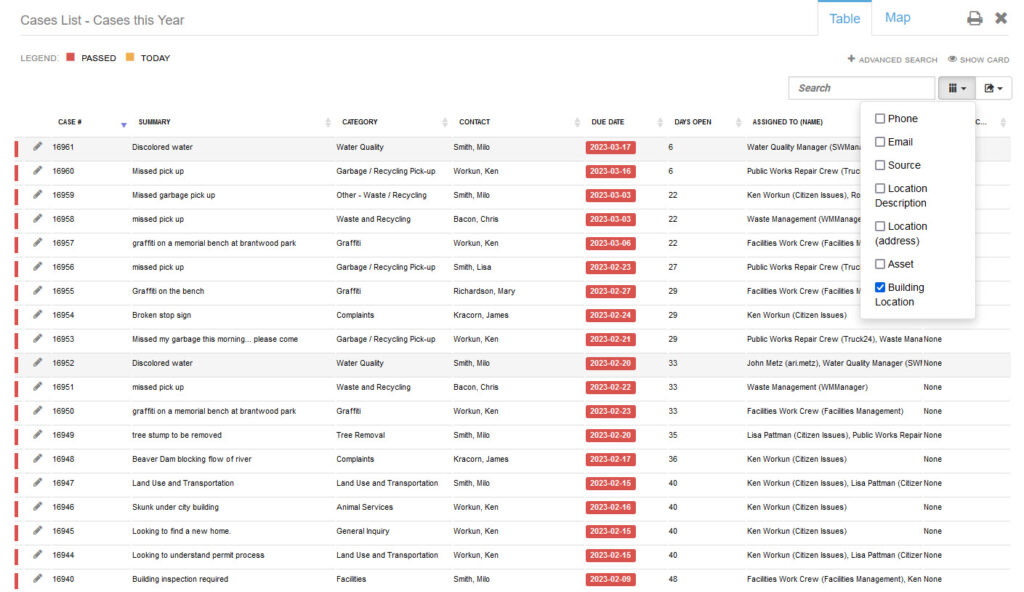
In the same way you can view any field in your case dashboard, custom fields can be added to dashboards and reports for at-a-glance viewing, sorting, and reporting on. Custom fields are treated the same way as the default fields, and can be interacted with similarly. For our example below, while viewing cases on the main dashboard, Building Location custom field can be added to the column display.
Aside from the main dashboard view, you are also able to use custom fields as filters and while searching for cases, allowing you to filter and find cases based on these custom criteria that have been created.
Start experimenting with custom fields today, and discover how quickly you can adapt AccessE11 to the needs of your municipality.