Search Knowledge Base
How To Create A Contact
Creating a Contact
This guide describes how to create contacts.
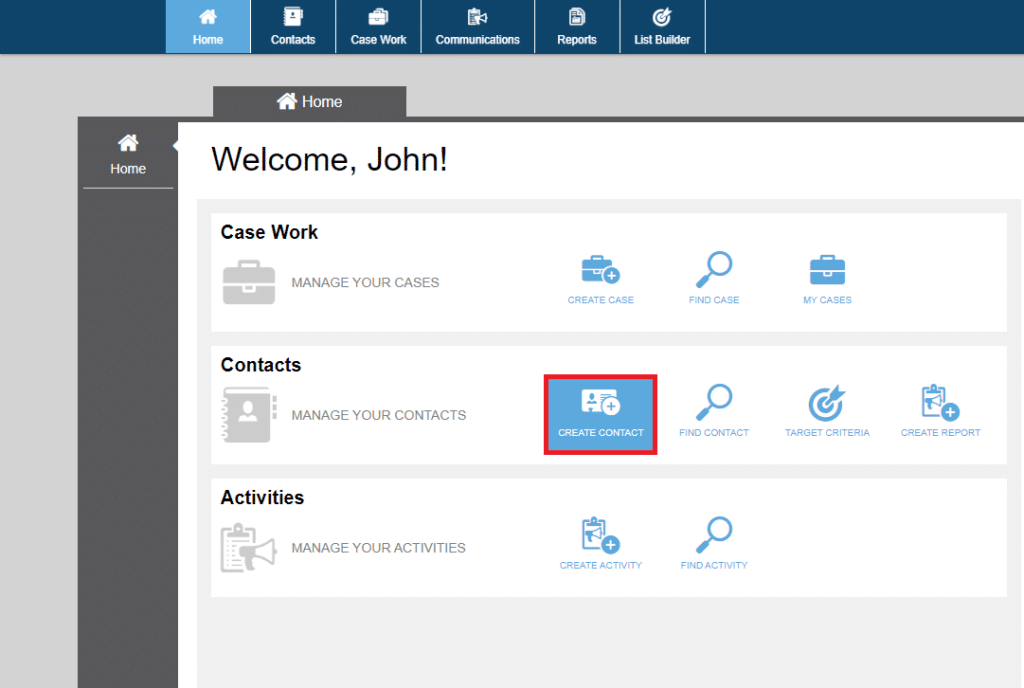
To create a contact, you can select the CREATE CONTACT icon in the Contacts bar on the home page. Alternatively, you can select the Contacts icon in the top menu bar then select the Create icon in the menu bar at the left-hand menu of the Contacts page.
There are many fields for entering information about the contact you are creating, but not all fields are mandatory. A contact must have at a minimum a first and last name, and either a phone number, email address, or a civic address.
Contact Name
Enter the contact’s name by filling out the appropriate information.
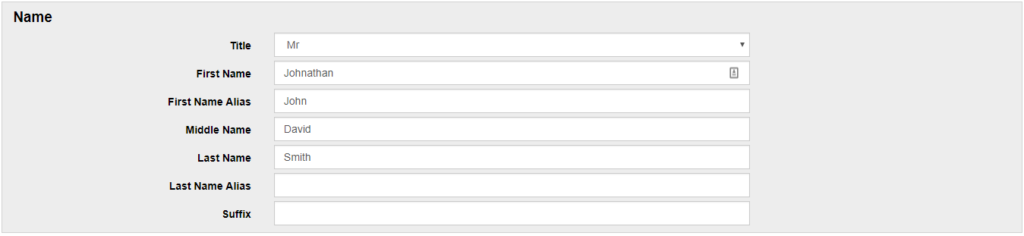
Using the Alias fields allows the quick search to find a contact based on alternate spellings, or alternate short forms of a name.
Address
The contact’s home address is entered in this section. A contact’s address can be entered by typing in the Civic Address field. As you type, the application will search the database for previously entered addresses. If the address is not found, it can be entered manually by selecting the + button on the right side of the field after you begin typing.

A contact may have two different types of addresses – a civic address and a mailing address. Selecting the checkbox labeled ‘Same as Civic Address’ will ensure that the information entered for the civic address will also be used for the mailing address. If you wish to include different information for the contact’s mailing address, click the checkbox to deselect this option and enter the mailing address separately.
Phone Number, Email, and Social Media
The contact’s phone number, email address, and social media (i.e. Other) information can be entered here. Each contact can have multiple entries for each of these fields with one entry for each field marked as the primary or preferred entry.
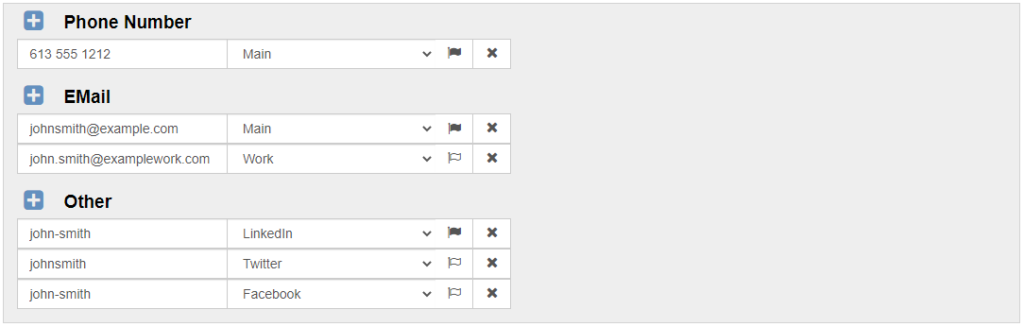
To enter a phone number, email address, or social media account click the + button to the left of the appropriate label and enter the applicable information.
Contact Notes
To enter additional information about a contact, a note can be created. Notes can contain text, images, and links to websites.
For additional security notes can be marked as either Internal or Secure.
Secure notes are encrypted in the database and are not searchable in the Advanced Search for contacts.
Internal notes can be excluded from certain reports.

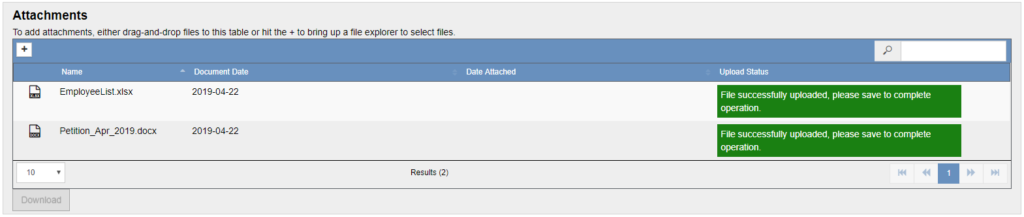
Attachments
Files can be uploaded and added as attachments to a contact’s profile. Simply dragging a file into the Attachments table will upload the file. Alternatively, selecting the + icon in the top left corner of the table will allow you to locate a file to upload. Uploaded files will be discarded if the Contact is not saved.
The following file types are allowed to be uploaded, all others will be rejected:
- .png
- .jpg
- .jpeg
- .gif
- .doc
- .docx
- webp
- webm
- hevc
- HEIC
- HEIF
- apng
- .xls
- .xlsx
- .csv
- .zip
- .ppt
- .pptx
- .rar
- AVIF
- .jxr
- .hdp
- .wdp
- .jp2
- .txt
- .msg
- .eml
- .wav
- .mp3
- .mp4
- .wma
- .j2k
- .jpf
- .jpx
- .jpm
- .mj2