Search Knowledge Base
How To Create Reports
Reports
Reports allow you to export data which can be downloaded to your computer. These reports can provide a broad range of insights into the activities of your case office and contacts.
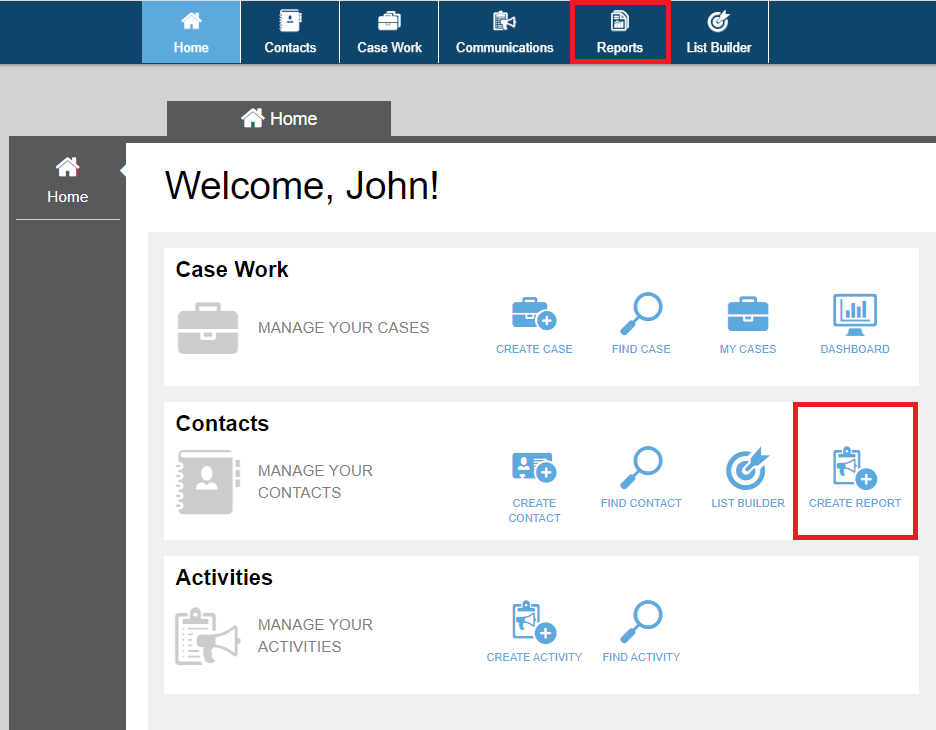
To navigate to the Reports section either:
- Select Reports from the menu at the top of the page. You may do this at any point while you are logged in.
- Select the Create Report option from the Contacts bar in the Home screen.
Create Report
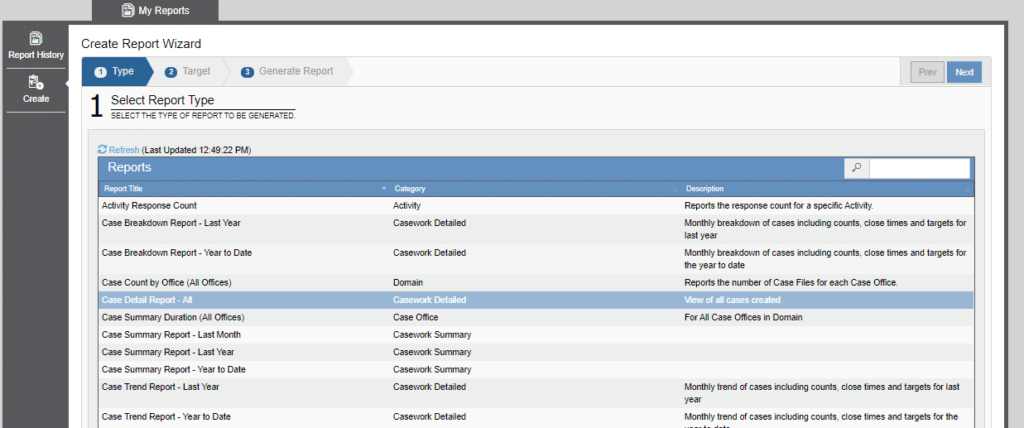
To create a report select the Create Report icon on the left hand side of the screen. This will display the Create Report Wizard.
Step 1: Select the Report
Select the report you would like to generate and select the Next button in the top right of the Wizard to proceed to the next step.
Step 2: Select the Target
Certain reports require that you select a target to define the scope of what will be included. If this step is not needed for a particular report, it will be skipped in the wizard automatically.
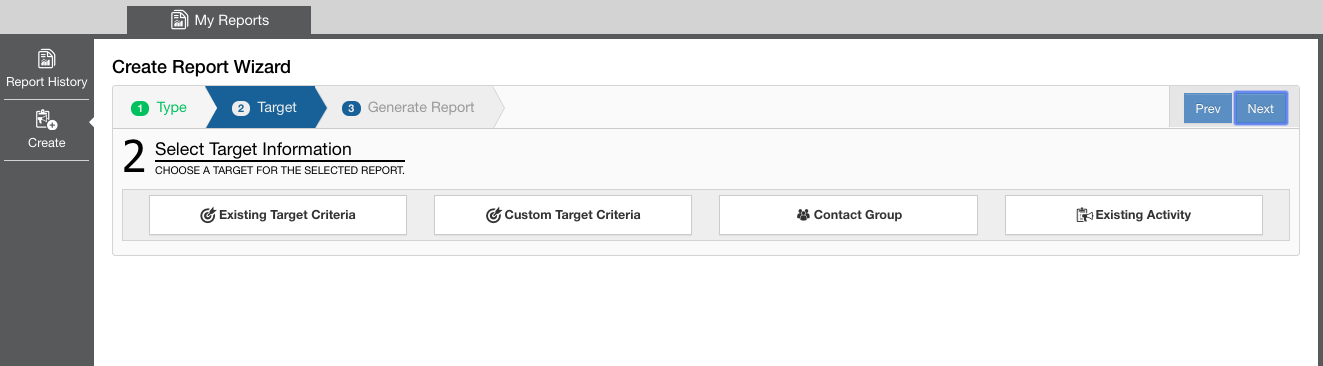
There are four options for targeting:
- Existing Target Criteria – You can select target criteria that have already been created.
- Custom Target Criteria –You can target contacts based on a variety of custom criteria. This gives you many options for grouping contacts based on their shared characteristics.
- Contact Group – You can target all contacts that are associated with a the current Contact Group.
- Existing Activity – You can select an existing Activity from a list of prior outreach initiatives to report on the set of contacts that was involved.
Choose your target type, then choose a specific target from the list provided. If the target you’re looking for does not appear in the list, try typing the name of the target you’re looking for in the search box.
Click next to continue to Step 3 of the wizard.
Step 3: Report Summary
Here you can review the details of the report to be generated.
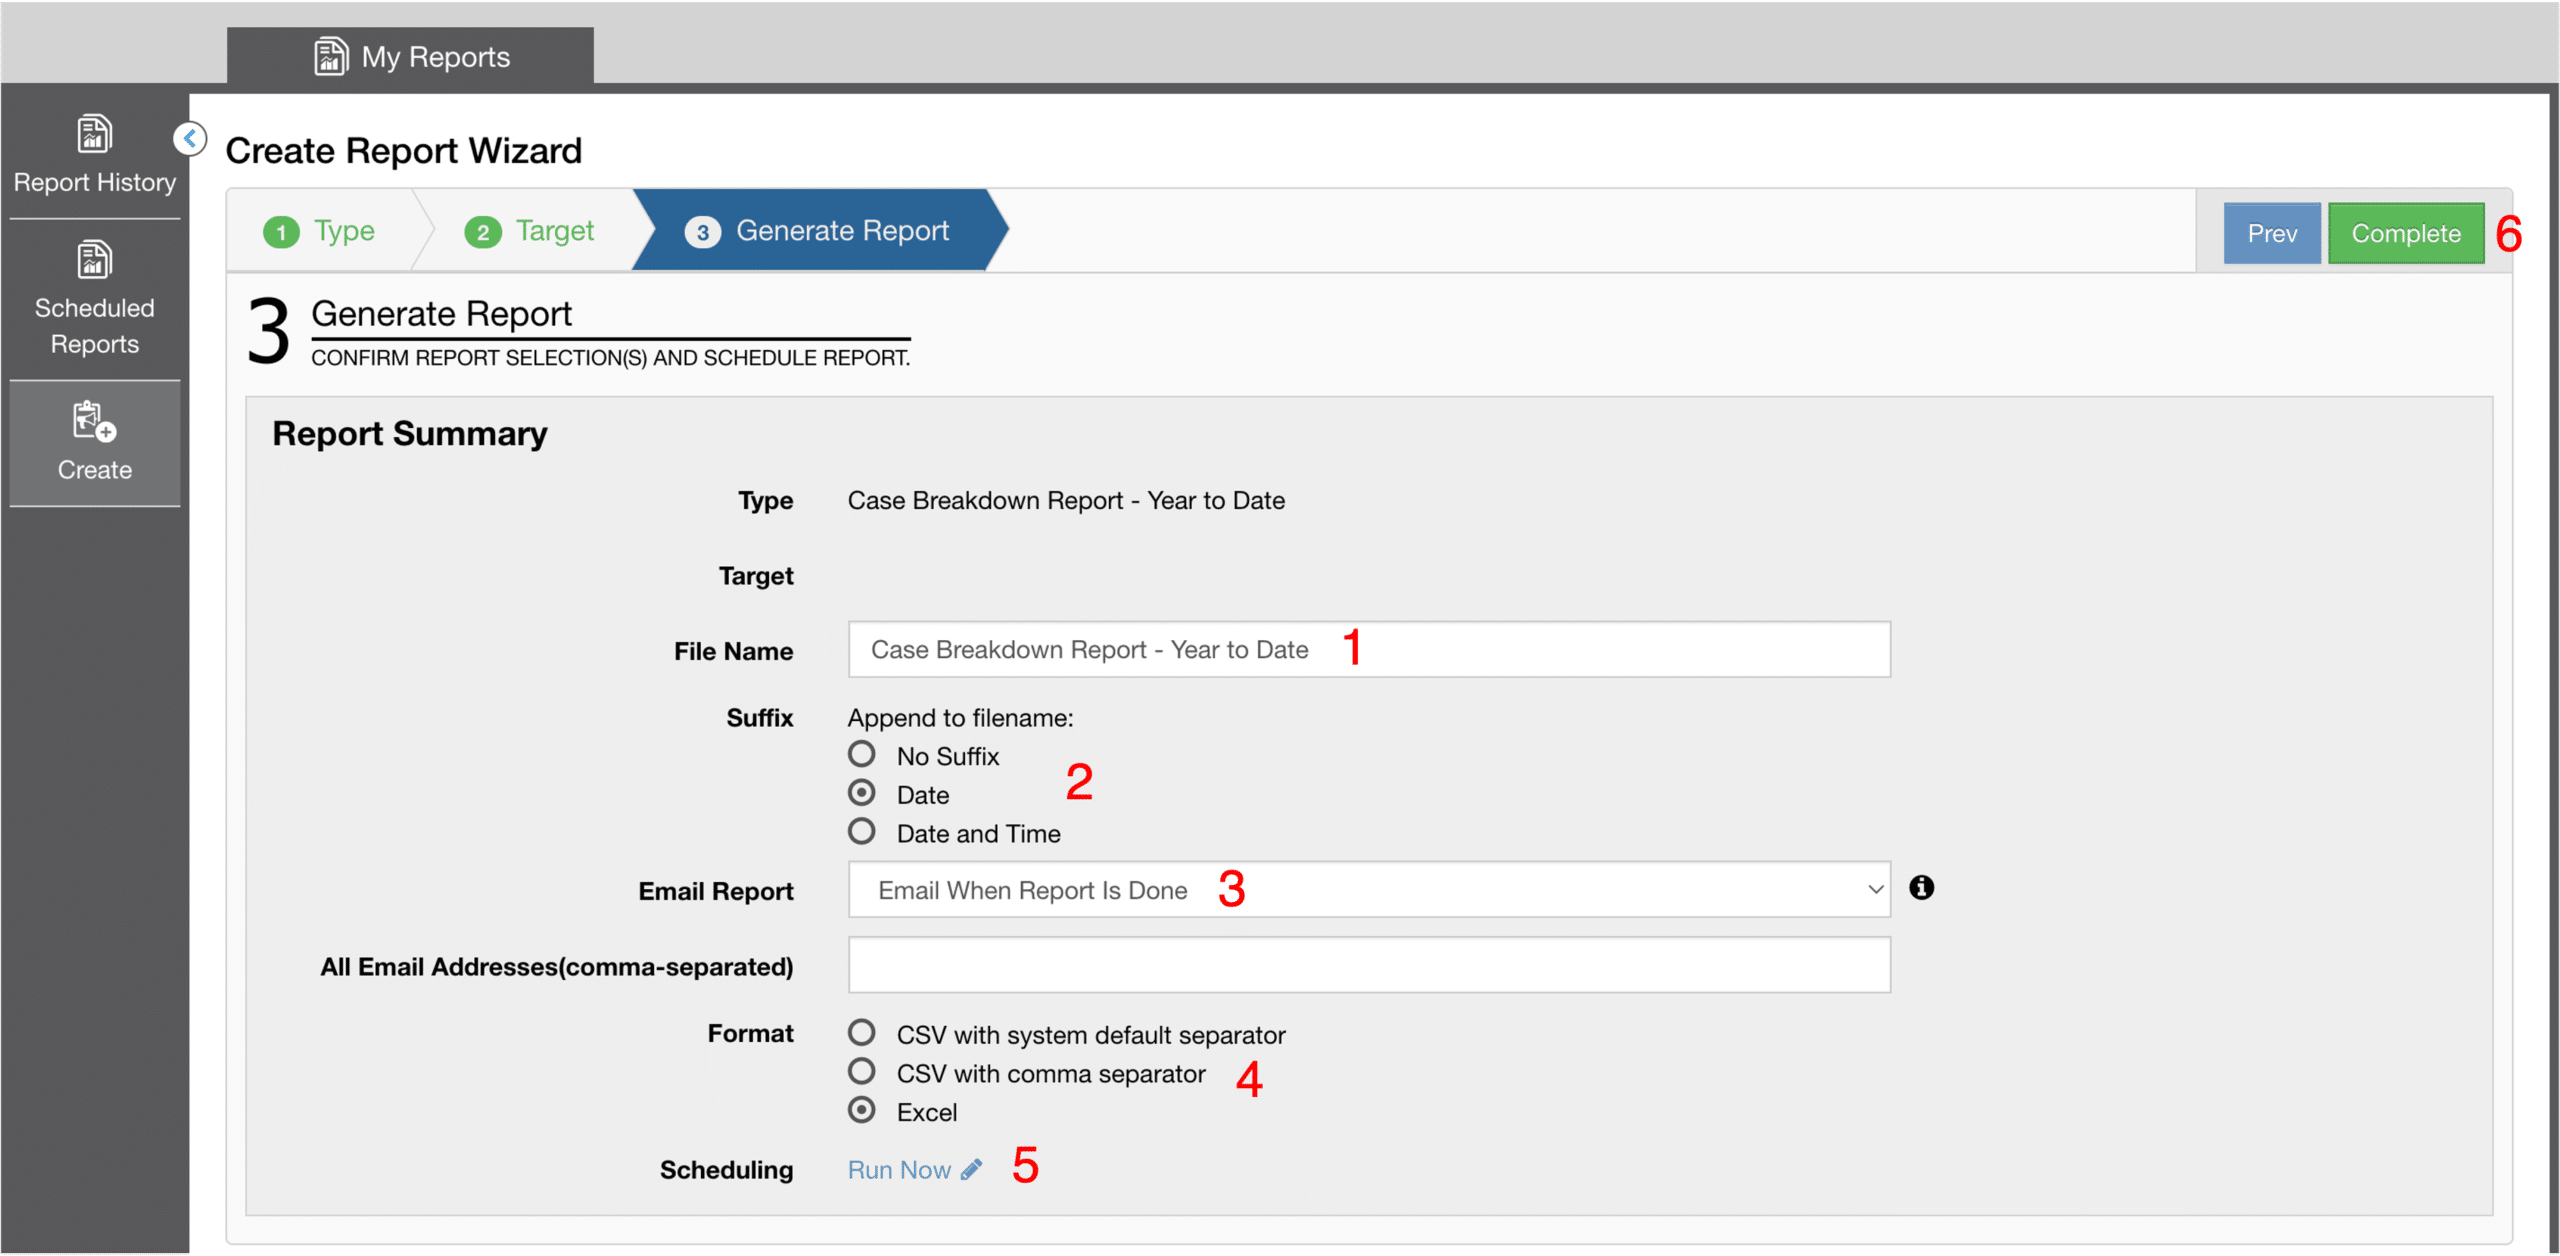
You may edit the name of the file to be generated (1) and optionally append a suffix to the end of that file’s name (2). This can be helpful if you generate the same report often and would like to keep track of when each file was generated.
Additionally, you can elect to send an email reminder to notify the intended recipients when the report has finished. You can choose to have this report sent as an attachment to this email (3). In this case, the file must be less than 9MB or it will not be sent.
When creating a report, you can also choose the format with which you would like the report to be created (4). You have three options to choose from: 1) CSV with system default separator 2) CSV with comma separator 3) Excel.
If desired, you can schedule the report to take place in the future, including on a recurring basis (5). A screen will be shown where you can select the frequency of the Report, the Start Date and the Execution Time, details that are specific to the selected Frequency, and an End Date.
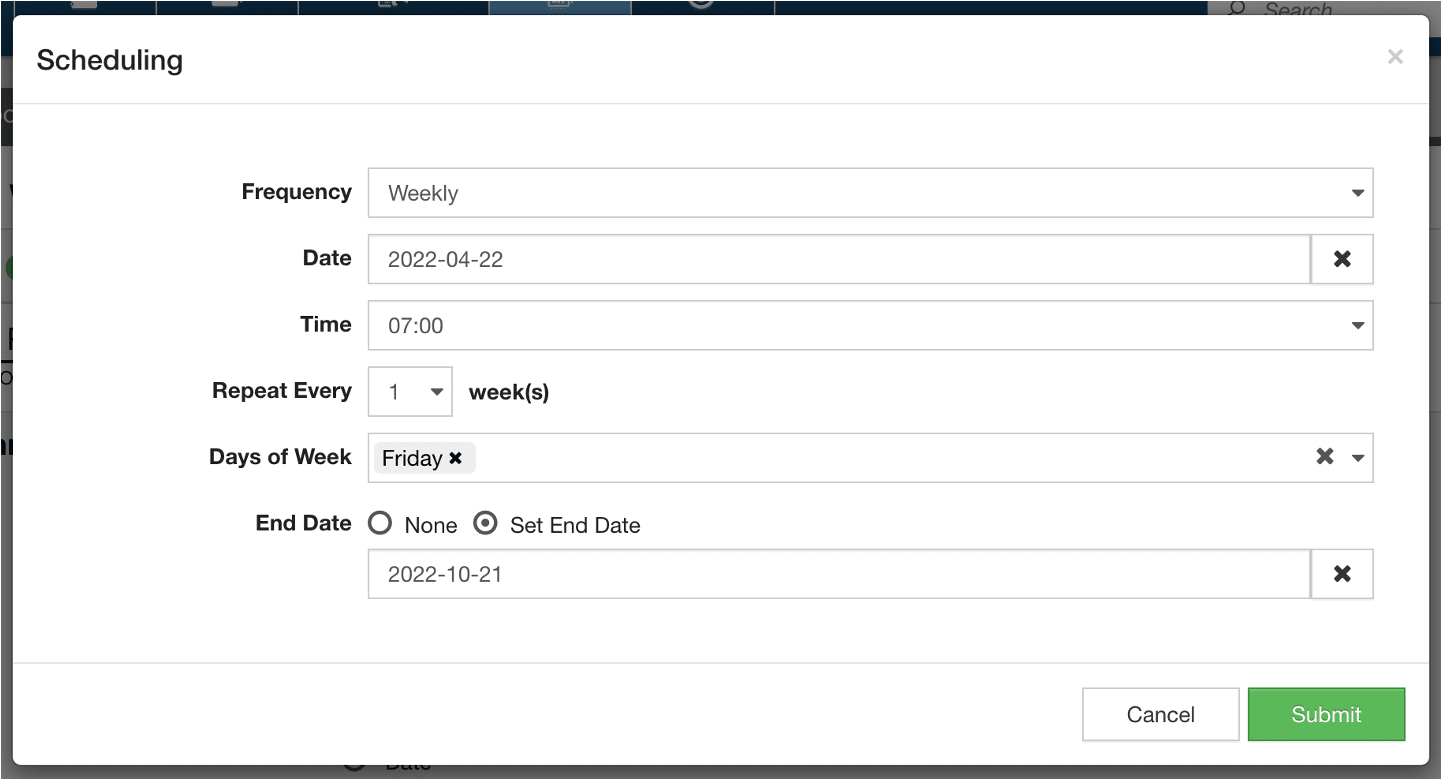
When you are satisfied with the choices, press Submit.
Finally, when you are ready, click the Complete button (6) in the top right of the Wizard to start generating the report.
Depending on the size of the report it may take time to create.
Scheduled Reports
To view or edit the list of reports that have been scheduled , select the Scheduled Reports option from the left hand menu. This will display a table showing the details of all currently scheduled reports.
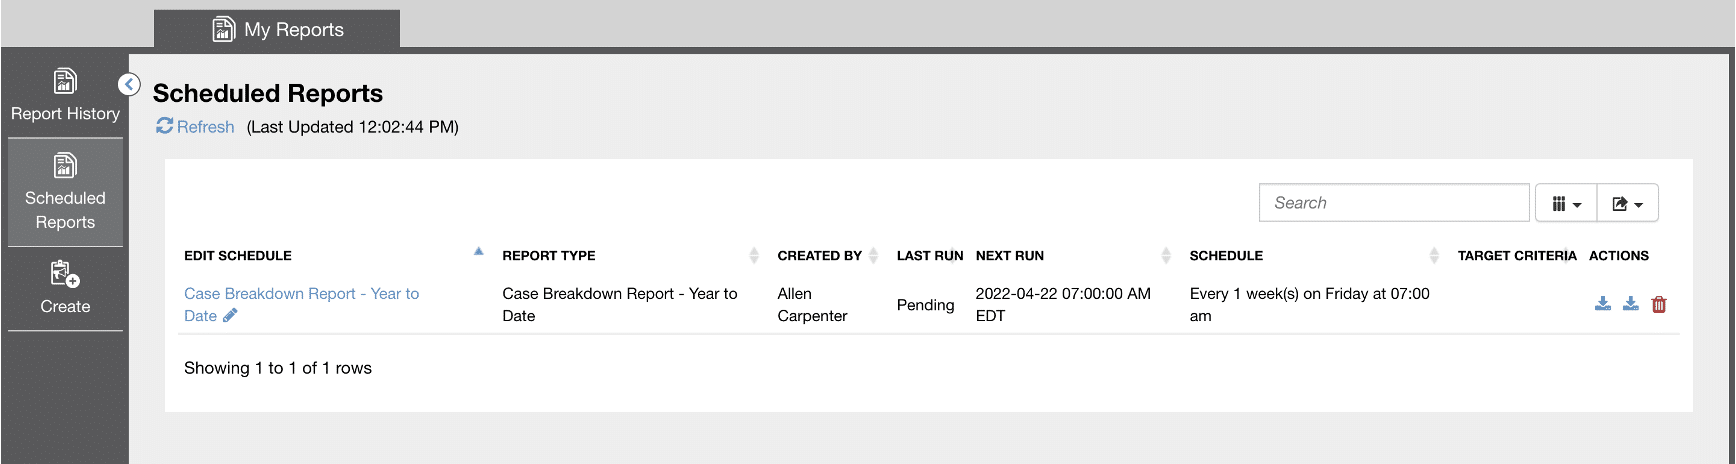
Selecting any report from the first column of this table will allow you to modify the scheduling parameters.
To download the most recent report or all reports, click either the first or second download icons respectively on the right side of the report row.
To delete a scheduled report, choose the trash can icon on the right.
A search box is available to make finding a scheduled report easier if there are many. You can also choose which columns you want by selecting clicking on the icon to the immediate right of search box. You can also export the table by selecting the export button.
Report History
To view the summary of reports that have been generated and reports in progress, select the Report History icon on the left hand side of the screen.
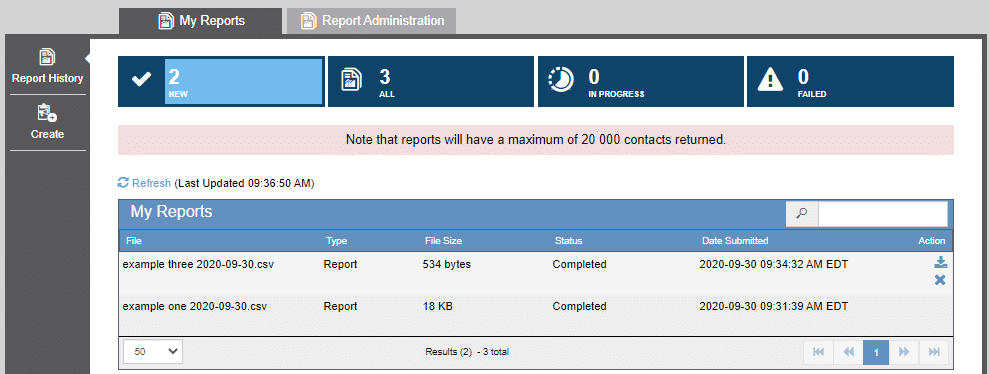
To download a report select it from the table and click the download icon (to view the icon, hover over the report row) on the right side of the report row.
Note: Reports that have never been downloaded will appear in the New tab of the Report History Dashboard. To view all reports, both downloaded and non-downloaded, select the All tab at the top of the screen.
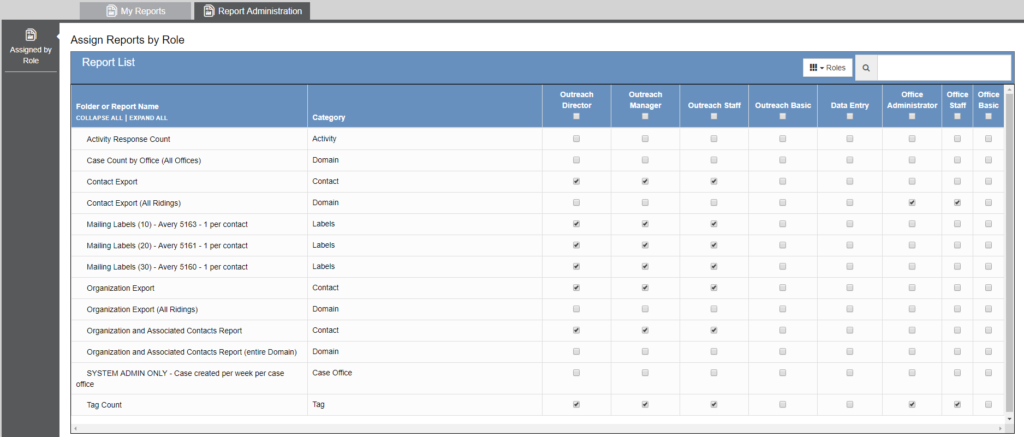
Report Administration
Reports are available to users based on their Role. Domain Administrators can enable or disable reports for specific roles. Selecting a checkbox in a particular column will enable the corresponding report for that role. Selecting the checkbox at the top of a column will enable all reports for that role. Remember to select the green Save button in the bottom right of the screen to save any changes.
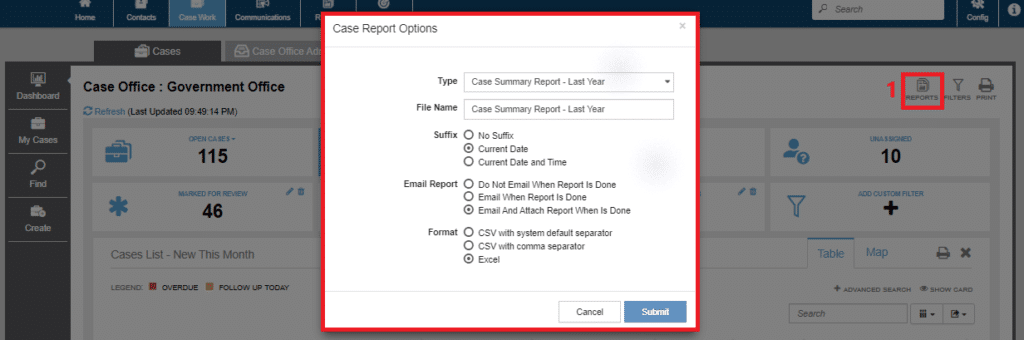
Reporting from the Case Work Dashboard
From the Case Work Dashboard, it is possible to Create any Case Work related Report for the entire Case Office. To do so click on the Reports icon (1). A pop-up should appear. In the pop-up enter the desired Report Type, Name, Suffix, Email setting, and Format. For more information about what each of the selections mean see above.