Search Knowledge Base
How To Create Target Criteria
Creating Target Criteria
Target Criteria comprise a set of characteristics such as demographics, locations, tags, emails, phone numbers etc. that, when combined, returns a list of Contacts or Organizations who share those characteristics. As an example, you might search all Contacts who have a phone number with the area code 416, with a communication policy that allows for contact by telephone, and that are tagged as being concerned about the environment.
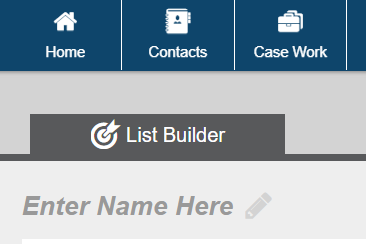
There are two ways to navigate to the Target Criteria application:
- Select List Builder from the menu at the top of the page.
- Select the List Builder icon within the Contacts row of the home page.
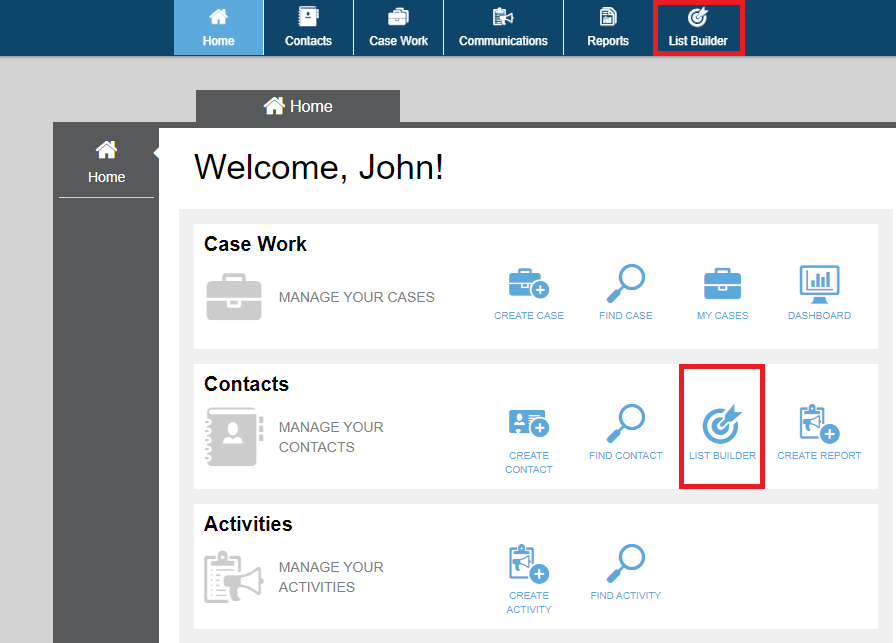
To initiate the creation of a set of criteria, click on + Create Target Criteria or the Create Target Criteria option from the menu on the left of the page.
Criteria Groups:
A named set of Target Criteria is made up of one or more criteria groups, each containing some combination of individual criteria types.
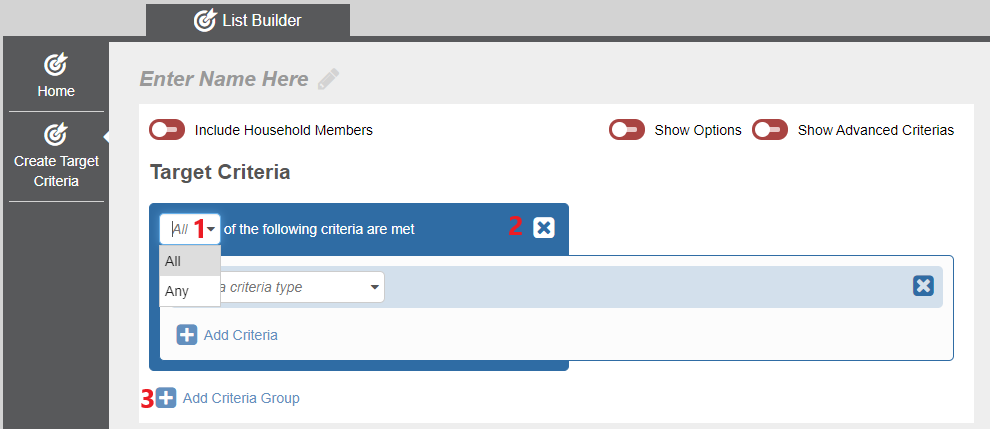
- There are two inclusion options for criteria groups:
- All: Matched contacts must meet all of the criteria in the criteria group
- Any: Matched contacts must meet at least one criteria in the criteria group
- The x icon for a criteria group can be selected to delete the entire criteria group
- Although a minimum of one criteria group is needed, + Add Criteria Group can be used to add additional groups
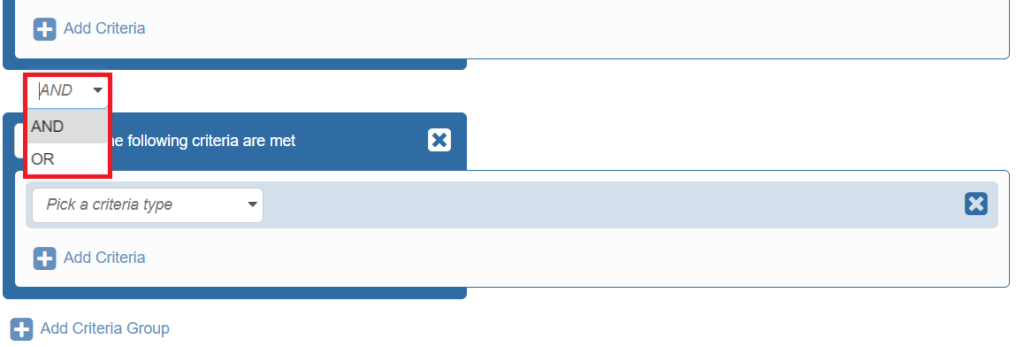
Two options exist when combining multiple criteria groups:
- AND: Matched contacts must meet the criteria in all criteria groups.
- OR: Matched contacts must meet the criteria in at least one of the criteria groups
Criteria
There are approximately 25 available criteria types that can be flexibly combined within a criteria group to match contacts in the database.
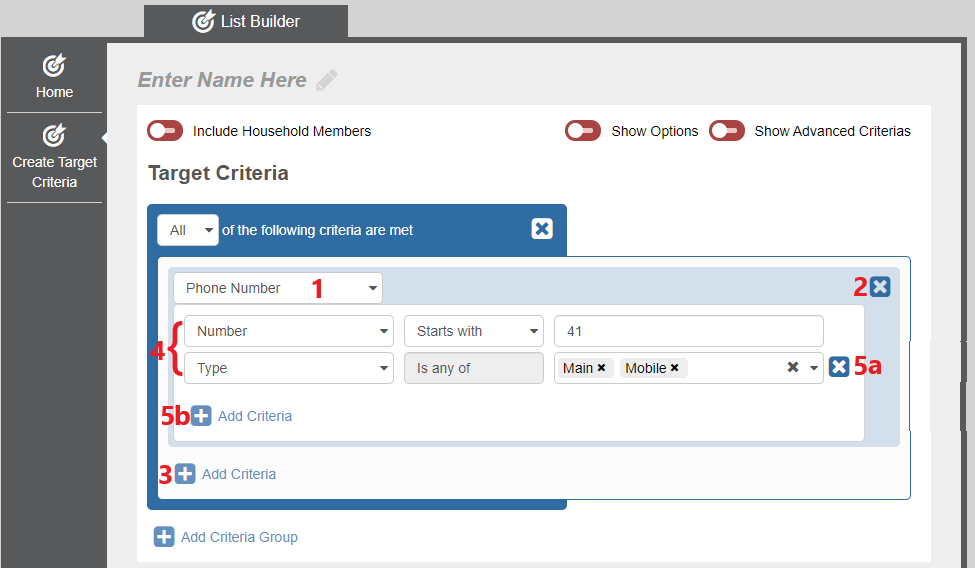
To manage individual criteria:
- Click on the drop-down box to choose the Criteria type, for example a phone number, tag, location detail, or preferred language.
- Click the x icon to delete specific criteria within the criteria group.
- Click the + icon to add a new criteria type
- Use these rows to fully describe an individual criteria type, for example a phone number starting with 613, with a preferred type set as mobile.
- For criteria types that allow for multiple attributes, such as the phone number example above:
(a) To delete one of these attributes, click the x icon.
(b) To add one of these attributes, click the + icon.
Advanced Criteria
There is additional functionality available in Advanced Criteria. This includes adding a Criteria Group within a Criteria Group, adding extra Criteria, and exclusions to Criteria Group options.
To enable Advanced Criteria, select the Show Advanced Criteria Toggle at the top of the Screen (1).
To add the Criteria Group, select the + Add Criteria Group icon (2).
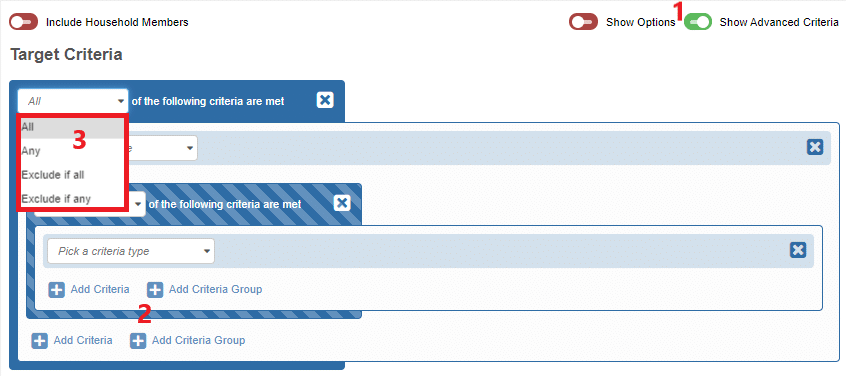
With advanced criteria enabled, there are four inclusion options for criteria groups (3):
-
- All: Matched contacts must meet all of the criteria in the criteria group
- Any: Matched contacts must meet at least one criteria in the criteria group
- Exclude if all: Contacts that match all of the following criteria are excluded
- Exclude if any: Contacts that match at least one of the following criteria are excluded
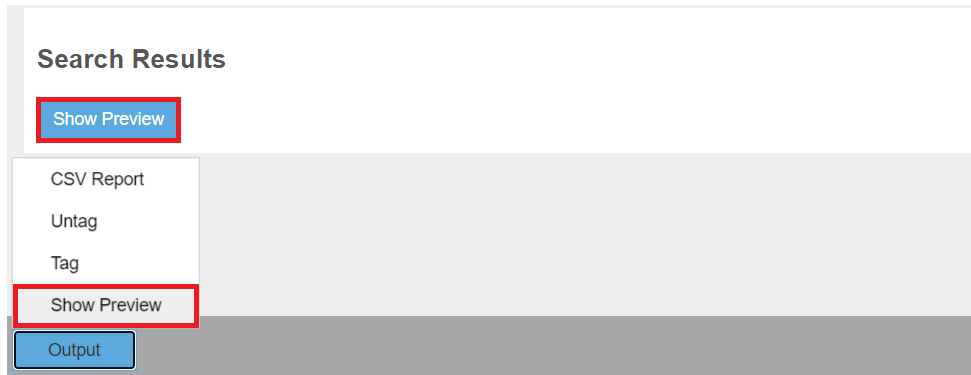
Getting Results
There are two ways to get the results for the Target Criteria:
- Select the Show Preview button under Search Results.
- Click on the Output button at the bottom of the page, then select the Show Preview option.
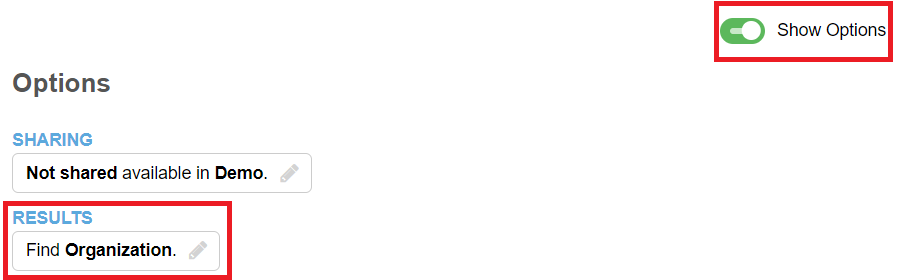
Getting Organization Results
To change the results from Contacts to Organizations, and vice versa, click on the Show Options toggle at the top right of the screen, and then select the Results field. In the Results Options pop-up, select the desired results type, Contact or Organization, and then click the Submit button to apply the change.
If you want to search organizations instead of contacts, click on the Show Options toggle on the top right of the screen, and then select the Results box on the right of the screen. A pop-up should appear. In the pop-up, select the Organization Result Type, and then click the blue Submit on the bottom right of the pop-up to apply the change.
How To Save
If you are happy with the results and want to be able to re-use the Target Criteria set in future, you can save it. To do this, first name the Target Criteria set by clicking on Enter Name Here in the upper left of the screen.
A pop-up should appear.
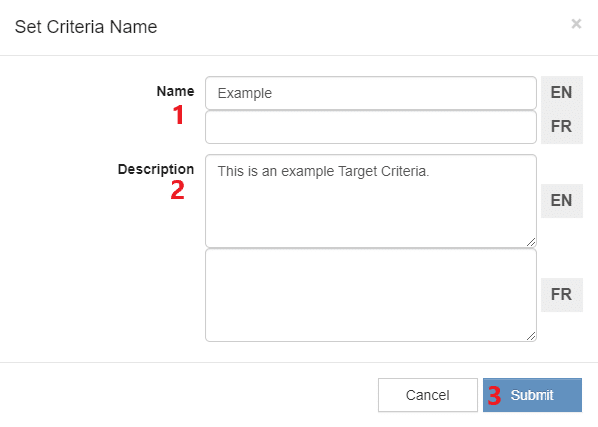
Enter a descriptive name in the Name sections (1) . Then, if desired, enter more information about a Target Criteria in the Description sections (2). Then click the Submit button (3) at the bottom right corner to save the name and description. Note: The Name and Description of the Target Criteria can be in either English or French.
Then click the Save button at the bottom of the screen to save the full set of Target Criteria.
![]()
Tags and CSV Reports
Once the resulting Contacts have been returned, it is possible to Tag them and to export detailed contact information to a CSV file.
Tagging:
There are two ways to do this:
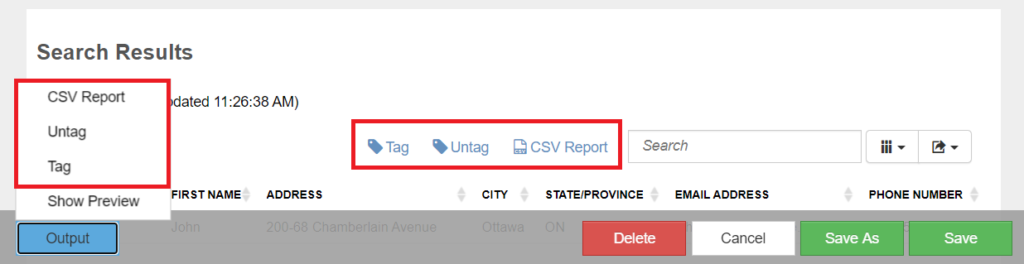
- Click on the Output button at the bottom of the screen then select the Tag option.
- Select the Tag button to the left of the Search box.
A pop-up will appear. Click on the drop-down Tag menu, then select the Tags that you want to apply to the Contacts. Lastly, click on the Add button to apply the Tag(s).
Untagging
It is also possible to remove selected tags from the Contacts in your result set. There are two ways to do this:
- Click on the Output pop-up at the bottom of the screen, then select the Untag option.
- Select the Untag button to the left of the Search box.
A pop-up will appear. Click on the drop-down Tag menu, then select the Tags you want to remove from the Contacts. Lastly, Click on the Remove button to remove the selected Tags .
CSV Reports
CSV Report generation using the results allows you to export data which can be downloaded to your computer. There are two ways to do this:
- Click on the Output pop-up at the bottom of the screen, then select the CSV Report option.
- Select the CSV Report button to the left of the Search box.
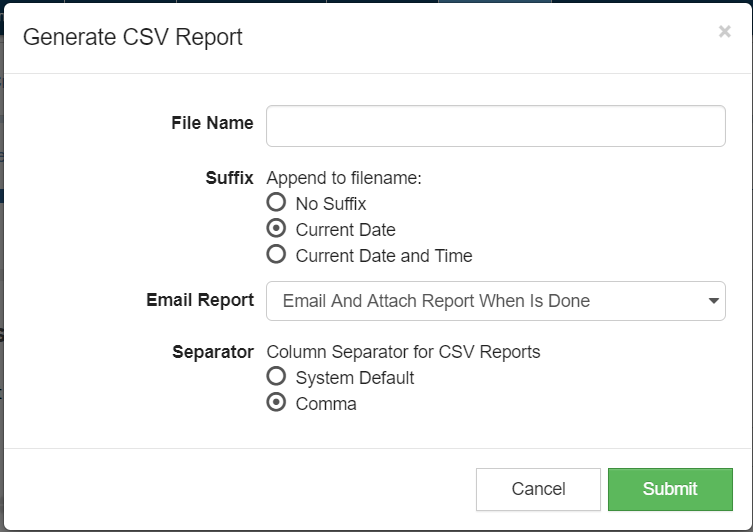
File Name: Type the name of the file that will be generated.
Suffix: You can choose to add a suffix consisting of the date or the date and time of the the report.
Email: You can elect to send an email notification when the report has finished. Moreover, you can choose to have the report sent as an attachment with this email. In this case the file must be less than 9MB or it will not be sent.
Separator: Specifies whether the CSV file uses the System Default or forces commas to be used for delimiting.
When done editing these settings, click the Submit button to export the data.