Search Knowledge Base
How To Edit A Contact
Updating a Contact
To edit a contact, navigate to the Contacts section of the application by selecting Contacts in the main menu or by using the FIND CONTACT icon on the homepage.
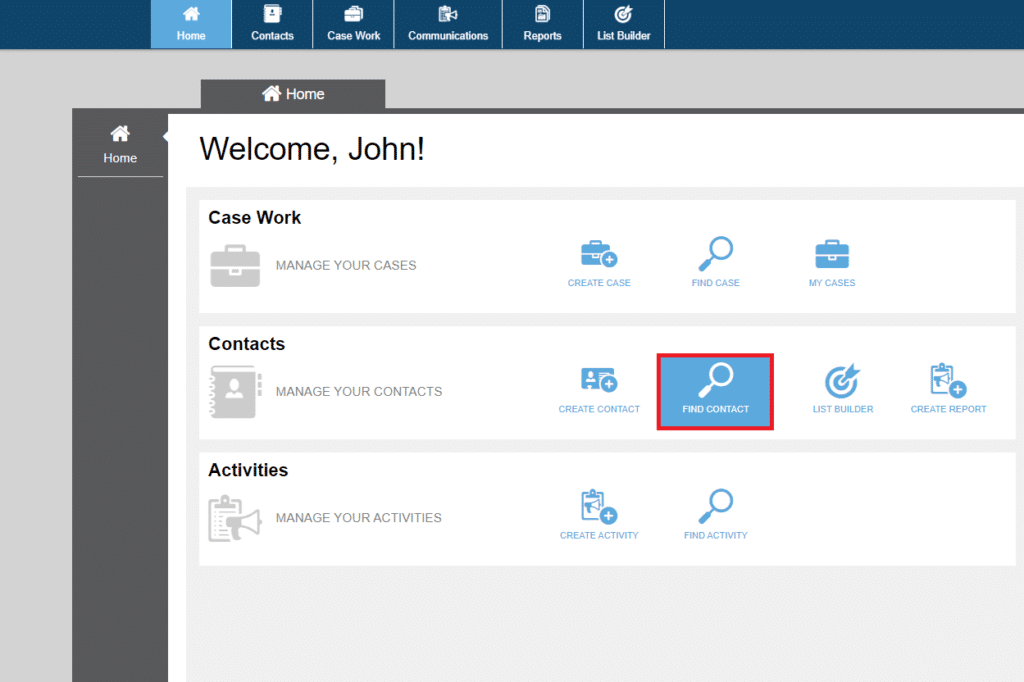
Search for the contact you wish to edit and select the contact. You will see all of the contact’s information including their street address, phone number, email address and more.
When updating contact information, bear in mind that a contact must have, at a minimum, a first and last name, and either a phone number, email address, or a civic address.
To apply the changes you have made, click the Save button in the bottom right corner of the page.
PRIMARY CONTACT INFORMATION
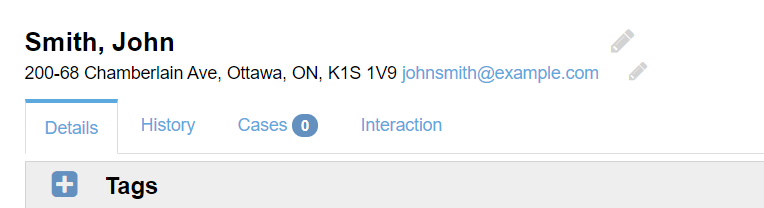
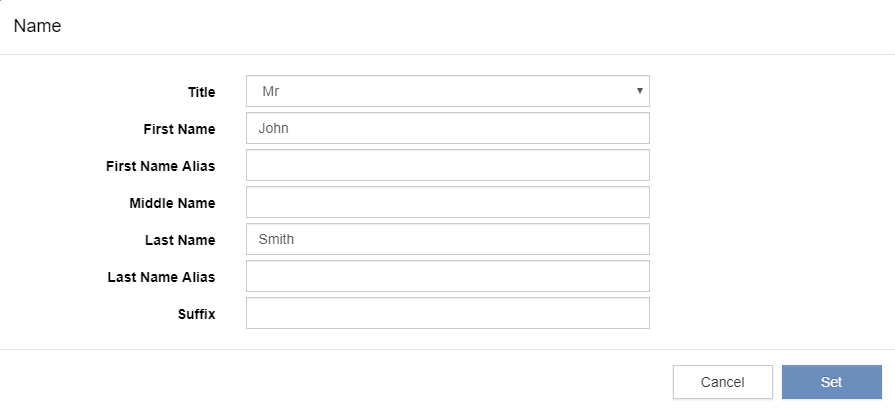
The contact’s name is displayed at the top of the page along with their street address, phone number, and email address. Clicking on the name of the contact displays a window to edit this information. Once the new name information has been entered, click Set and the new information will be displayed. The contact still needs to be saved for this information to be updated.
Using the Alias fields allows the quick search to find a contact based on alternate spellings, or alternate short forms of a name.
Along with the primary contact details discussed above, the Contacts application provides the following tabbed sections:
- Details: Contains general information, including address, telephone number, social media, household members and personal profile.
- History: Contains a historical record of all expired data for the contact, including older names, emails, and tags.
- Cases: This is a link to the Case Work portion of the application. If it is being used, this section will display the case history for the contact.
- Interactions: This section stores a record of how and when the contact has been reached via various outreach activities, including canvasses, surveys, emails, and SMS.
DETAILS
This tab displays all of the current general information specific to the contact.
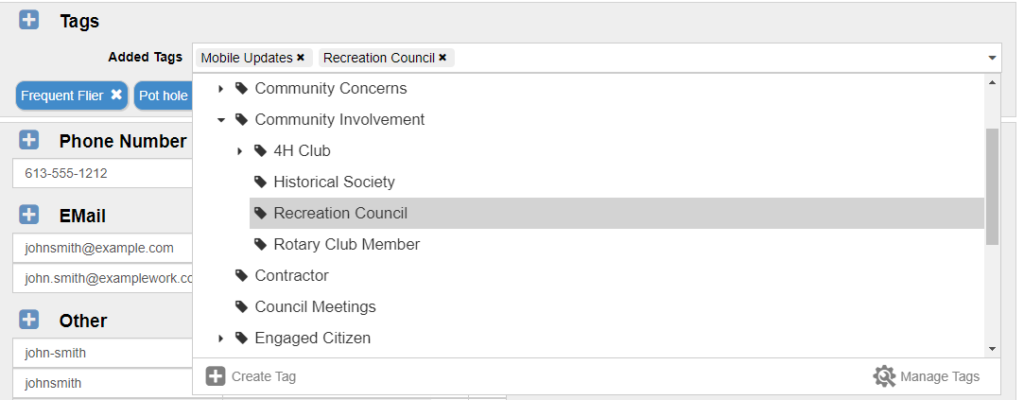
Tags
A tag allows you to group people into specific categories. When creating activities or reports it’s possible to select all contacts with a specific Tag, creating a very specific target group.

To remove a Tag, click the x in the right hand side of the Tag. To add a tag, select the + button alongside the Tags label and select the tag(s) you would like to add. Once you have selected all of the tags you want to add, click the save button in the bottom right corner of the screen.
Phone Number, Email, and Social Media
The contact’s phone number, email address, and social media information can be updated here. Each contact can have multiple entries for each of these fields with one entry for each field marked as the primary or preferred entry.
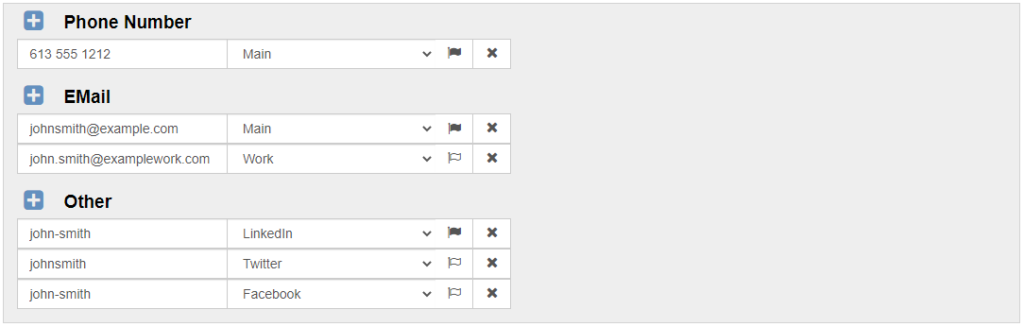
The primary entry for these fields will be displayed at the top of the page with the contact’s name. Selecting the flag icon identifies the entry as the primary information for the selected field.
Address
The contact’s home address is entered in this section. A contact’s address can be updated by typing the new address in the Civic Address field. The application will search the database for previously entered addresses. If the address is not found, it can be entered manually. A new address can be entered by selecting the + button on the right side of the field after you begin typing in that field.

A contact may have two different types of addresses – civic address and mailing address. Selecting the checkbox labeled ‘Same as Civic Address’, will ensure that the information entered for the civic address will also be used for the mailing address. If you wish to include a different address for the contact’s mailing address, click the checkbox to deselect this option and enter the mailing address separately.
Household Members
In some systems, there is a section that allows contacts to be grouped by households.
This feature is used when multiple contacts to share the same address. To indicate that multiple contacts are living in the same residence together, add them to the household member section.
Select the + button in the upper left hand corner of the Household Members table, then choose whether you would like to add a new contact to the household or move an existing one. If you choose to create a new contact the application will navigate to the Create Contact section.
Choosing to move an existing contact will display a search form to select a contact. In this case, the selected contact’s civic address will be updated to match the current contact’s address.
Attributes
Note: if you do not see this section that means it has not been configured for your organization.
Think of an attribute as an enhanced tag: it provides a way to track more complex contact data in a way that is customizable for your organization. Here are some examples of attributes you may have on your system:
- Whether or not the contact is a member
- Has volunteered
- Has made a local donation
- Does not want to be contacted.
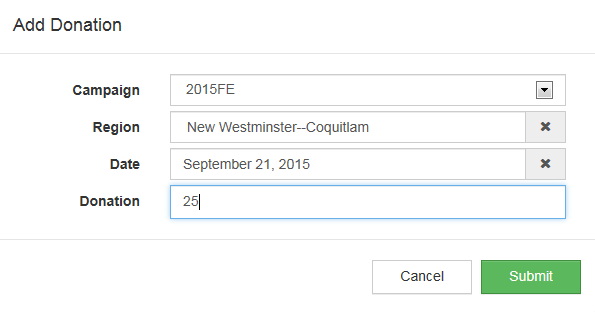
- Licenses and Permits

To add a donation, for example, you just click on Donation and on the Add (+) icon.
To add a license or permit, click on the + icon.
![]()
Then select the attribute type and edit its details.

Contact Notes
To enter additional information about a contact, a note can be created. Notes can contain text, images, and links to websites. The Notes section will display previously created notes and allow you to add new notes to the currently selected contact.
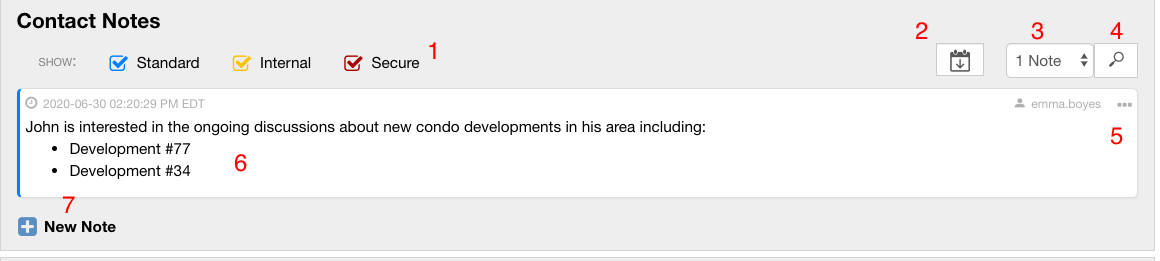
- Filter the notes you see by type (see below for more details)
- Sort the notes by date.
- Select how many notes to view (default is 5)
- Search the Contact’s notes.
- Delete or edit a note
- By default, only the first 10 lines of a note are displayed. If the note is longer than ten lines, a “show more” button will allow you to display the entire note.
- Create a new note. When creating a note, you have the option to make secure and/or internal:
Secure notes are encrypted in the database, and are not searchable in the Advanced Search for contacts
Internal notes can be excluded from certain reports
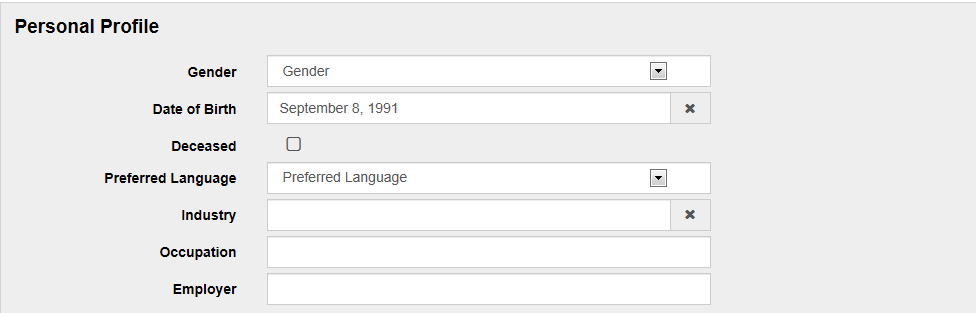
Personal Profile
This is where you can indicate a contact’s gender, birth date, whether they are deceased, their preferred language, profession (industry), occupation and employer.
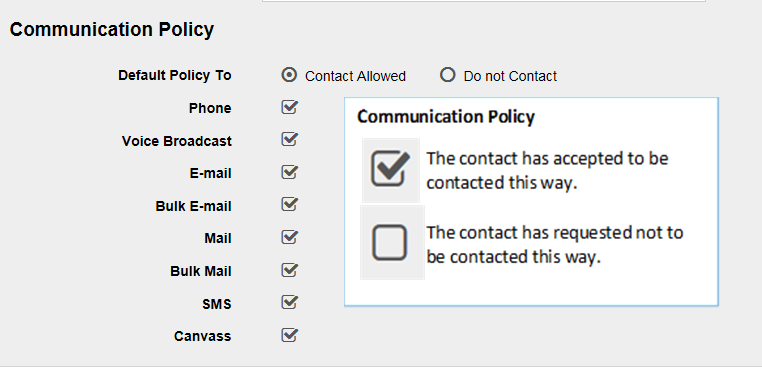
Communication Policy
The Communication Policy section allows you to specify the contact’s preferred methods of communication. For example, if a contact unsubscribed from a newsletter or requested to be removed from a mailing list, you could capture this information here.
Organizations
Some contacts are associated with specific organizations, for instance they may be a member of a union or community group. This section displays all of the organizations the contact is associated with.

- Selecting the + icon in the left corner of the Organizations table will allow you to search for and select Organizations as well as indicate the Contact’s role within the organization and when they had that role.
- Selecting the Pencil on the right side of the table will let you edit the Contact’s role and the dates they had that role.
- Selecting the x icon on the right side of the table will remove the Organization association from the Contact.
IDs
Every contact has a unique ID which cannot be modified. In addition to this ID, up to four external IDs can be assigned to the contact. These external IDs can be used to search for the contact and they can be modified. External IDs can be employee numbers, student IDs, or any other identification number used to distinguish the contact.

Attachments
Files can be uploaded and added as attachments to a contact’s profile. Simply dragging a file into the Attachments table will upload the file, or alternatively, selecting the + button in the top left corner of the table to upload a file. Once the file has been uploaded, the name and date can be edited by clicking the pencil icon on the right side of the table.
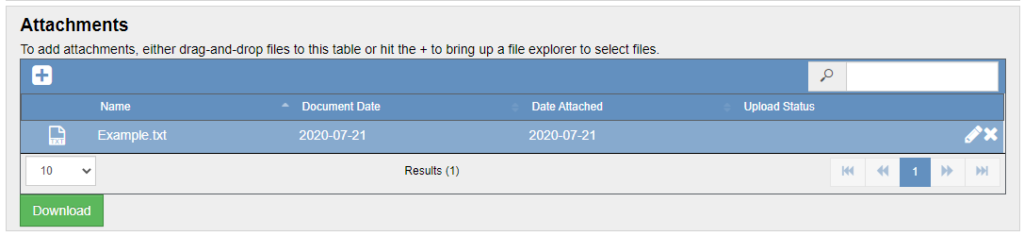
Attachments can also be removed by selecting the x icon on the right side of the table . Selecting an attachment and clicking the Download button will download a copy of the file to your local computer.
It is important to note that the uploaded files will only be saved if the green save button in the bottom right corner of the page is clicked. The following file types are allowed to be uploaded, all others will be rejected:
- .png
- .jpg
- .jpeg
- .gif
- .doc
- .docx
- .xls
- .xlsx
- .csv
- .zip
- .ppt
- .pptx
- .rar
- .txt
- .msg
- .eml
- .wav
- .mp3
- .mp4
- .wma
- webp
- webm
- hevc
- HEIC
- HEIF
- AVIF
- .jxr
- .hdp
- .wdp
- .jp2
- .j2k
- .jpf
- .jpx
- .jpm
- .mj2
- apng
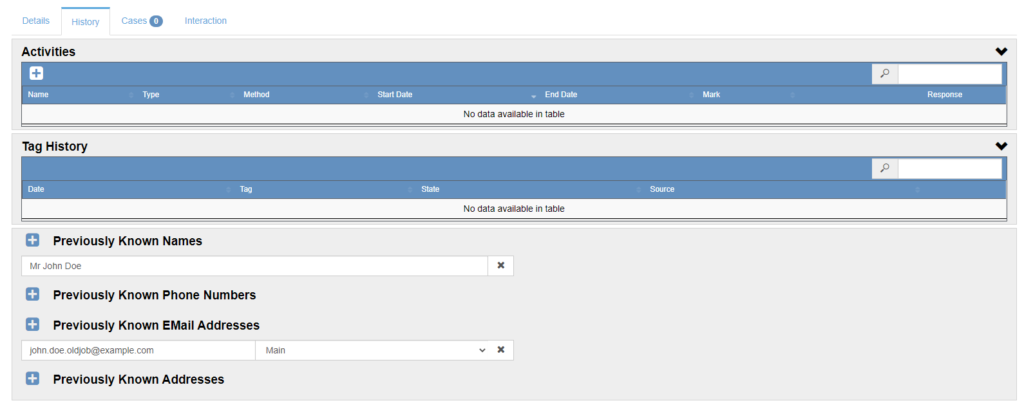
HISTORY
The History section the following information:
- If the contact was involved in any previous outreach activities executed by your organization.
- Any tags which were associated with the contact in the past.
- Any previous names, phone numbers, emails, or addresses (useful when a contact moves or changes employment).
CASES
All cases associated with the contact will be listed here. Selecting a case from the list will cross launch to the Case Work application with the case already selected and ready for viewing/updating.
New cases can also be created by selecting the + button in the top left corner of the table. This will cross launch the Case Work application to create a new case with the contact information already populated.

INTERACTION
This section contains the communication history for the contact. The date, time, and type of interaction is displayed, for example opening a MailChimp email activity email or SMS interactions.
