Search Knowledge Base
How To Use Inbound Channels
Inbound Channels
Critical to the efficiency of any case management system is an ability to create new cases as easily and as quickly as possible. While the system provides a web and mobile interfaces that are simple to use, information needed to create a new case is often already captured elsewhere. For example, a new issue often surfaces as an email that is sent to case office staff.
To streamline the creation of cases, a mechanism is provided to let authorized system users create new cases that are populated with the contents of an email. This is referred to as an “Email Inbound Channel”. An Inbound Channel is a capability that extends the system to accept data from sources other than the web or mobile application user interfaces.
Email Inbound Channel
Any email can be converted to a case that is categorized and assigned to the appropriate staff member simply by forwarding it to a pre-defined email address from an authorized account. Some of the key aspects of this feature include:
- Security. By default, the system will only accept emails from email addresses belonging to active users who are assigned as staff to the case office. There is also an option to accept all incoming emails. If this option is selected, cases will be created for every incoming email.
- Multiple Email addresses per case office. A case office administrator can setup multiple inbound email addresses, each with its own case category and staff assignment settings.
- Process Automation. Forwarding any received email to a configured case office email addresses will result in:
- A case being created with the email’s subject line as the title.
- The case category and assignee being set automatically based on the configuration of the email channel.
- The creation of a case note from the contents of the email.
- Any attachments to the email being added as attachments to the case.
- Association of the case will to a contact in the database using a simple set of options:
- If the email address and name of the originator of the email match a contact in the database, it will be associated to them.
- If the email address and name of the originator of the email cannot be found, the system will either create a contact or assign the case to a default contact depending on how the inbound channel is configured.
Email Channel Set-Up
The following screen shots walk through the administrative steps to setup an Email Inbound Channel. NOTE: you must have Case Office Administrator user privileges to set-up a new channel.
Configuring the Inbound Channel
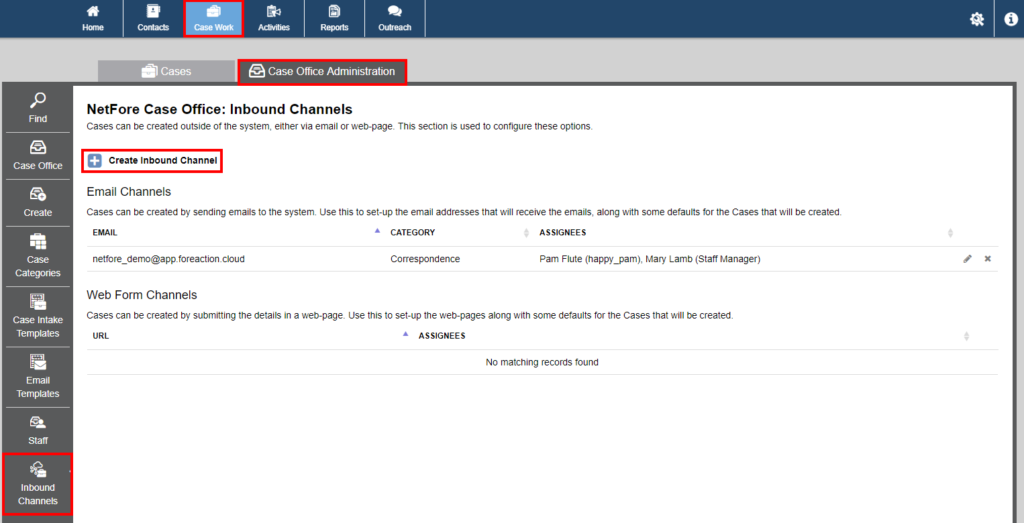
First navigate to the Case Work Application, then to the Case Office Administration tab. Next click on the Inbound Channels menu option.
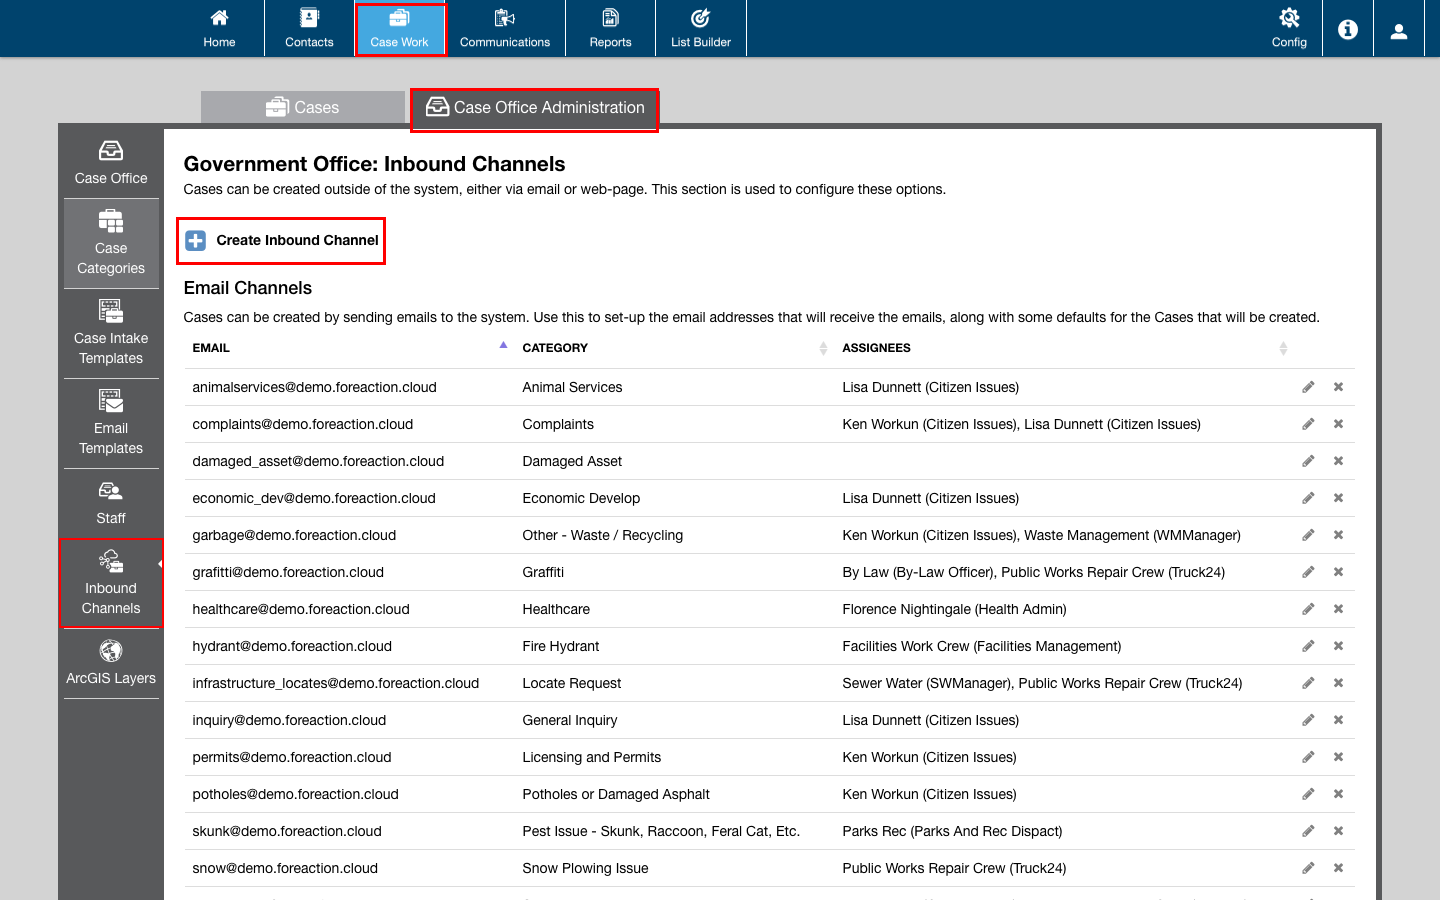
Select the Create Inbound Channel icon (the plus sign).
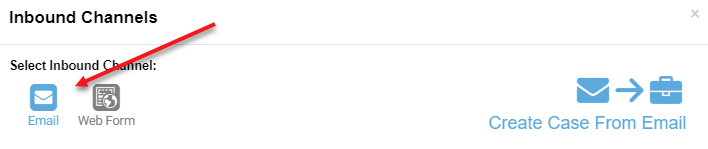
A popup will request that you choose the type of inbound channel you wish to create. Select the Email icon in this case.
Inbound Channel Configuration Form
An Email Inbound Channel allows you to:
- Define a unique email address
- Choose a category for cases that are created from emails to the above address
- Identify the case office staff member(s) who should be assigned
- Configure how to handle contact association and/or creation when creating the case from an email.
You can setup multiple inbound email channels, each creating a case with a different category and assignee.
Here is an example:
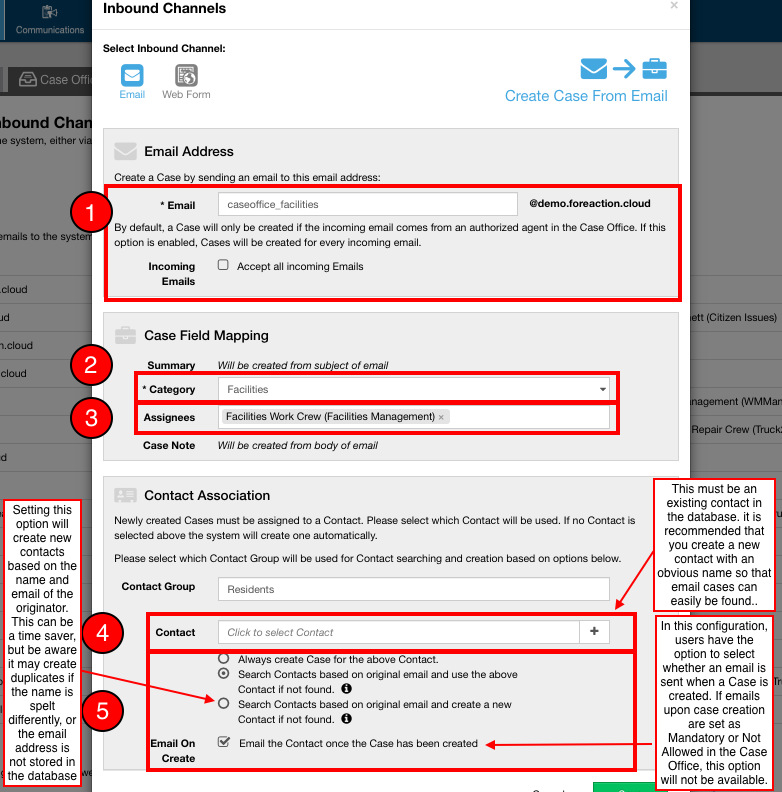
With the configuration shown above, by forwarding an email to (1) caseoffice_facilities@demo.foreaction.cloud, a case will be categorized under Facilities (2), and assigned to (3) the Facilities Work Crew. If Accept all incoming Emails (1) is selected, cases will be created for every incoming email rather than just emails from authorized agents.
In all cases the system sets “@demo.foreaction.cloud” as the email suffix. Each email must be unique across the entire system, so we strongly encourage using a prefix of your case office name (or a short form of it) and the category name to remove confusion.
The contact associated with the case will be a default contact that you create and/or select (4) or the contact representing the email originator depending on the option chosen (5).
Defining the set of approved emails
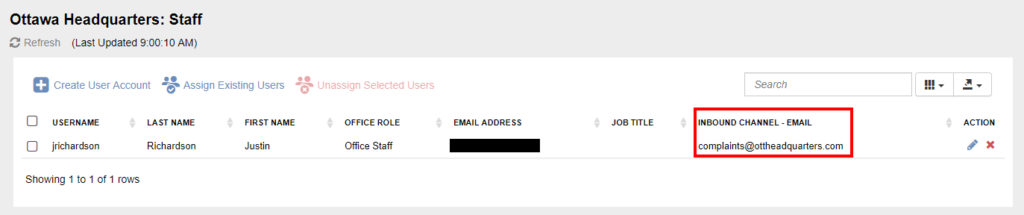
There is an inbound channel email address attribute for case office staff members. These must be set in order to authenticate them so they can create cases using the inbound channel. These email addresses do not need to match the staff member’s email address (i.e. the one used to reset passwords, etc). For instance, if you have a main email account for a case office, you can associate this email account with a staff member. Any cases forwarded from that inbox will be deemed to have been created by that staff member. Additionally, multiple email addresses can be associated with one staff member.
In the example below, any emails sent from complaints@ottheadquarters.com will be accepted, and the case will be created on behalf of Justin Richardson.
Generally, only email addresses configured here will be able to send emails to the system- emails coming from other addresses will be rejected. If you would like the system to accept emails from other addresses, select Accept all incoming Emails as explained in the screenshot above.
Web Form Inbound Channel
Citizens that you serve may also create cases online by entering information in a Web Form. To enable the ability to create Web Form Inbound Channels please contact NetFore Support to set up your Web Form.
Inbound Channel Configuration
Once the Web Form has been setup, a corresponding Web Form Inbound Channel needs to be configured in a similar manner to setting up an Email Inbound Channel. Follow the same steps described above to navigate to the Inbound Channels configuration page, and select the Create Inbound Channel icon.
When asked to choose what type of channel to create, select the Web Form icon on the right.

Inbound Channel Configuration Form
A Web Form Inbound Channel allows you to:
- Select a URL for the channel from those that have been set up for your domain
- Define who cases created through the channel should be assigned to
- Configure how to handle contact association and/or creation when creating the case from the Web Form.
Here is an example:
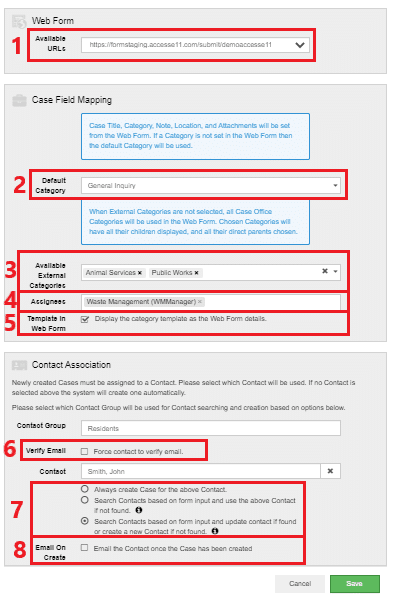
With the configuration shown above, navigating to https://form.foreaction.cloud/submit/ottawa-headquarters will display the web form for this Case Office (1). If they do not select a category, the default category (General Inquiry in this configuration) will be used (2). When citizens fill out a web form, they will have the option to select one option from the specified Available External Categories to describe their case (3). Any new case from the channel will be assigned to the named assignees, in this example Waste Management (4).
If an intake template has been created and assigned to a case category, it is also possible to configure the webform to show the template to the citizen reporting the issue (5). In this way, instructions can be provided, or specific questions can be asked to ensure that the citizen fills in the correct information.
When creating a case using a Web Form, contact information must be provided including first name and last name, and one of a phone number, an email address, or a home address. With Verify Email selected (6), the individual submitting the case will be required to include their email address and they will receive an email to confirm their identity. This will contain a four digit code that must be entered for the case to be created.
New Cases must also be assigned to a contact. You can decide to always assign new cases to the same contact, to automatically search existing contacts and assign it to a default contact if a match is not found, or search existing contacts and create a new contact if a match is not found (7).
When creating cases using a Web Form, you can also choose to have an email sent to the contact associated with the case when the case creation is complete (8).
The following is a sample of a generic Web Form that can be branded to meet your specific needs.
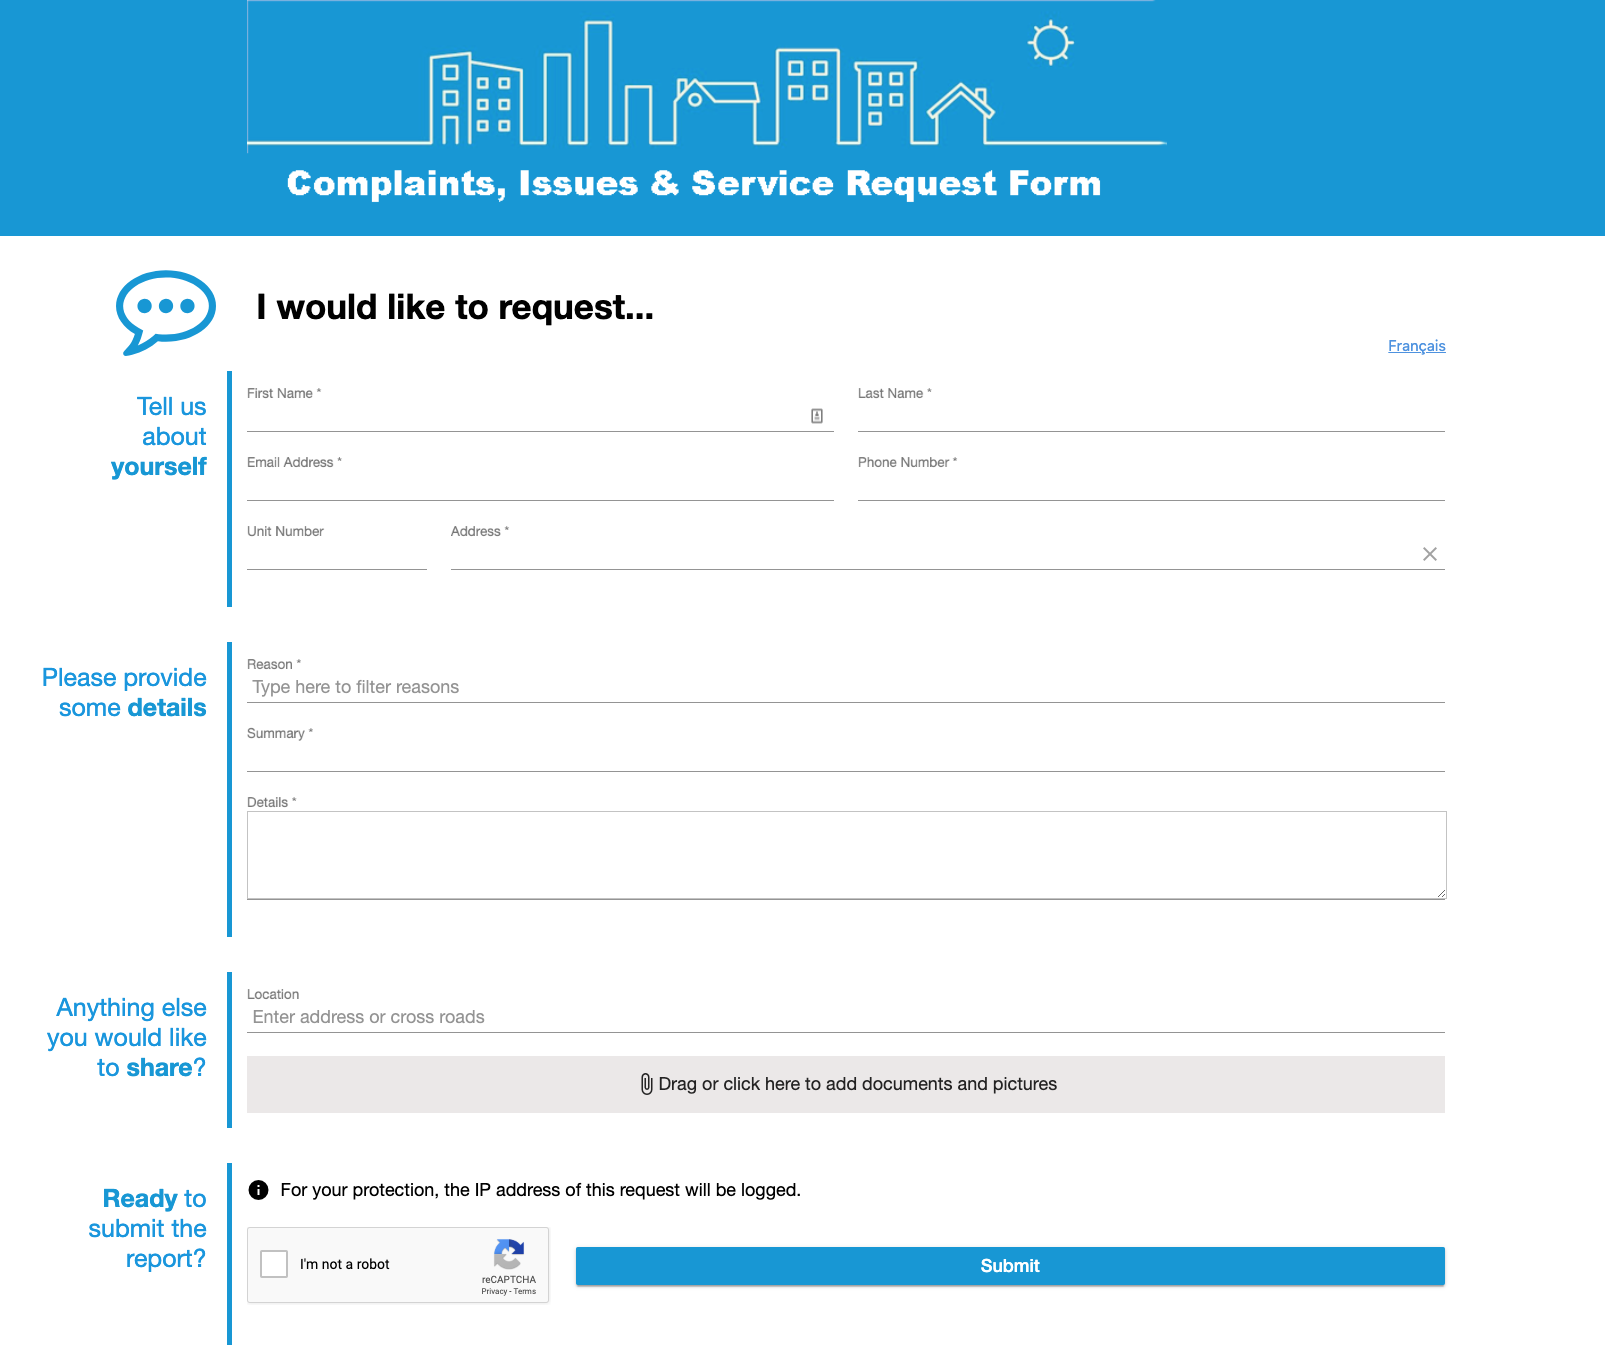
View Citizen Portal
When creating or editing a Case, it is possible to have the Contact emailed on its creation or on the creation of a Public Note. In the email, there is a link to the Portal which lets them view their Cases and Public Notes.

To setup the Portal, click on the Portal icon. Then input the desired information, which includes the information you want the Contact can see about their Case, the Portal header, and the Portal footer.