Search Knowledge Base
How To Import Contacts
Importing Data
With foreAction it is possible to create many Contacts at once. Instead of creating a single Contact at a time, a .csv file can be imported and foreAction will use the data contained in the file to automatically create Contacts.
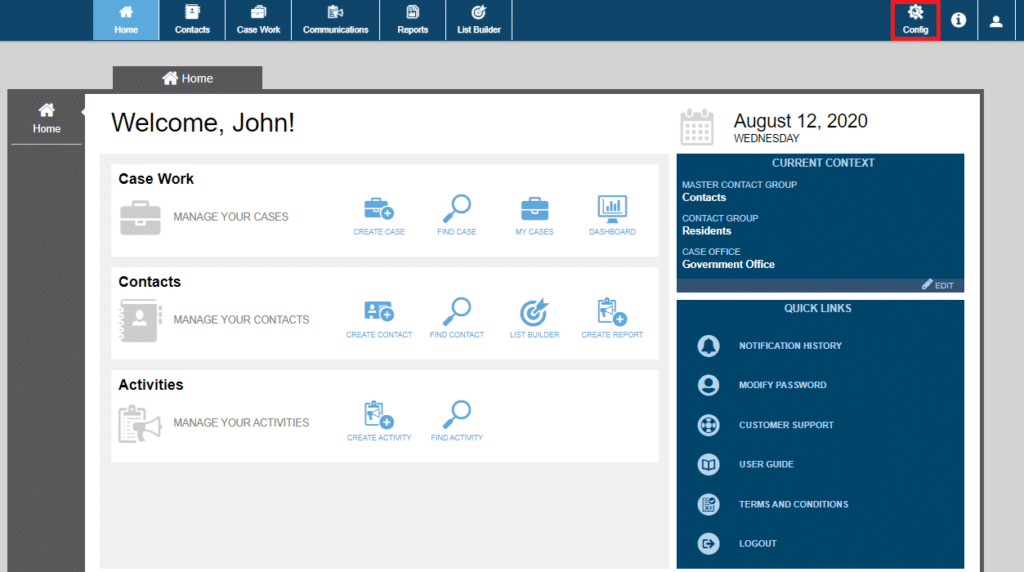
To import data select the Domain Configuration icon in the top right of the screen.
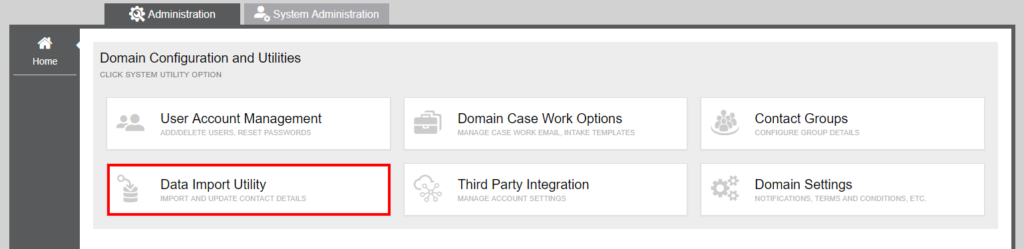
Now select the Data Import Utility from the options provided. This will display the Data Import Wizard to help you import your CSV file.
Step 1: Select File
The first step when importing data is to select your file and determine what guideline will be used when creating Contacts.
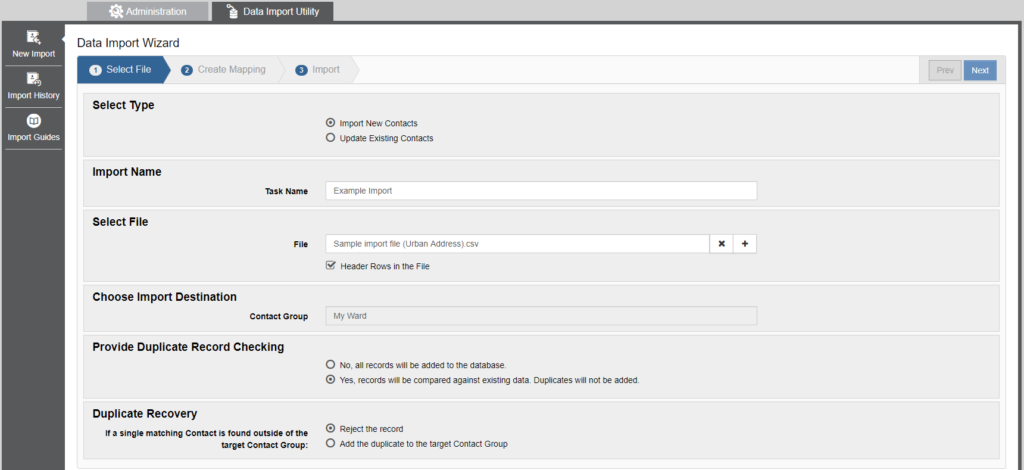
Select Type
Here you decide whether you would like to create new Contacts or update existing Contacts. When choosing to update Contacts, foreAction will compare the information of the file and the information present for existing Contacts to determine which Contact will be updated. You will have a choice whether to match on a Contact’s ID or match on the Contact’s personal information, more on this below.
Import Name
This name will be used to identify the import task. Previous imports can be viewed by selecting the Import History icon on the left side of the screen. Naming the task will help you locate a specific import.
Select File
Here you can select the file to be imported. To upload the file either drag it to the File Name field or select the file you would like to import from the file explorer. Only files with extension .csv can be uploaded for data import, all other file types will be denied.
For a Contact to be imported successfully, they must have a name and at least an Email, Phone Number, or Address.
For an Organization to be imported successfully, they require at least a Name.
Select whether the file you are uploading contains headers or does simply contains the data to be imported by clicking the checkbox labeled ‘Header Rows in the File’. This will tell foreAction if it should skip the first line in the file or not.
Provide Duplicate Record Checking
If you selected Import New Contacts in the Select Type step this option will determine what action is taken when foreAction encounters a Contact with data matching a record in your .csv file. Selecting ‘No, all records will be added to the database.’ will create new Contacts regardless if a match is found. Selecting ‘Yes, records will be compared against existing data. Duplicates will not be added.’ will not add Contacts when an existing Contact with matching information is found.
Record Matching Criteria
If you selected Update Existing Contacts in the Select Type step this option will determine how existing Contacts are matched against data in the file.
Step 2: Create Mapping
In this section you can map which columns of your CSV file will be used to populate fields of the newly created Contacts.
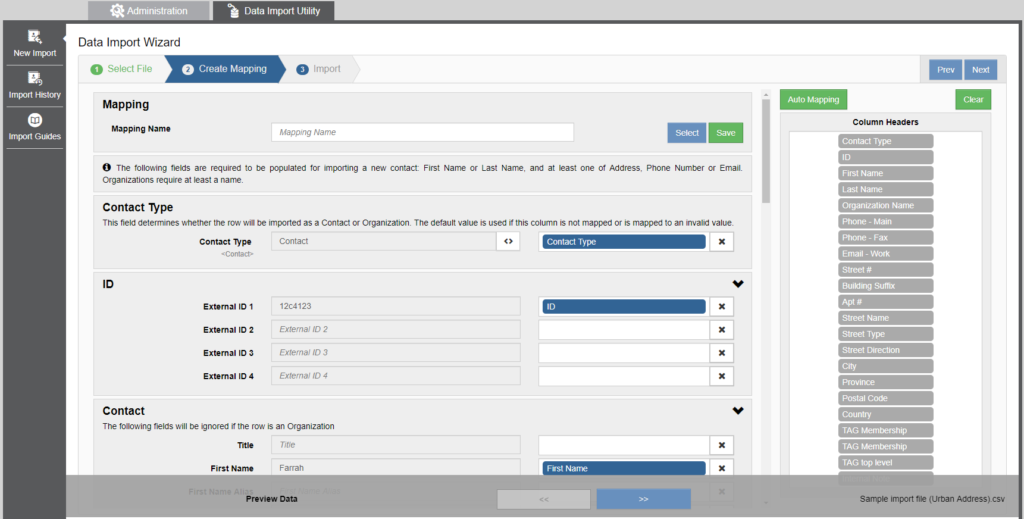
You can select Auto Mapping in the upper right side of the pane to automatically have the columns associated with the Contacts or Organizations fields, or you can drag each column header from the list on the right into the appropriate input field. To preview how the data from your file will be mapped to the input fields use the << or >> button to cycle through each row of the CSV file. This will display the data of the selected row in the fields next to the column headers.
Character Limits
If a field exceeds its character limit, it will be rejected. Here is the character limit for each column:
| Field | Max Characters |
|---|---|
| External ID | 40 |
| Contact Name | |
| Honorific | 20 |
| First Name / First Name Alias | 60 |
| Middle Name | 60 |
| Last Name / Last Name Alias | 60 |
| Suffix | 15 |
| Organization Name | |
| Name (en/fr) | 60 |
| Alias (en/fr) | 60 |
| Address | |
| City / Town | 60 |
| Address (Urban specific) | |
| Street # | 12 |
| Apt # | 12 |
| Street Name | 60 |
| Street Type | 15 |
| Address (Free Form specific) | |
| Reserve | 60 |
| Address 1 | 120 |
| Address 2 | 60 |
| Personal Profile | |
| Occupation | 60 |
| Employer | 60 |
| Communication | |
| Email / Social Media | 100 |
| Phone | 20 |
| Other | |
| Tag Name | 60 |
Address
Please note that an import can import all its addresses as either urban or freeform, but not both. Also note that the City, Province, and Country can all be defaulted while doing the import.
- Minimal Requirements
- Freeform addresses require at least an Address 1, City, and Province
- Urban addresses require at least a Street number, Street number, City, and Province
- Other Requirements
- Province – must be the two-letter acronym for the Province, all caps.
- Postal Code – must be 6 characters long if Canadian, all caps, eg K4C1H9. If American, must be either 5 digits, eg 43209, or five digits, followed by a dash, followed by 4 digits, eg 99577-0727
- Country – CA if Canada, US if United States, otherwise leave as is.
- Building suffix – can only be an upper-case letter, 1/2, 1/3, or 1/4
- Street Direction – one of: N, S, E, W, NE, NW, SE, SW
Communication
- Phone numbers:
- Make sure there are no non-numeric characters.
- If you’d like the number to be a specific type (Main, Work, Home, Cell, Fax, Pager), specify this in the header, eg ‘Phone – Fax’, otherwise it’ll be set to Main.
- Extensions – any extension should be appended onto the phone number itself preceded by an x, eg 6131234567 with the extension 123 becomes 6131234567×123
- Email:
- Must be a valid email format
- If you’d like the email to be a specific type (Main, Work, Home), specify this in the header, eg ‘Email – Work’, otherwise it’ll be set to Main.
- Social Media:
- Specify the type in the header. We currently support: Facebook, Twitter, LinkedIn, Skype, or just a generic Website
Other
- Personal Profile
- Date of Birth – must be in the following format: YYYY-MM-DD, eg 2018-05-16
- Gender – only accepts supported genders. To see your supported genders, view a Contact, go to Personal Profile, and click the Gender dropdown.
- Deceased – only accepts yes or no
- Preferred Language – only accepts supported languages. To see your supported languages, view a Contact, go to Personal Profile, and click the preferred Language dropdown.
- Tags
- You’ll format the tags by putting the name of the parent tag in the column header preceded by the word TAG (so we know what it is), and a single Tag as the column values.
- If a contact has multiple tags per parent tag, separate those tags into separate columns and give them the same column header names.
- Make sure all the Tag columns don’t exceed the 60-character limit. Any overflow will be truncated.
- Communication Policy
- By default, a contact’s communication policy will allow all forms of communication. Only include these fields if you want to disable communication of a certain type.
- Set the column header to one of the types of policy (Phone, Voice Broadcast, Email, Bulk Email, Mail, Bulk Mail, SMS, Canvass) followed by the word Policy, eg Phone Policy.
- The only values that are accepted are yes or no.
- Note – if you’d like the note to be secure and/or internal, include that in the column’s header, eg ‘Note Secure’
When you are satisfied with the column mapping click the Next button to proceed to the final step.
Step 3: Initiate Data Import
Now that you have selected the file you wish to import and have mapped all the columns you can start the import process. Select the Complete button in the top right corner of the page to start the data import.
Import History
Once you have scheduled your data import you can view it’s progress in the Import History section. Here you can see a summary of the import including how many Contacts were rejected or accepted, the status of the import, and when it was finished.
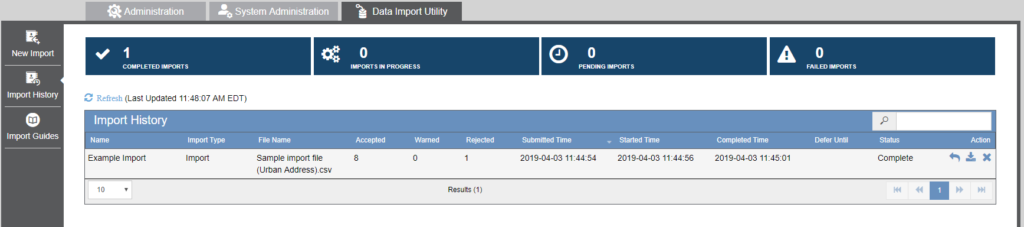
Once an import is complete a report can be downloaded detailing which rows were accepted, which resulted in a warning, which were rejected and why. To download this report select the download icon on the right side of the Import History table.![]()
A data import can also be reverted to remove the contacts created from the CSV file. To do this select the revert icon on the right side of the Import History Table.![]()