Search Knowledge Base
How To Manage Tags
Managing Tags
Tags can be used to track issues important to your contacts. Tags can also be used with the List Builder to generate lists of contacts based on their Tags. For example, if a contact has shown interest in Green Energy, you can tag that contact with “Green Energy”, “Solar Power”, etc.
Tags can be created for an entire Domain or a specific Contact Group. Domain-wide Tags can only be created by your Domain Administrator. For Contact Group Tags, you must have at least Outreach Manager permissions to be able to Manage Tags. The Tags added or modified using Tag Management will affect all users that have access to your Domain and Contact Group.
Navigating to Tag Management
To navigate to the Tag Management features:
- Click on the Contacts icon on the navigation bar located at the top of the page, or select one of the Contact quick links on the home page.
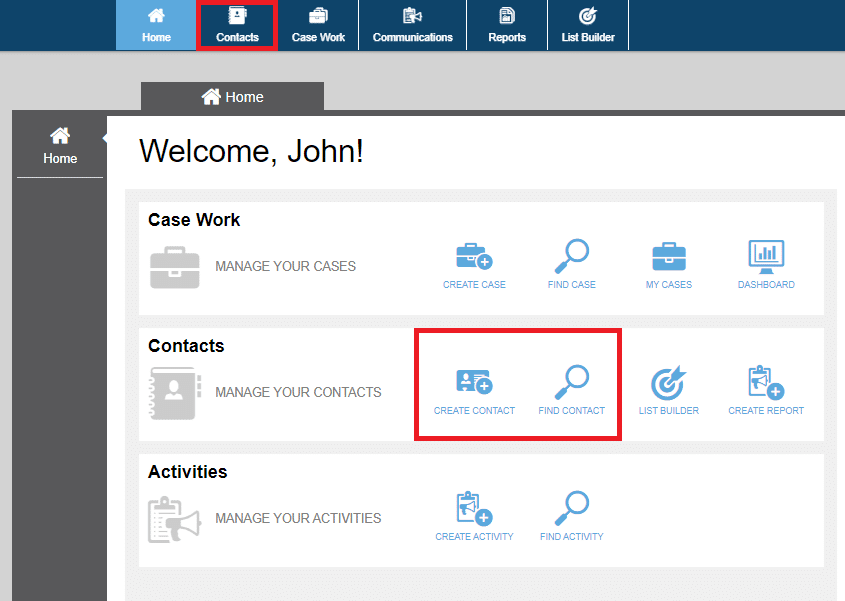
Then click on the “Tag Management” tab on the lefthand menu of the Contacts page. This will open up the Tag tree. The tree is segmented by your Domain and Contact Group to help manage both Domain-wide Tags and Contact Group-specific Tags. Your assigned permissions determine the Tags you are allowed to create, edit, and delete.
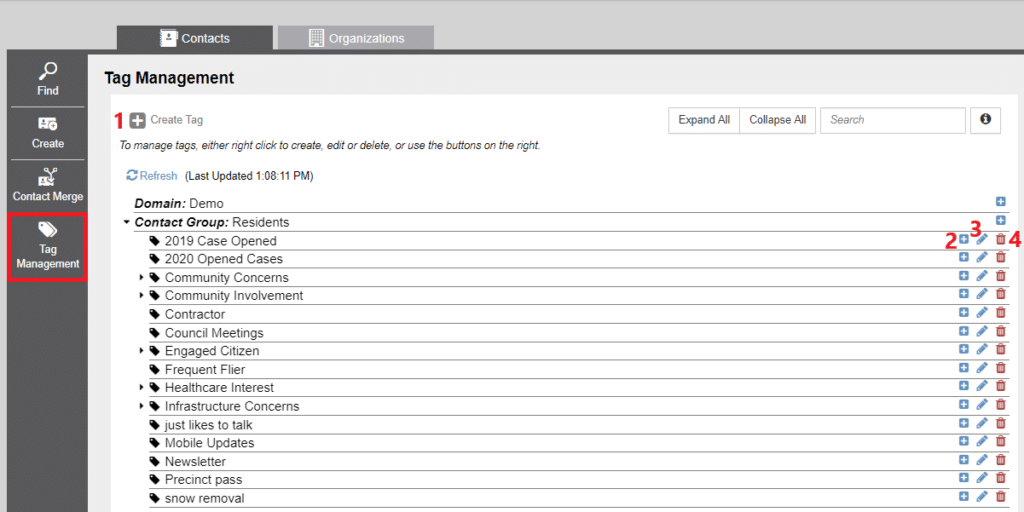
From the Tag Management tab, you can:
- Create a Tag
- Create a Child-Tag
- Edit a Tag
- Delete a Tag
1. Creating Tags
Follow the steps below to create new Tags.
Step 1: Open the Create Tag Menu
Click on the “Create Tag” button on the top left corner of the Tag Management window.

Step 2: Create New Tag
The parent field will automatically select your assigned Contact Group. It can also be changed to any of the existing Tags that fall under your account permissions. Enter the name of your Tag in the labeled field and then click on the green Save button at the bottom right of the pop-up. The newly created Tag will be available to all users in your Contact Group.
2. Creating Child Tags
Tags are hierarchical. Child tags can be used to be more specific about a certain group of contacts. They can be used to identify contacts with additional granularity. For example, a “Wind Power” Tag might be created under a “Green Energy” Tag in the Tag management tree to help differentiate contacts with a general interest in “Green Energy” contacts.
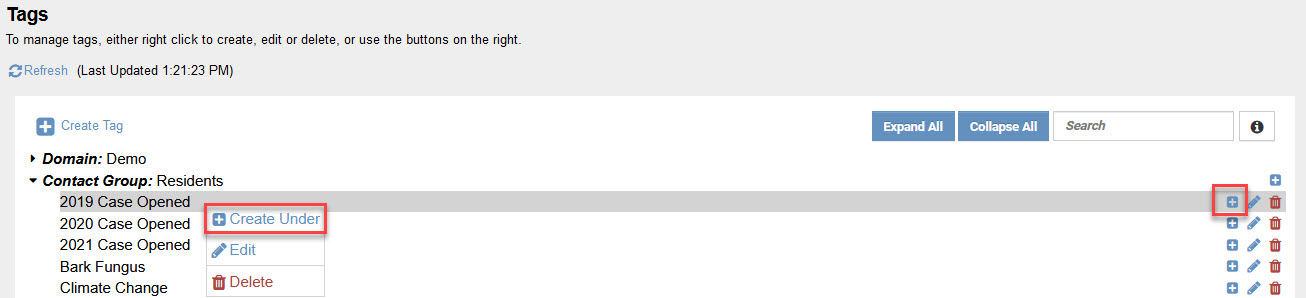
Step 1: Select Parent Tag
There are two ways to do this:
- Click the add icon (+ icon) on the right of an existing Tag that you want to be the Parent Tag.
- Right-click on an existing Tag that can be edited and select the “Create Under” option from the drop-down.
Step 2: Create New Tag
The Create Tag menu will open with the parent field set to the selected Parent Tag. Enter the name of your Tag in the labeled field and then click Save. The Tag you just created will be a child of the selected parent tag.
3. Editing Tags
Editing Tags allows you to change the name and Parent Tag of existing Tags.

Step 1: Select Tag to edit
There are two ways to do this:
- Click on the edit icon (pencil icon) for an existing Tag that you want to edit.
- Right-click on an existing Tag and select the “Edit” option from the drop-down.
Step 2: Edit Tag
The Edit Tag menu opens with the current details of the selected Tag. The top of the menu will show the number of tag references from existing contacts.
To move Tags within the Tag tree, the parent field can be changed to any of the existing Tags that fall under your account permissions. When a Tag is moved, all its child Tags will move with it. The English and French names can also be edited. When you are done with your changes, make sure to save before you exit the window.
4. Deleting Tags
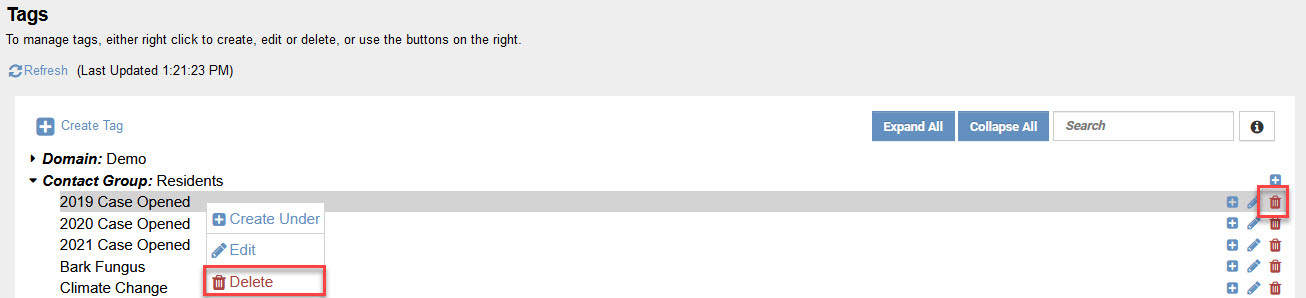
Step 1: Select Tag to delete
There are two ways to do this:
- Click on the delete icon (Trash icon) for an existing Tag.
- Right-click on an existing Tag and select the “Delete” option from the drop-down.
Step 2: Delete tag
A pop-up should appear. The top of the pop-up will show the number of contacts that the Tag and its children are associated with. By confirming the deletion, the Tag and its children will be permanently removed for you and for all users who had access to the Tag. The Tags will also be removed from the contacts that have been tagged with it.
Managing Tags using the Tag Picker
For simplicity, most Tag Pickers in the platform provide direct access to the Tag management features.
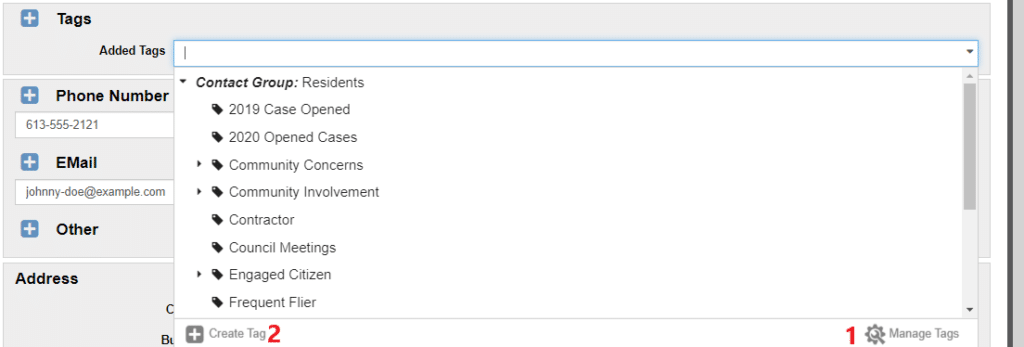
1) Opening Tag Management from Tag Picker
When a Tag Picker is opened, below the Tag tree there will be a “Manage Tags” option. When “Manage Tags” is selected, a Tag Management window will open as a modal in your current page, with the same capabilities as main Tag Management page described above.
2) Creating Tags on Tag Picker
Selecting the “Create Tag” option in a Tag picker will open a Create Tag modal, allowing you to create Tags directly anywhere in the Tag hierarchy.