Search Knowledge Base
How to Use ArcGIS Layers
Working with AccessE11 and ArcGIS
It is very common for citizen reported issues to relate to physical assets that are owned by the municipality. For municipalities that rely on ArcGIS for mapping physical infrastructure, AccessE11 offers an out-of-the box integration to flexibly configure and render any number of layers defined in an ArcGIS domain within the platform’s own embedded maps. When specifying the location for an asset-related case, customer service staff only need to choose from the available layers to display relevant assets as pins in AccessE11, hover over a pin to view identifying information, and click to associate the asset to the case. This seamlessly geo-locates the case, and retrieves the asset identifying information that you choose to store with the case details. Any need to swivel-chair between multiple systems to consolidate all necessary information is eliminated.
ArcGIS Layers
ArcGIS Layers are data sets that are added to a map in order to see a variety of things. For example, while working on a Case, you may want to display a layer that shows the location of street lights or a layer that shows the location of fire hydrants. These ArcGIS Layers can be dynamically displayed on AccessE11’s embedded maps within the Create and Edit Case screens.
Administering ArcGIS Integrations
Case Office Administrators are provided with a set of tools for setting up and maintaining ArcGIS integrations.
Setting up ArcGIS Connections
The first step involved in using ArcGIS data within AccessE11 is setting up a Connection to your organization’s ArcGIS Server.
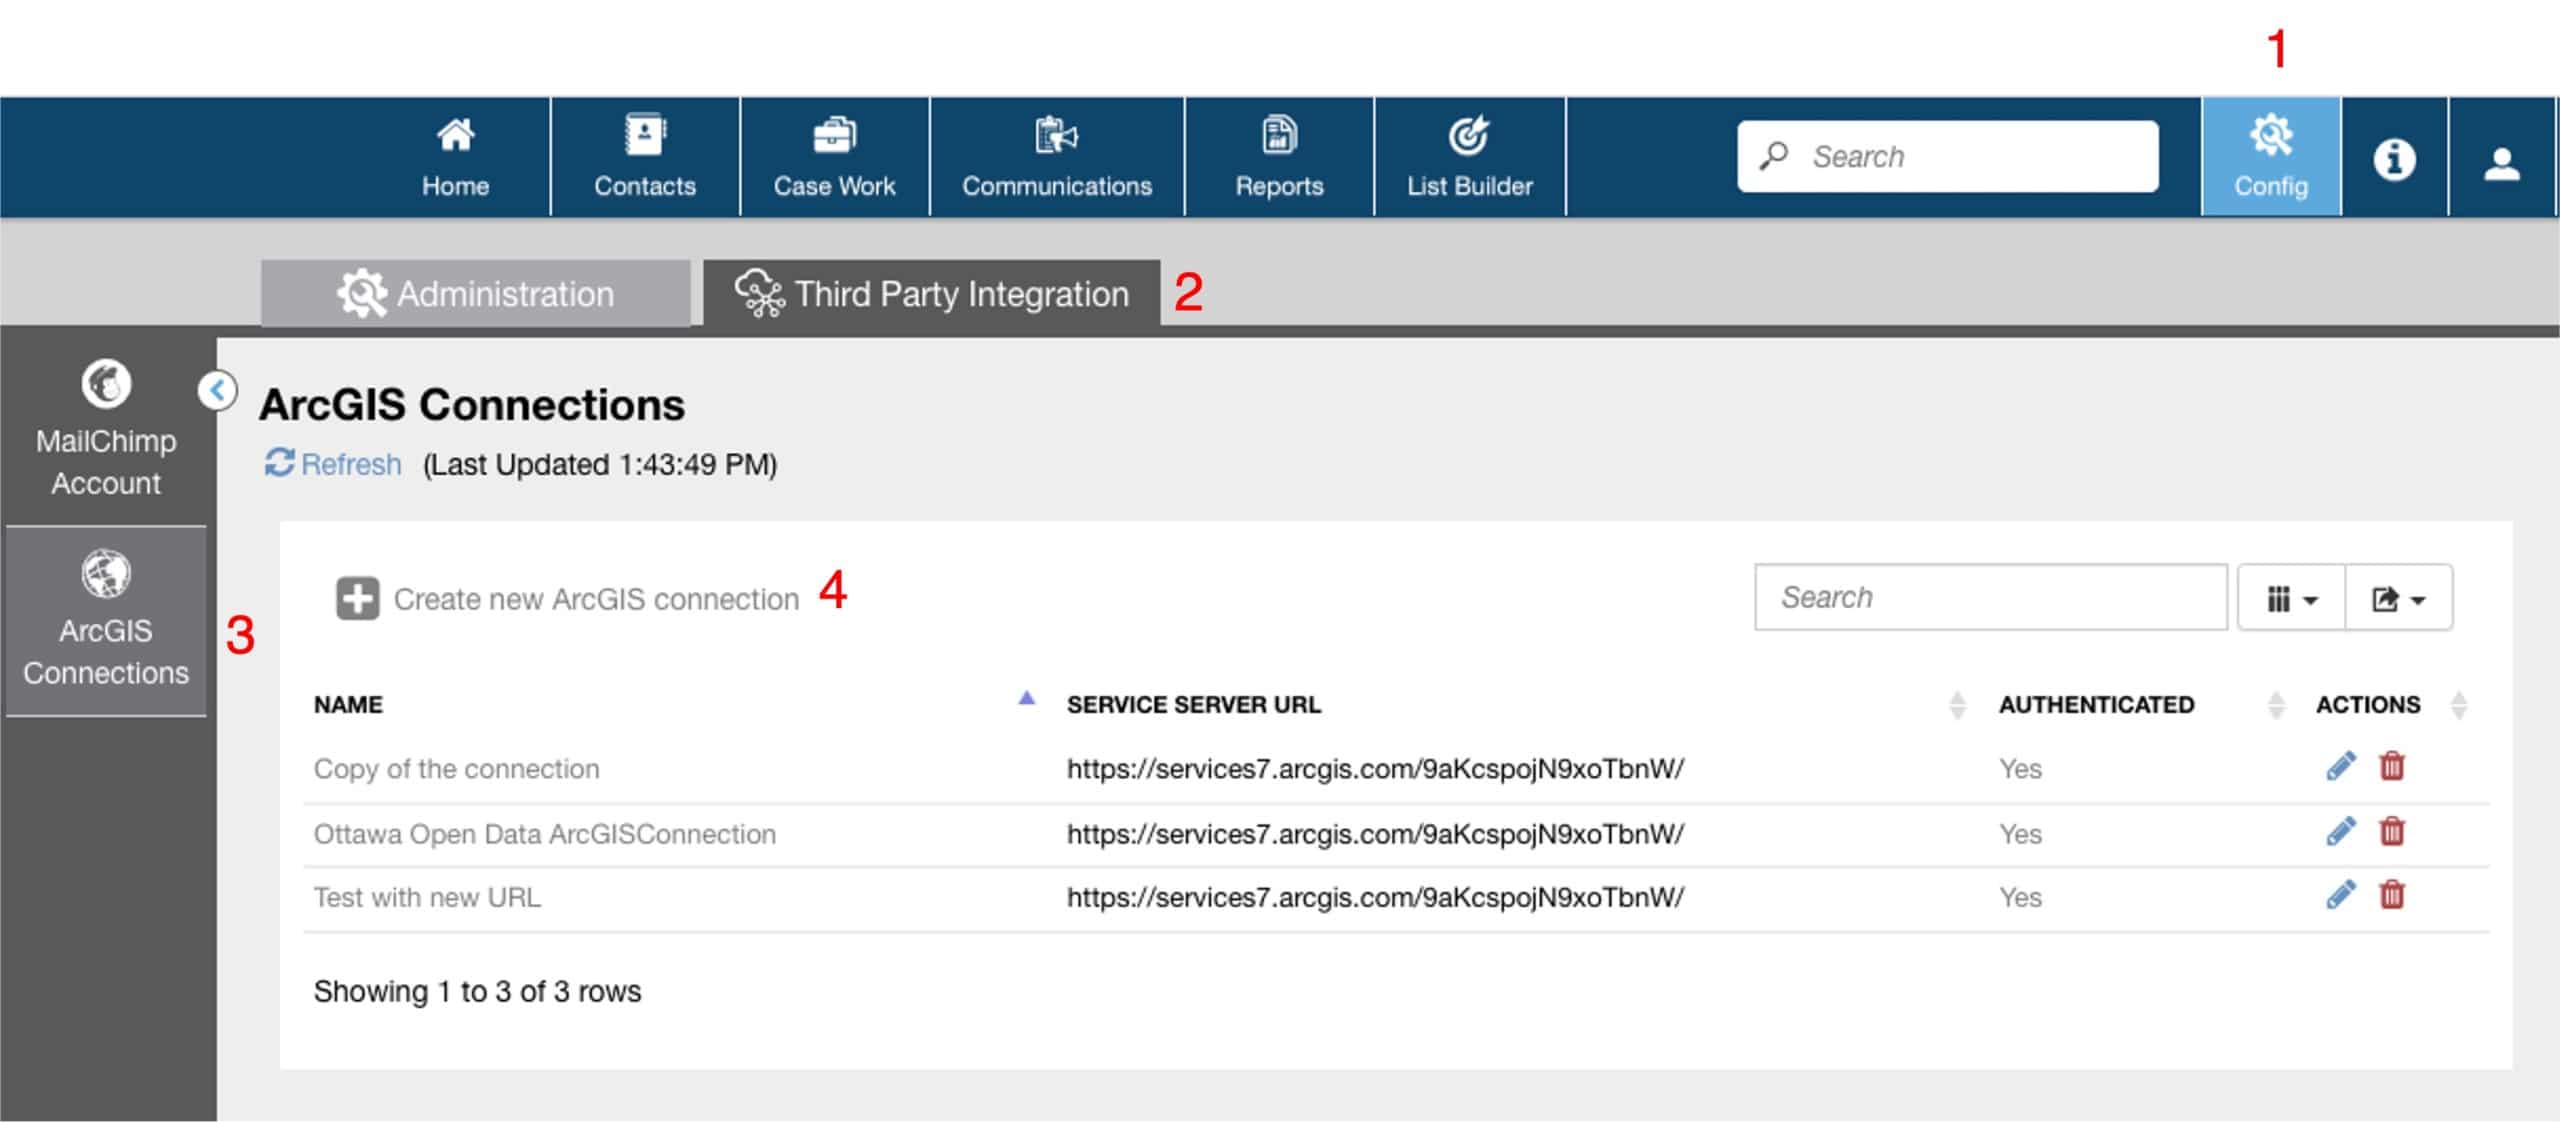
To initiate the process of setting up a new connection:
- Select the Config option from the main menu (1)
- Choose the Third Party Integration tab (2)
- Select ArcGIS Connections from the left menu bar (3)
- Then select Create new ArcGIS connection (4)
A form similar to the following will be shown.
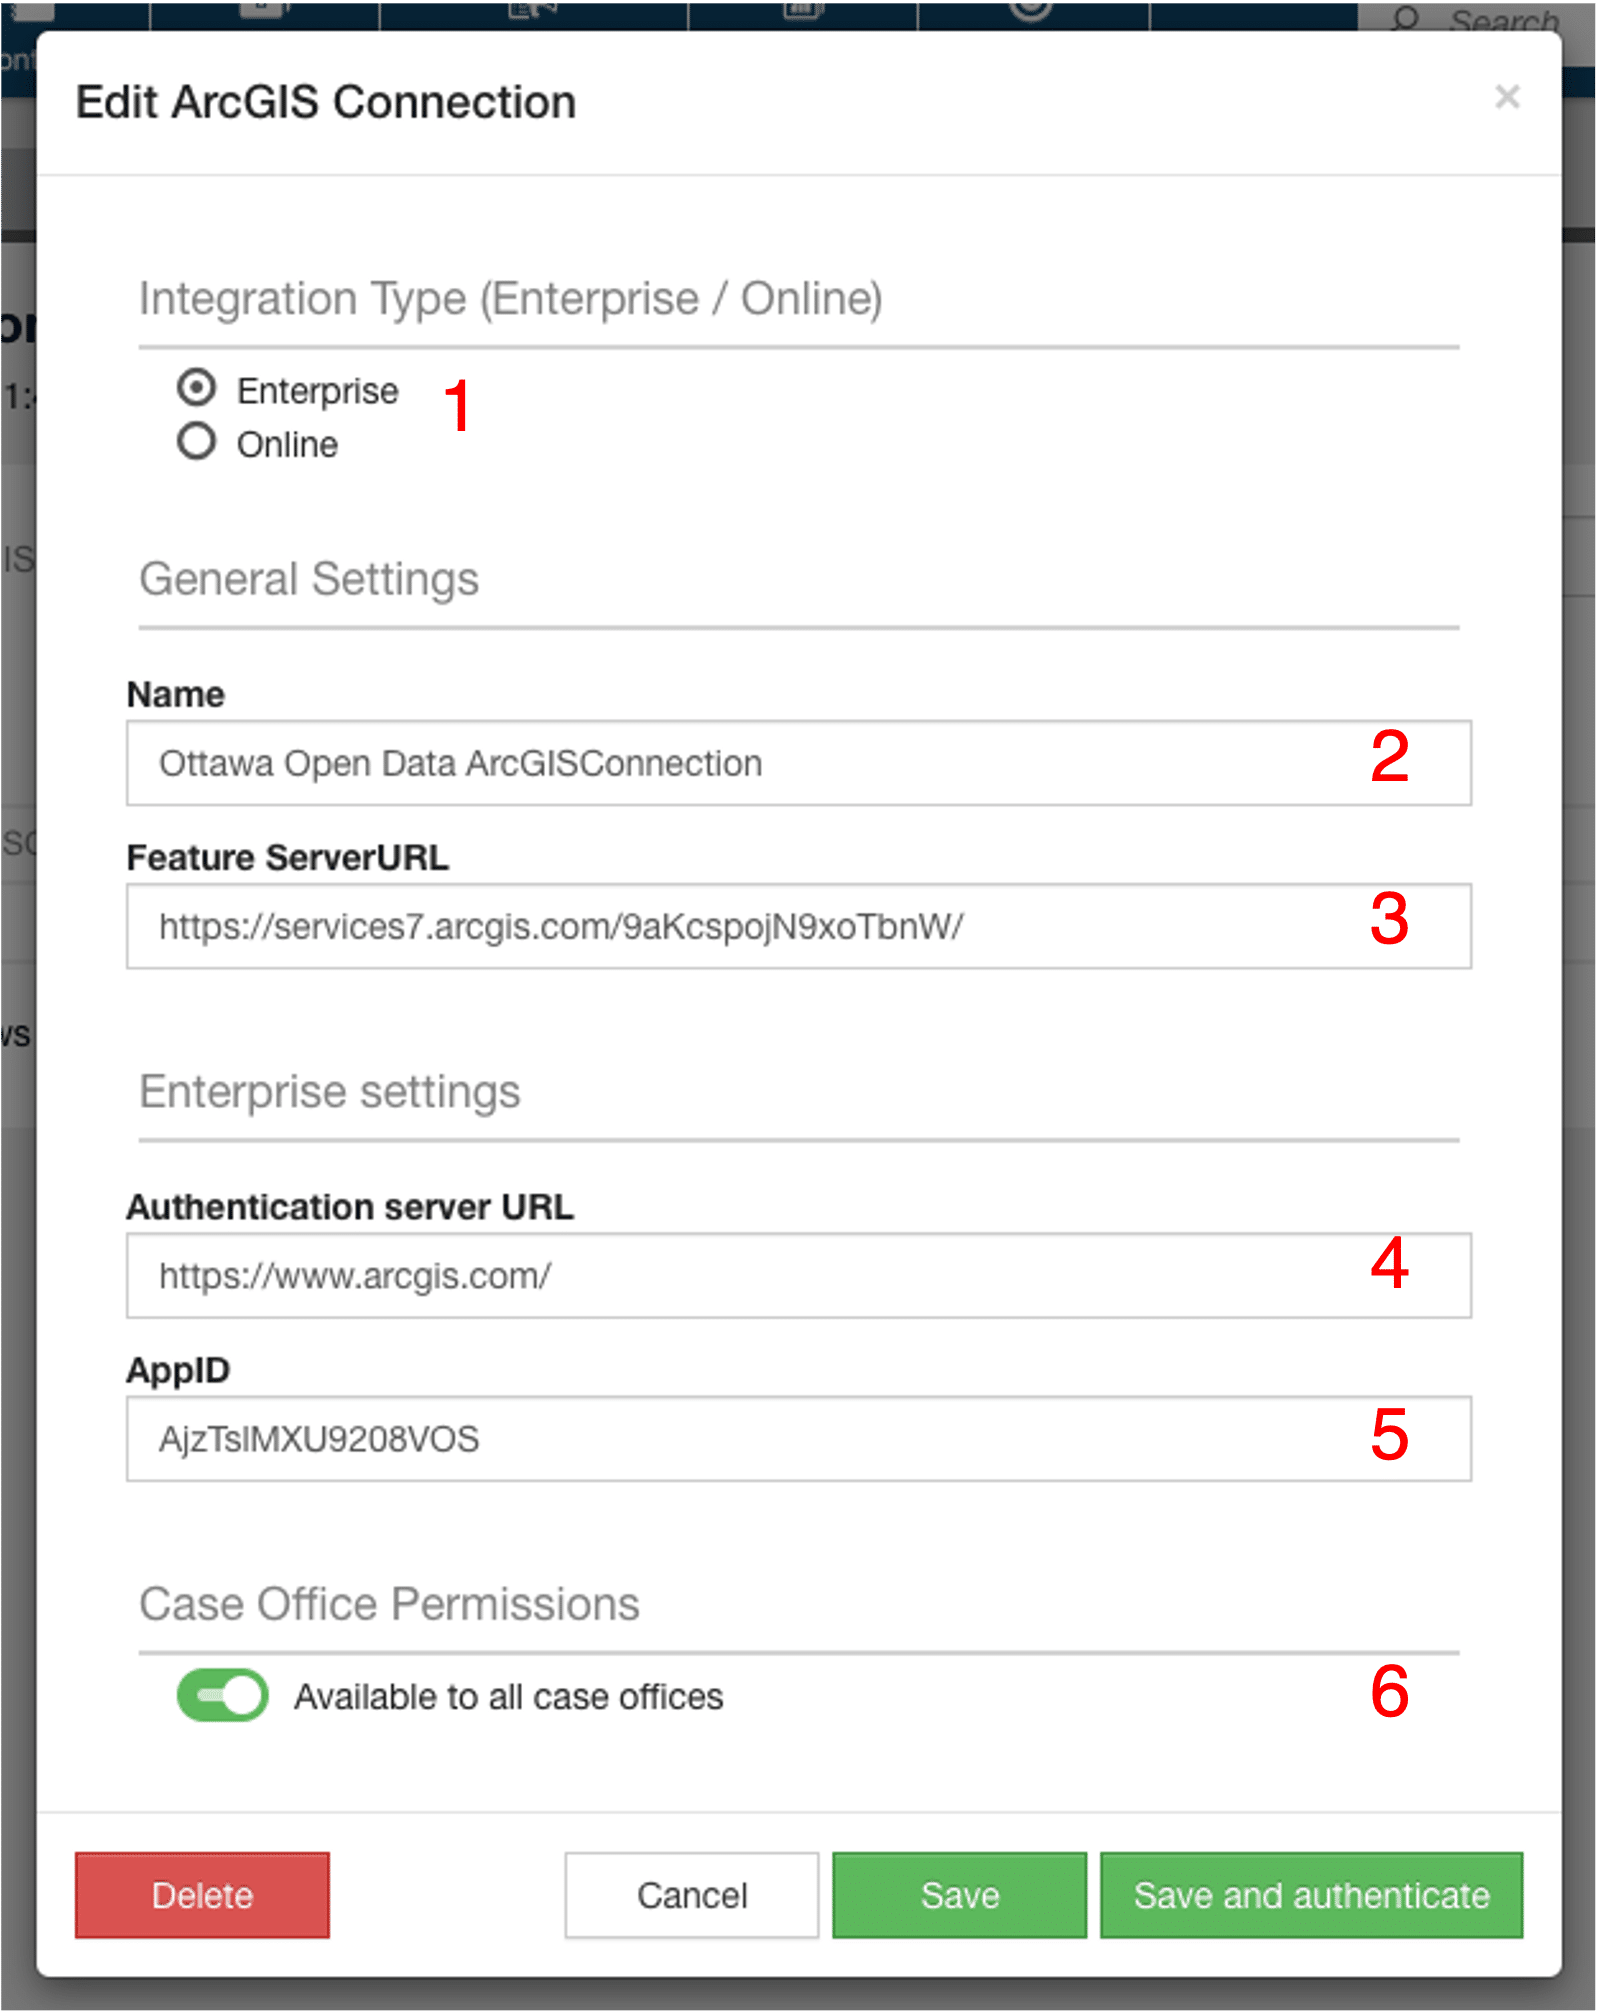
You will be prompted to:
- Select whether the ArcGIS connection is for an Enterprise or Online service (1)
- Give your ArcGIS connection a name (2)
- Enter the ArcGIS ServerURL that you wish to connect to (3)
- For an Enterprise connection, enter the Authentication Server URL (4)
- For an Enterprise connection, enter the ArcGIS AppID (5)
- Specify whether the connection is to be shared with all Case Offices or only selected Case Offices (6)
When you have finished, you will need to Save and Authenticate the the specified ArcGIS server to complete the connection.
Configuring ArcGIS Layers for AccessE11
Once a Connection is established, Case Office Administrators can configure the details of the ArcGIS Layers that they wish to make available within AccessE11.
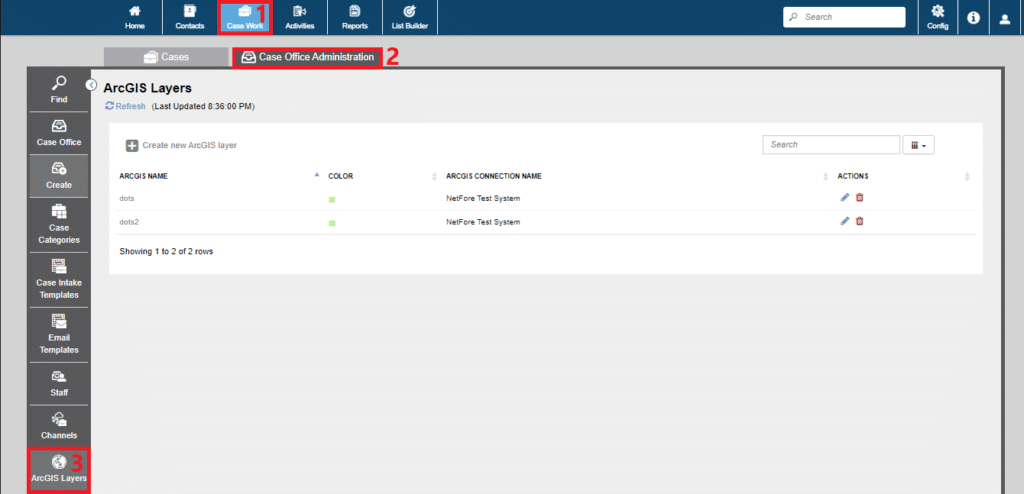
To Navigate to the ArcGIS Layers configuration screen:
- Go to the Case Work application by clicking on the Case Work option from the main menu (1).
- Go to Case Office Administration by selecting the Case Office Administration tab (2).
- Then go to the the ArcGIS Layers section by selecting the ArcGIS Layers option from the menu within the left-side menu (3).
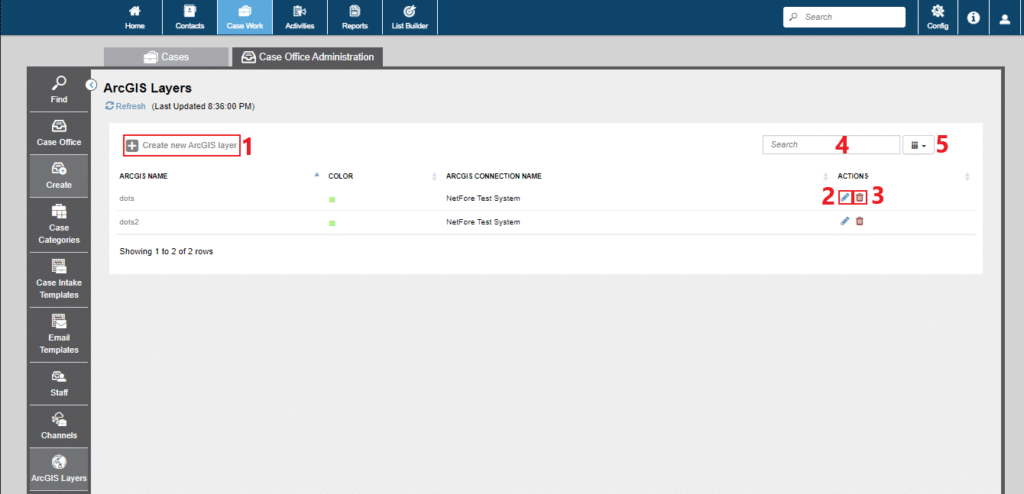
Once there, you will see options to:
- Create a new ArcGIS layer (1)
- Edit an existing ArcGIS layer (2)
- Delete an existing ArcGIS layer (3)
- Search for an existing ArcGIS layer (4)
- You can also choose which columns you would like to have visible in the table (5)
Creating an ArcGIS Layer
To add a new ArcGIS layer to those available in AccessE11, select the “+ Create new ArcGIS layer” button. The following pop-up will appear:
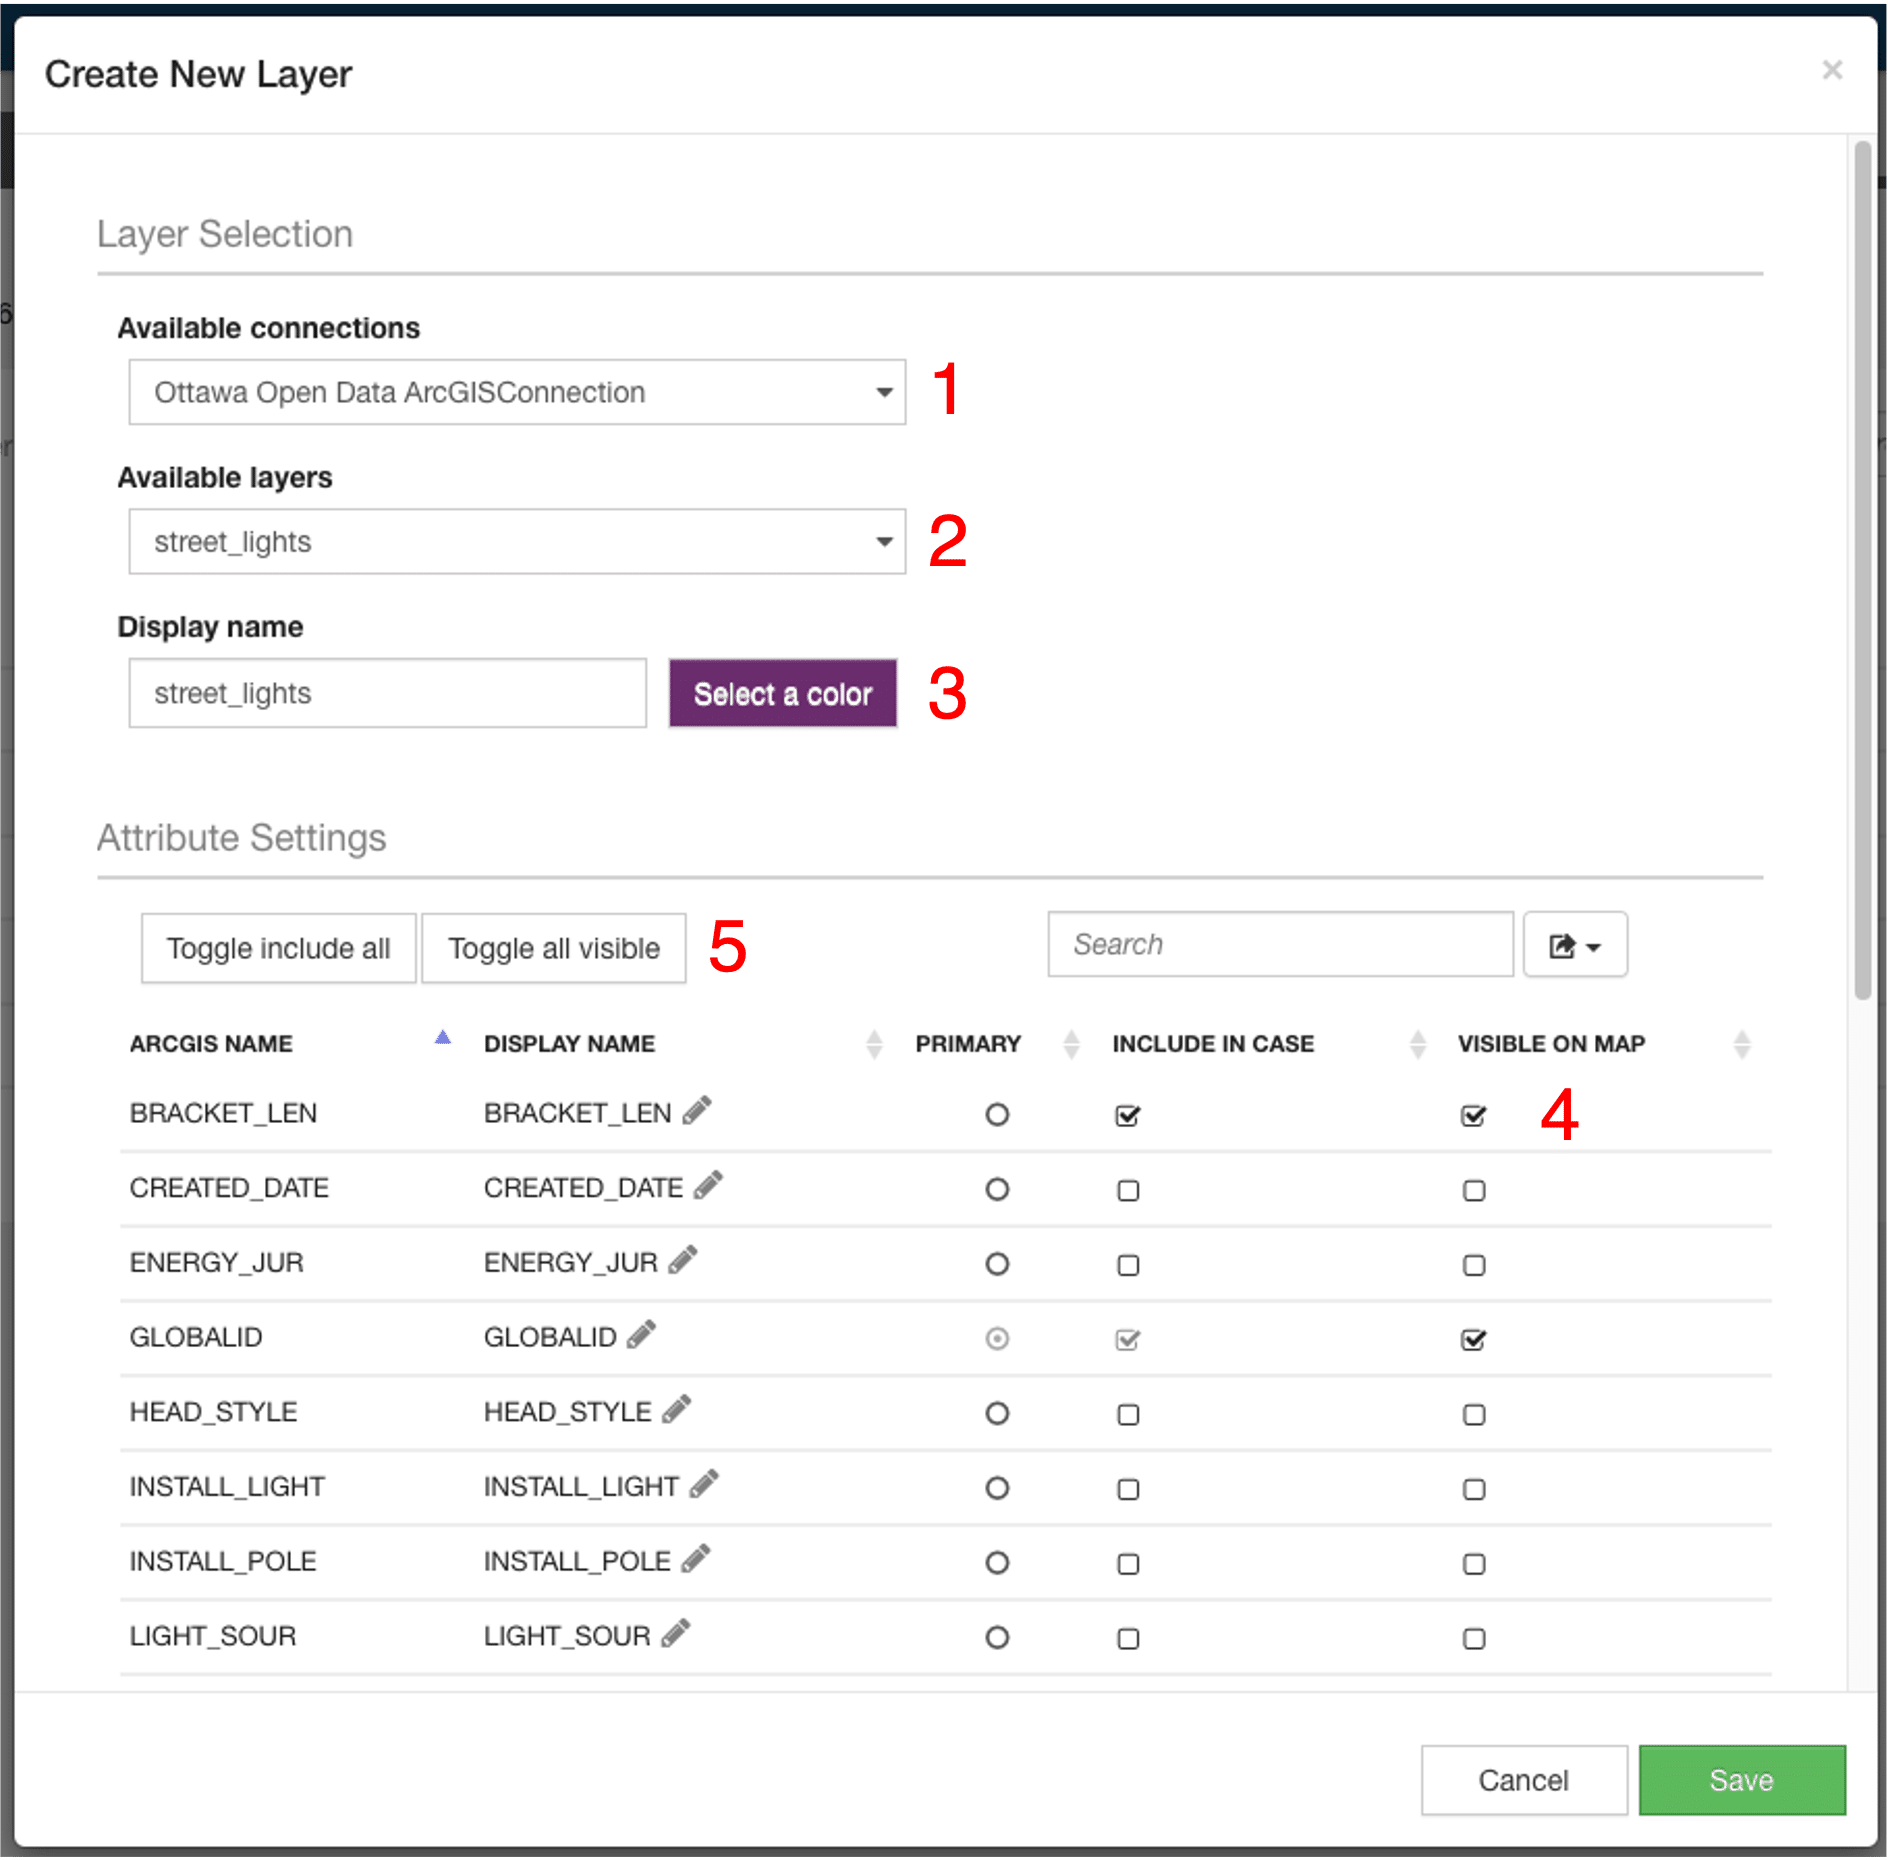
- Select one of the available connections that has been created for your organization (1)
- Choose which ArcGIS Layer you would like to make available to your Cases (2)
- Choose the Display Name as you would like it to appear in AccessE11 (3)
- Choose a Color for the Layer as you would like it to appear in AccessE11 (4)
- Review the attributes exposed by ArcGIS and select those that you would like to have in the Case details and those that you would like to display on the map. If you have selected more than one attribute to be included in the Case details, you can select one of them to be the primary attribute (5)
Finally, if you would like to include all the Attributes in the Case details, click on the Toggle include all button, and if you would like to include all the Attributes in the hover text for pins on the map, click on the Toggle all visible button.
Once you have selected the desired Layer and configured the attributes, click Save in the bottom right corner of the pop-up.
Editing an ArcGIS Layer
To Edit an ArcGIS layer, click on the pencil icon. Then edit the fields in the pop-up. See above for more information on each specific field.
Deleting an ArcGIS Layer
To Delete an ArcGIS Layer, click on the garbage can icon and then confirm it in the pop-up.
Using ArcGIS Layers in Case Work
Once the Layers have been configured for the Case Office, they will be available to staff involved in managing Case Work.

To work with the Layers on the Map when Creating or Editing a Case:
- Select the Globe button in the bottom left corner of the map (1)
- Select which Layer(s) you would like to display on the map from the pop-up (2)
- Hover over any pin, line or shape on the map to see the ArcGIS attributes that have been configured for display (3)
- Then, to associate ArcGIS data with the Case, select a pin. The attributes that are configured for inclusion with Cases will be shown as an Asset in the Case details (4)