Search Knowledge Base
Managing Users
This article will discuss how Administrators can manage the Users in their foreAction case office and provides a deeper understanding of the settings available to you. Before we begin, we must take a look at the two different sections that can manage Users, as well as explain the difference between the two.
Sections to Manage Users
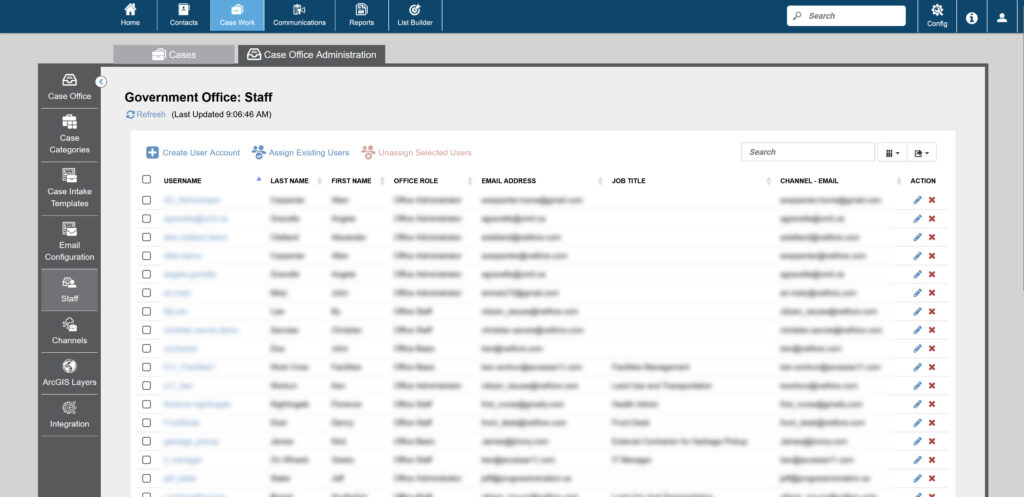
There are two distinct sections that can manage users within foreAction. While they are very similar, there are a few notable differences. The first section is called Staff Management, and it can be found by going to your Case Office Administration tab, and selecting Staff along the left-hand side.
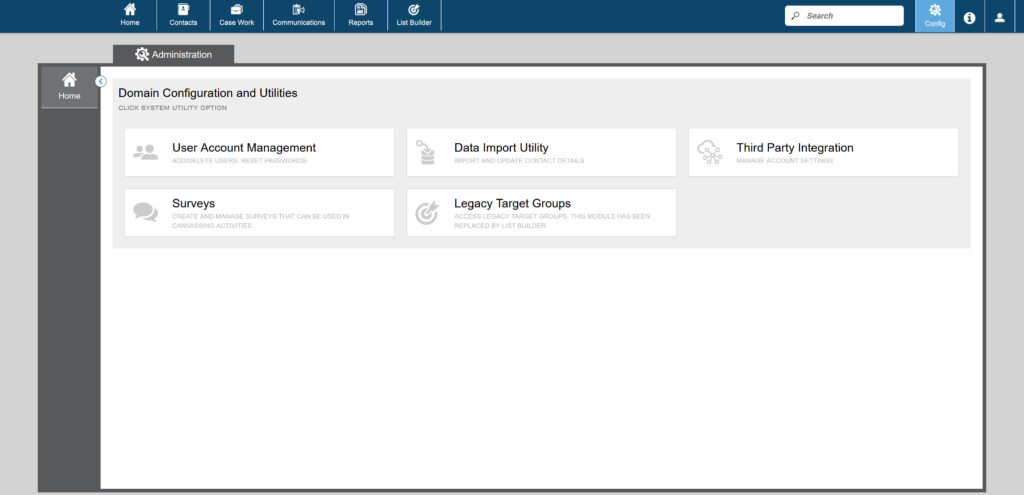
The other section that can manage users is called User Account Management, and it can be found by clicking Config at the top right of your screen, and choosing User Account Management under the Administration tab.
Both sections will manage users in the same way, the only difference is which users are visible to you. Staff Management will only show you the staff that are currently assigned to the specific Case Office that you are working on, while the User Account Management section has the option to view all Users, even ones who aren’t assigned to a Case Office, or are assigned to a different Case Office.
For many users of the system, who are only dealing with a single Case Office, both of these sections will be identical. However, if you are dealing with multiple Case Offices and Contact Groups, you may get a different list of users depending on which section you pick.
With that out of the way, let’s explore creating and managing a user.
User List
The list of users gives an overview of all the users in your organization. From this view, you can see Name, Email, Roles and Last Login Date of each user. You can also click the checkbox at the very top to view disabled/expired users.
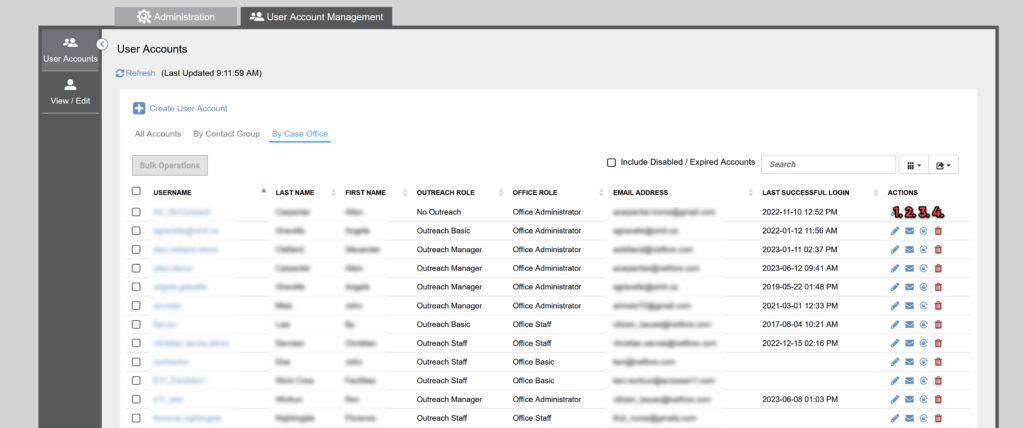
The four actions at the right of each user allow you to do the following:
- Edit User
- Re-Send Welcome Email
- Reset Password
- Delete User
From this menu, you can also create a new user by clicking Create User Account at the top of the screen.
Managing a User
The first step to managing a user is to choose which user you want to edit. With your list of users visible, either click on the blue colored username of the user you wish to edit, or the pencil to the far right. This will bring up the user management screen.

This page can be broken down into three sections, which will be explained more in detail later.
- User Details – Provides an overview of the details of the user. Includes their username, name, and email address, as well as their current account status. Please Note: Usernames cannot be changed once created. If someone wants their username changed, you will have to create an entirely new user.
- Permissions – Shows which Contact Groups and Case Offices this user is currently assigned to, as well as their role within each.
- User Access – Displays the login history of this user, including any failed attempts. Also allows the option to manually approve IP addresses that this user is allowed to login from.
User Details
The User Details section provides an overview of the user. In this section, Administrators can edit the name and email address of a user, if any of that information changes. As noted above, usernames cannot be changed once they are created.
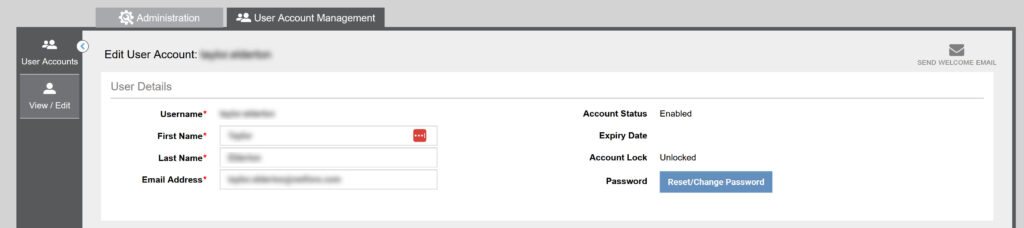
This section is also very important if a user gets locked out of their account. If a user has tried their password too many times and locked themselves out, has an expired account, or just can’t even remember their username, you are able to send a password reset email to their email address, or you can manually assign a temporary password.
Very Important Note – You must click Save at the bottom of the screen after making any changes, including sending the Password Reset email. If you do not click save, none of your changes will be implemented.
Permissions
The Permissions section shows both the case office and contact group that the current user is assigned to, as well as their role within both. Note that if a user is not assigned to a Contact Group, they will not be able to manage cases within their case office.
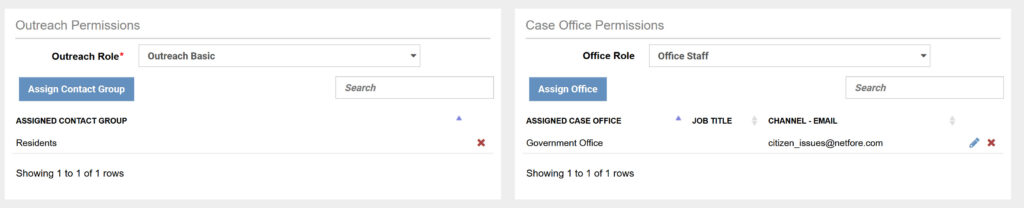
The process of assigning a user to a new Contact Group or Case Office is straightforward. By clicking on the blue button, administrators can allocate users to their desired group or office, streamlining organizational structure and access permissions. In addition, the Case Office offers a notable Channel – Email feature that grants each specific user the ability to initiate case creation by simply sending an email to the designated Channel Email. You are able to set up multiple emails under each user. With this flexible setup, administrators gain precise control over which users can create cases based on the channel email utilized, ensuring optimal customization and efficiency in your workflow.
To change the role of a user, simply click on the dropdown box listing their role, and choose a new permissions role for them.
Finally, to remove a user from a Contact Group or Case Office, click the red X to the right of that assigned group or office.
Very Important Note – You must click Save at the bottom of the screen after making any changes, including sending the Password Reset email. If you do not click save, none of your changes will be implemented.
User Access
Finally, the user access section provides a view of login history for this user. This is an important section to verify that no unauthorized people are accessing the system, nor is it being accessed from a device or location that is not authorized. You can view IP Addresses, device information, and login attempt date from this section.
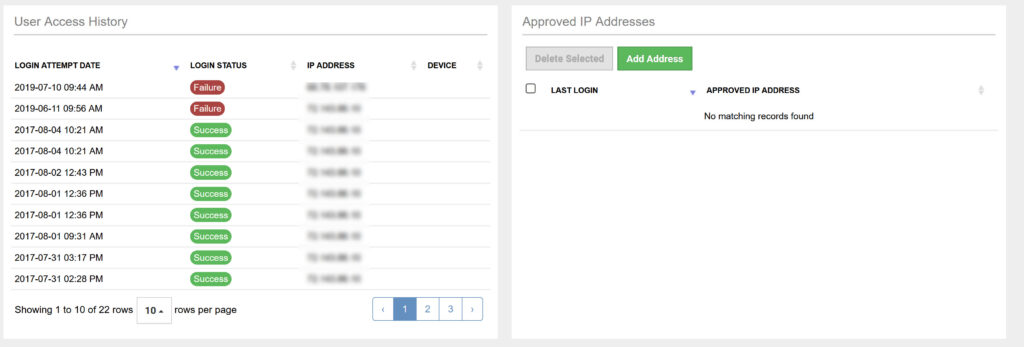
You also can manually assign IP addresses to a user, which ensures that this user can only login from one of the approved IP addresses.