Search Knowledge Base
How To Manage Case Office Templates
Case Office Templates
Your Case Office makes use of templates to streamline and give consistency to your communications. There are two types of Templates: Case Intake Templates and Email Templates.
Case Intake Templates are used to structure Notes when creating Cases. These templates can be used to add information common to certain Cases instead of having staff manually enter the information every time a similarly categorized Case is created.
Email Templates are used when automated emails are sent by the application on behalf of your Case Office. If your Case Office is configured to send emails when a Case is created, updated with public notes, closed, or assigned to a staff member, your configured Email Templates will be used to define the contents and format for these emails.
Case Intake Templates
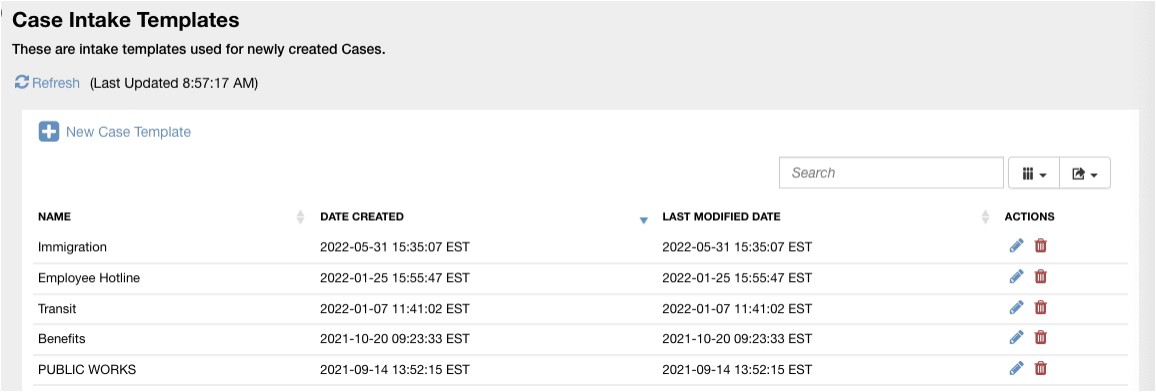
To view the current Case Office’s Case Intake Templates, go to Case Work > Case Office Administration > Case Intake Templates. You will see a table listing all of the Templates available within the selected Case Office for newly created Cases.
Creating a Case Intake Template
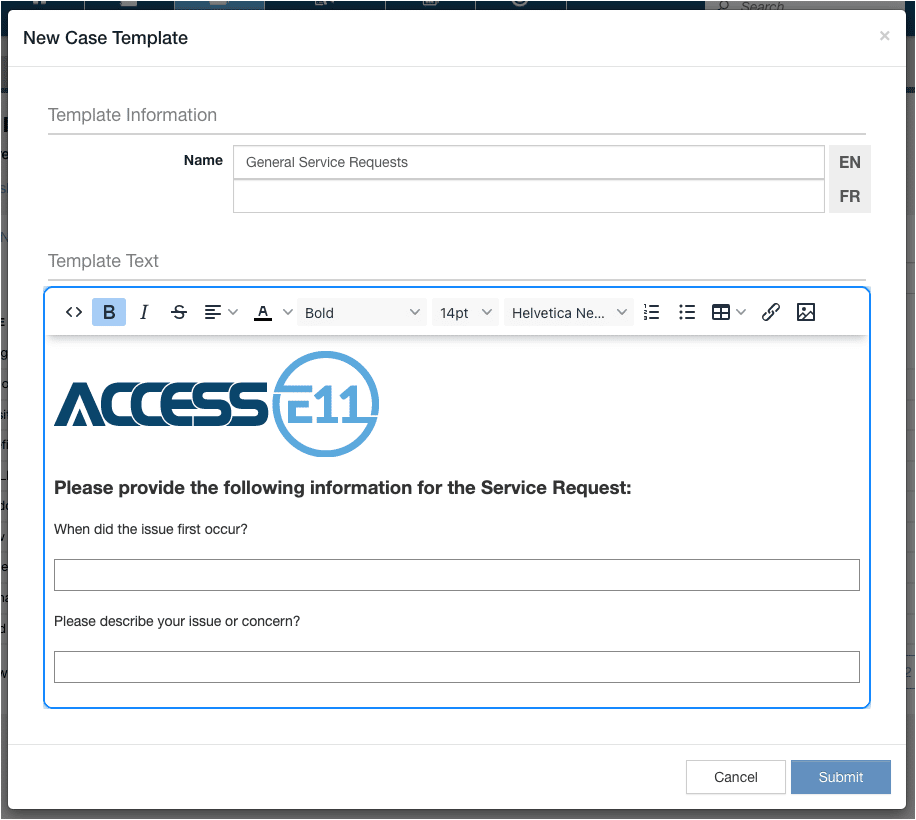
To create a new Case Intake Template, click the ‘+’ symbol in the upper left corner of the Templates table. Give the template a Name and use the WYSIWYG editor to add and format the text you wish to use. Click Submit when done.
Editing a Case Intake Template
To edit a Case Intake Template, hover over the relevant entry in the Templates table and click the edit (pencil) icon. Make the desired changes and click Submit.
Deleting a Case Intake Template
To delete a Case Intake Template, hover over the relevant entry in the Templates table and click the trashcan icon. You will be prompted to confirm that you really want to delete the template. Click Delete and the Template will be deleted from the application database.
Email Templates
Case Office Administrators have the option to enable sending of emails to the Contact that raised the issue whenever the associated Case is created, updated or closed. They also have the option to enable the sending of emails to Case Office staff when they are assigned to a Case.
To make use of these features, you must first ensure that email templates exist.
To view the current Case Office’s Email Templates, go to Case Work > Case Office Administration > Email Configurations. Along with some global confiurations settings, here is an example of what you might see:
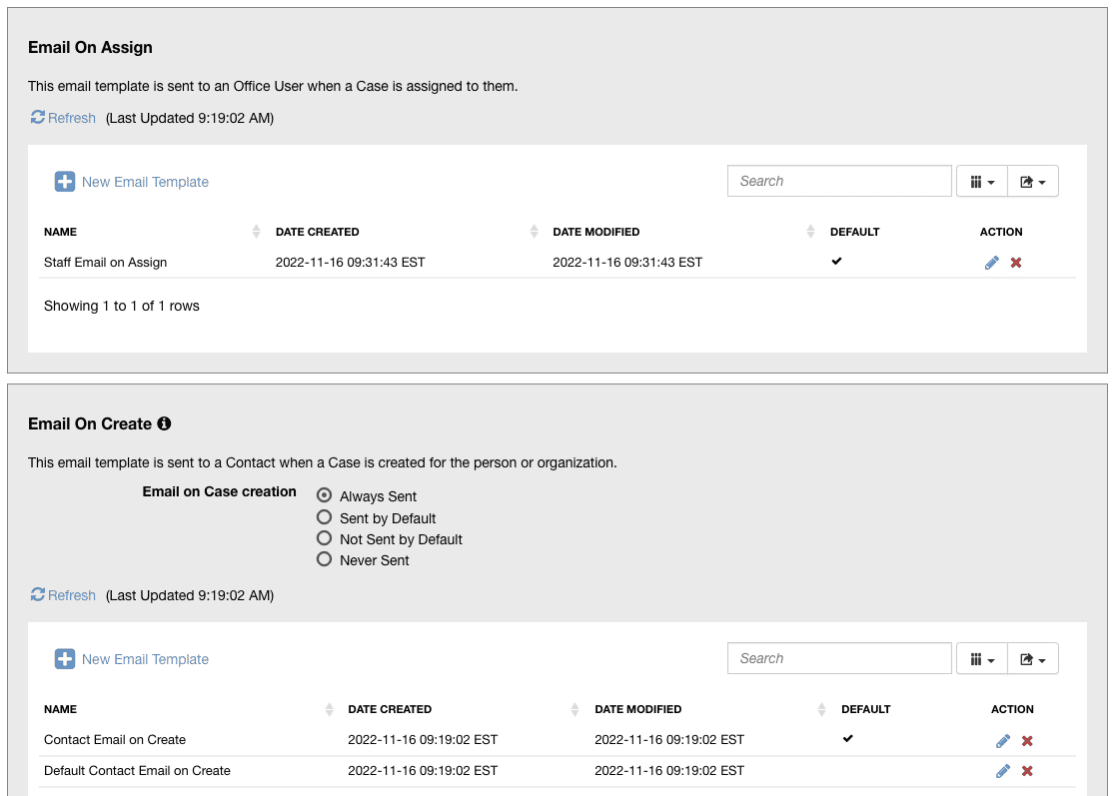
In this example, you can see that some Email Templates are available, including defaults that can be applied generally for the Case Office, i.e. where more specific Templates are not defined for specific category or issue types.
To create a new Email Template for use within the current Case Office, click the ‘+’ icon in the table for the desired email type, i.e. one of Email on Assign, Email on Create, Email on Close, or Email on Public Note. Enter a Name and Subject and use the WYSIWYG editor to outline the email body’s contents and format.
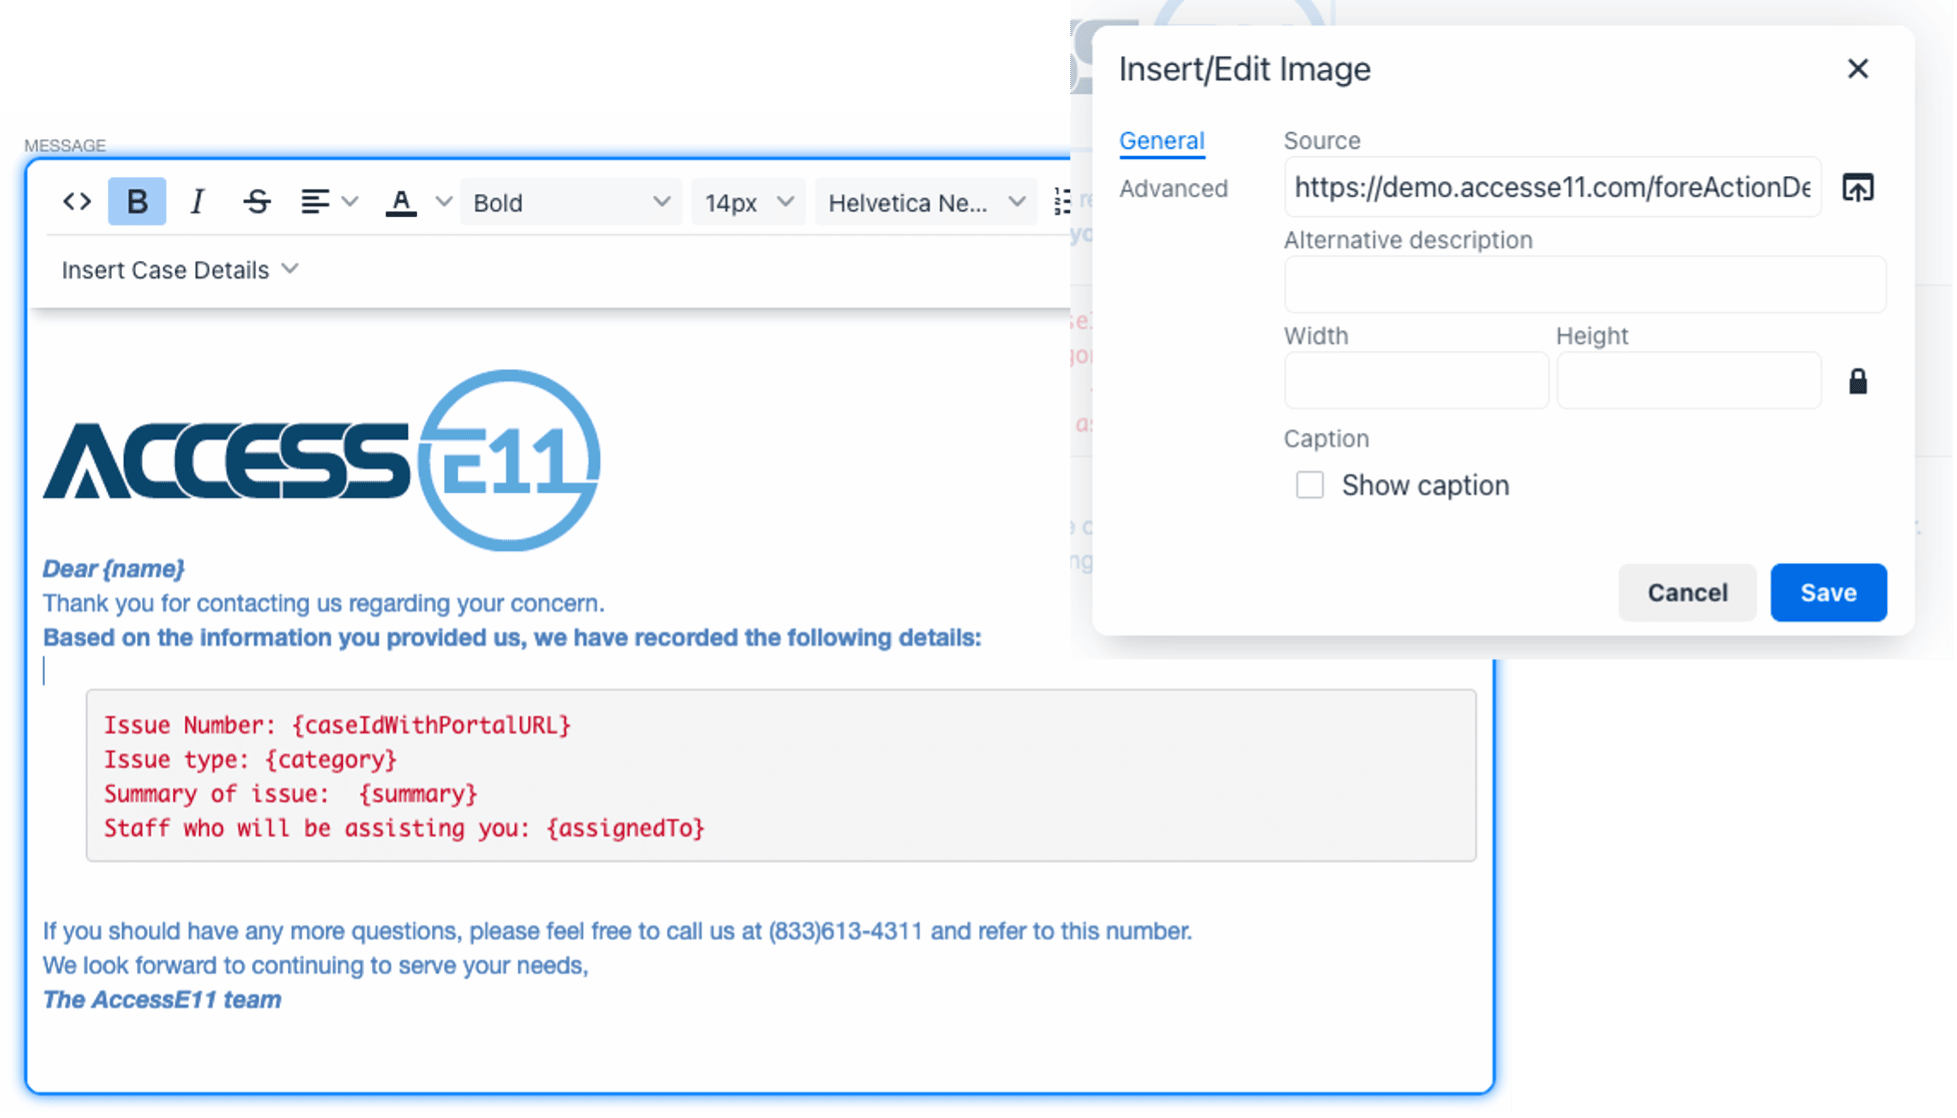
You will note that the editor includes an Insert Case Details feature which can be used to add placeholders in the email that will be replaced with case-specific data from the application database when actual emails are generated. These appear in curly braces within the editor and can include the following:
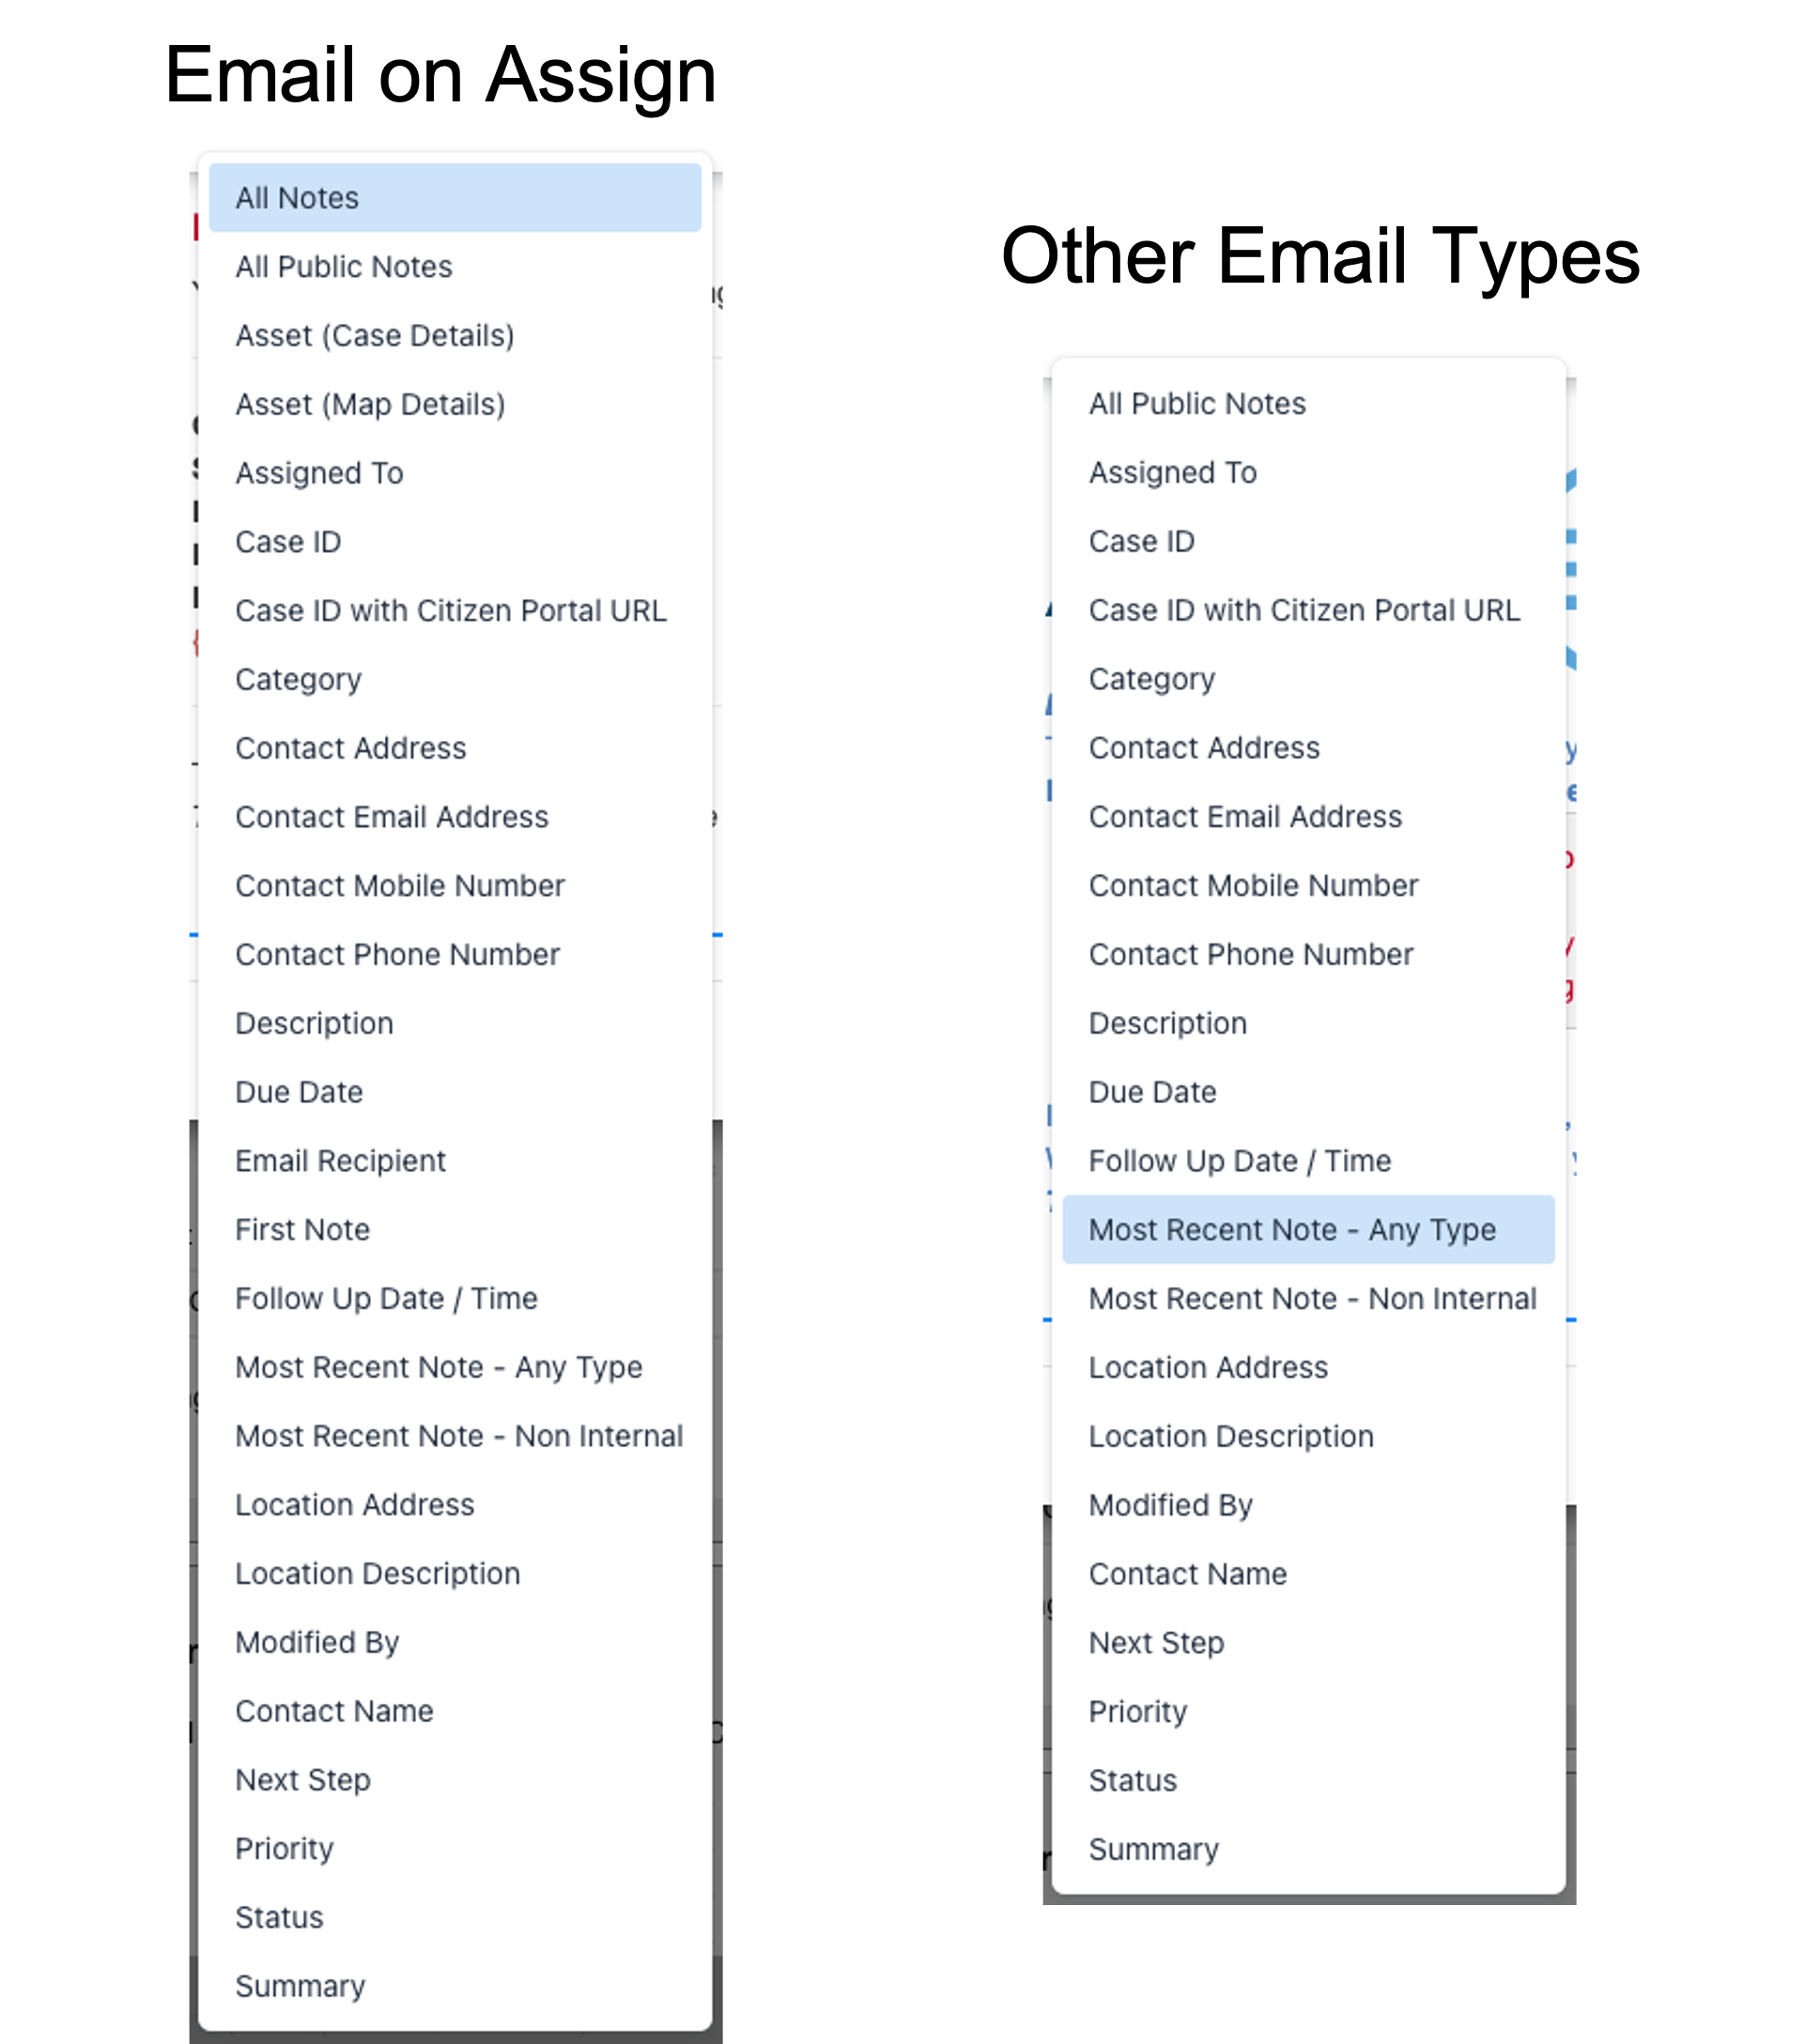
Notes:
- A Clickable Case ID within an email will redirect the Contact to the Citizen Portal, where they can view the Case details and status, and add additional notes directly.
- For Email on Assign, the Case ID will be redirect the assigned staff member to the Case within the internal web application.
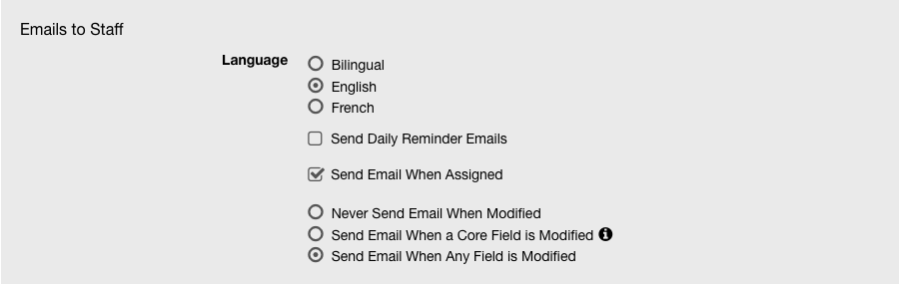
Once you have the Email Templates defined, make sure they are enabled for the Case Office.
For emails to Staff, Send Email When Assigned needs to be enabled.
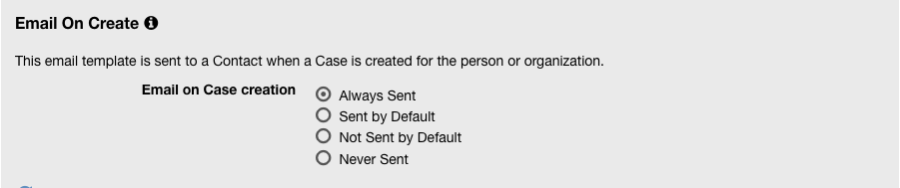
For the ‘Emails to Contacts:
- You define whether or not Emails can be sent to the Contact when the Case is created or closed, or when a Public Note is created or edited. Furthermore, you can configure these to be mandatory if desired, whether by default they are sent or not, and also if you never want them sent.
And finally, using the remaining global configurations you can:
- Choose the language(s) in which you want the emails to be sent.
- Specify the originating email address and send from name for the emails that are auto-generated.
- Configure optional BCC email addresses for emails sent to contacts.
Associating Templates with Case Categories
Once you have defined the set of Templates that you plan to use for your Case Office, you can decide how you want these to be associated with the individual Case Categories that are managed on the platform. If you choose not to override the default Templates that have been defined, you can skip this step.
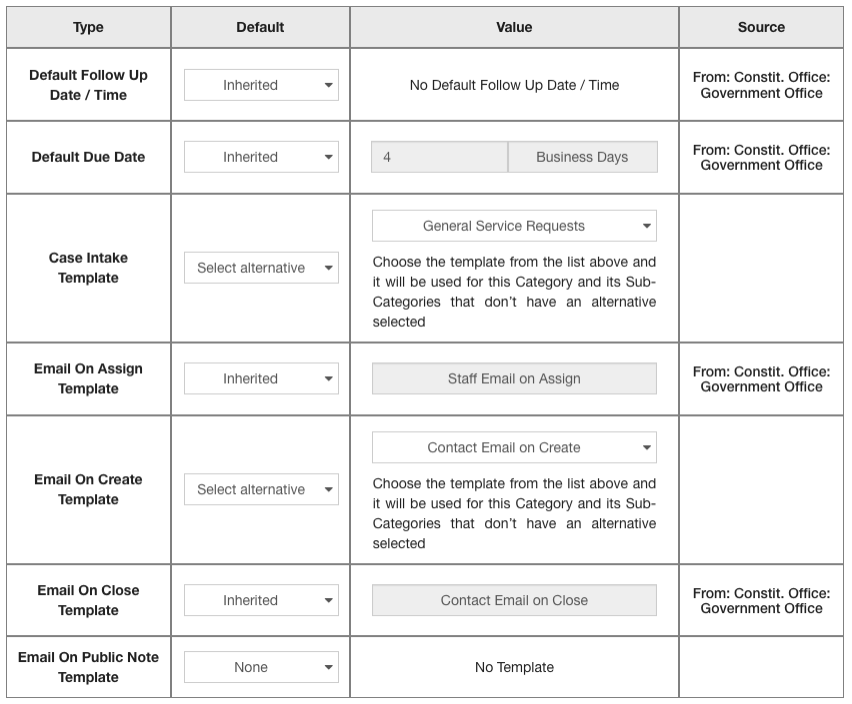
To override the defaults, navigate to Case Work > Case Office Administration > Case Categories. Select the category you are interesting in and click Open to edit it. You will see the table shown below and, for each Template type, will have the following configuration options.
- Inherited – indicates that the Case Office default will be used.
- Select alternative – indicates that the default will be overridden. In this case, a replacement must be selected,
- None – indicates that no Template will be used or, for Email Templates, that emails of the associated type will not be sent.
Once configured, select Save to apply your changes.