Search Knowledge Base
How To Search For Cases
Searching For Cases
The Cases that are assigned to you can be viewed within the Case Work application. With sufficient permissions, you can also view Cases that are assigned to others. Using the “Find” option within Case Work, you can access multiple search criteria that can be used in combination to quickly find the case or cases of interest.
There are two main ways to navigate to the Case Work application once you are logged in:
- Select Case Work from the top-most menu. You may do this at any point while you are logged in.
- Select one of the Case Work options from the Home screen.
Within the Case Work application itself, select Find in the left-hand menu.
![]()
Enter the criteria that you wish to use to search the Case Office’s Cases, then click the Search button.

A list of Cases matching these criteria will be shown in the table below the search fields.
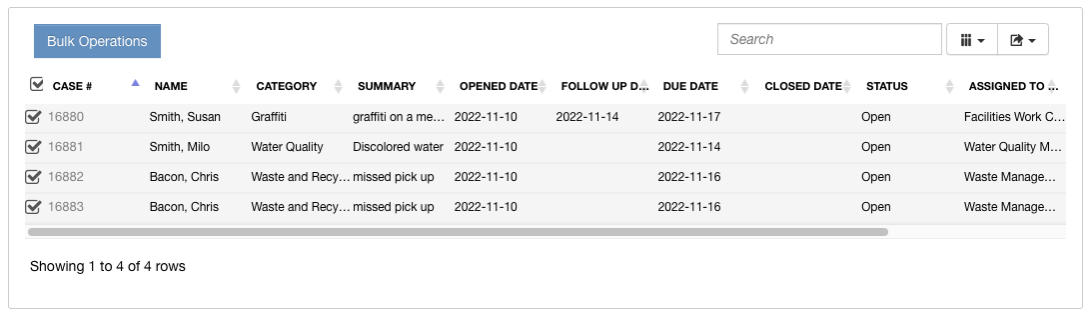
Clicking the CASE # in any row in the search results table will open the corresponding Case so that it can be updated.
The “quick find” filters at the top of the page are also selectable and will build the appropriate filter when returning the list of matching Cases, for example all Open Cases or all Unassigned Cases, etc.
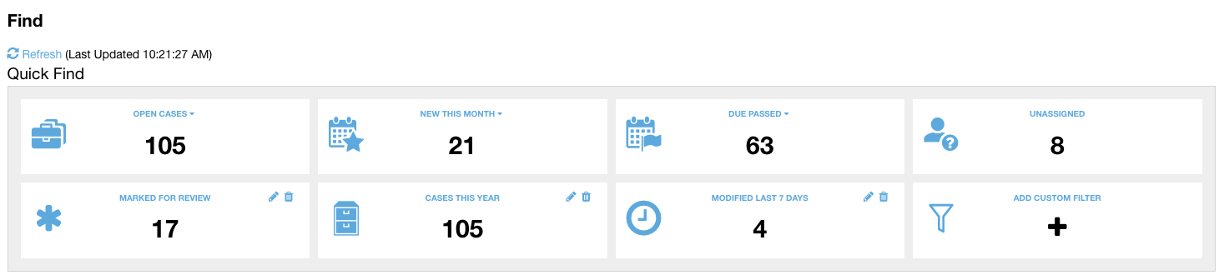
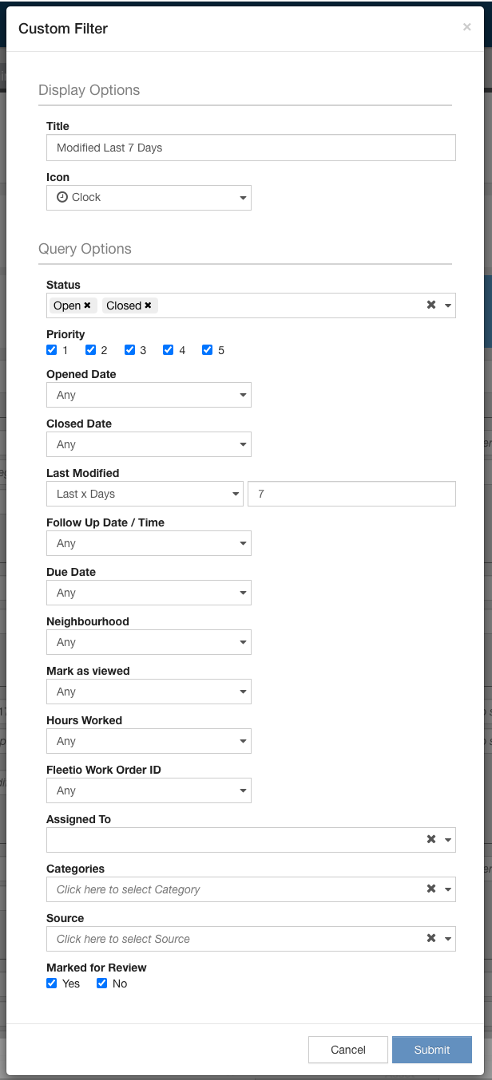
It is also possible to define up to 4 custom Quick Find filters with this tool, providing you with extensive flexibility with how you simplify repetitive searches that are of particular interest to you. For example. you might be interested in all Cases Marked For Review.
Bulk Operations
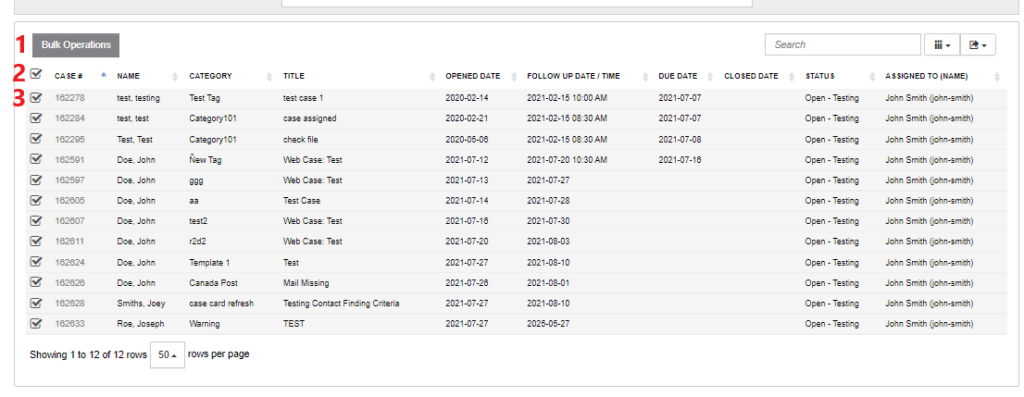
Instead of having to manage individual Cases on their own, you can perform a number of bulk operations for the Cases returned by your search. You can choose specific Cases for a Bulk Operation by selecting the checkboxes for the Cases to include (3). Alternatively, you can choose all Cases returned in the search by selecting the checkbox in the header row of the table (2). Once you have the selected Cases to include for the Operation, click the Bulk Operation button (1) on top of the table and choose the Bulk Operation you would like to run. NOTE: Some Bulk Operations can only be done by an Office Administrator.
The following Bulk Operations can be performed without Office Administrator privileges:
- Add Assignees: You can add one or more assignees to the selected Cases. To do so, select Add Assignees from the Bulk Operations dropdown. A pop-up will appear. Then, from the Staff to Assign dropdown, select the people you would like to assign to the Cases. Select “Assign Selected Staff” to complete the operation.
- Export as CSV: Exporting the Cases to a CSV file will create a report that can be downloaded in the Reports application.
- Category Change: You can change the Category of the selected Cases. To do so, select “Category Change” from the Bulk Operations dropdown. A pop-up will appear. Then, from the New Category dropdown, select the Category you would like to assign to the Cases. Select “Replace with Selected Category” to apply the change.
- Generate Case Summaries: This option will generate a summary PDF report of all the Cases in the search results. When this option is selected a window will be displayed for you to tailor the information that is included in the report. Selecting “Generate” will launch the report creation task, and once the report is complete it will be downloaded to your local computer.
- Remove Assignees: You can remove one or more assignees from the selected Cases. To do so, select “Remove Assignees” from the Bulk Operations dropdown. A pop-up will appear. Then, from the Staff to Un-Assign dropdown, select the people you would like to un-assign from the Cases. Select “Un-Assign Selected Staff” to complete the operation.
- Set Follow Up Date: You can set a single Follow Up Date for all of the selected Cases. To do so, select Set Follow Up Date from the Bulk Operations dropdown. A pop-up will appear. Then, from the New Follow Up Date dropdown, select the Date you would like to assign to the Cases, and press Apply. Then select the Time of Day you would like for the cases to be followed up on. Select “Replace with Selected Follow Up date” to apply the change.
- Status Change: You can change the Status of the selected Cases. To do so, select Status Change from the Bulk Operations dropdown. A pop-up will appear. Then, from the New Status dropdown, select the Status you would like to assign to the Cases. Once you have the desired Status selected, select “Replace with Selected Status” to apply the change.
- Tag Associated Contacts: This option allows you to add tags to the Contacts associated with the selected Cases.
The following can only be done by Office Administrators:
- Delete Cases: Office Administrators can Delete all of the selected Cases. To do so, select Delete Cases from the Bulk Operations dropdown. A pop-up will appear that asks for YOUR account password. Once entered, select “Delete Cases” to delete them.
- Set Due Date: Office Administrators can set a single Due Date for all of the selected Cases. To do so, select Set Due Date from the Bulk Operations dropdown. A pop-up will appear. Then, from the New Due Date dropdown, select the Date you would like to assign to the Cases, and press Apply. Select “Replace with Selected Follow Up date” to apply the change.