Search Knowledge Base
How To Update A Case
Updating a Case
After a Case has been created you will need to update it from time to time until the issue has been resolved and the Case is ultimately closed. If configured, notifications will be sent to the assigned users as changes are made to the case.
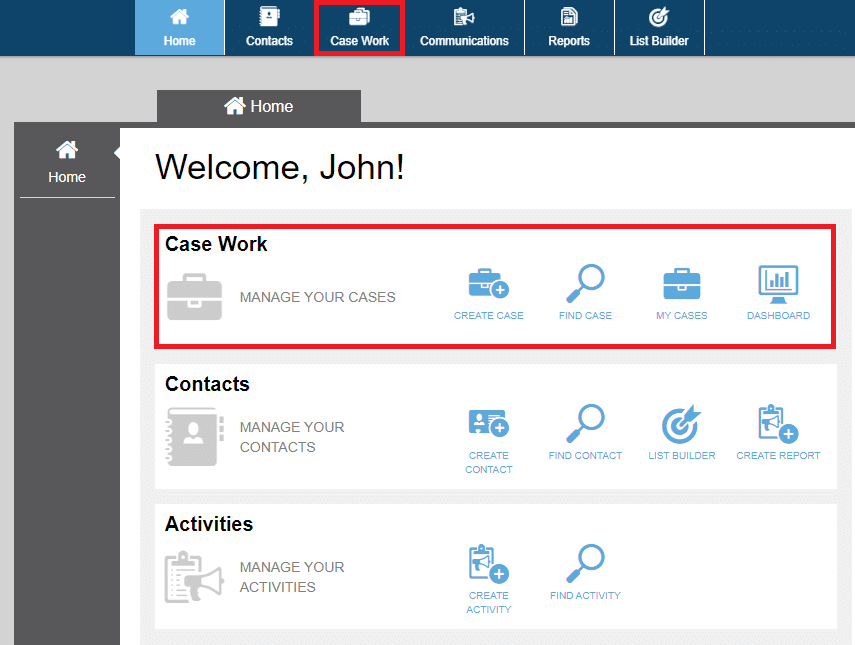
There are two main ways to navigate to the Case Work application once you are logged in:
- Select Case Work from the top-most menu. You may do this at any point while you are logged in.
- Select one of the Case Work options from the Home screen.
To update a Case, first find the Case using one of the methods outlined in How To Find A Case.
If working within the Case Work Dashboard and My Cases dashboards, the simplest approach to updating Cases is to view the case details directly in the dashboard and use inline edits to make any changes. To do this, first make sure that the Case card for the selected Case is visible on the right hand side as seen in red in the image below. Then hover over the Case details within the card that need updating to edit and save any changes without leaving the dashboard.
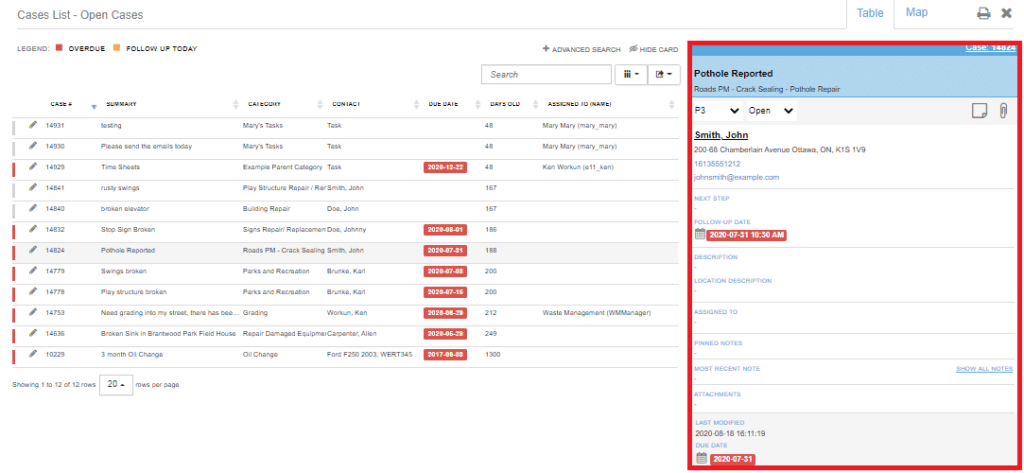
If you wish to have a full page view of the Case when performing updates, you have the option of selecting the edit icon for a Case in the first column of the Case List table in the dashboard, or selecting an existing Case from the search results table when using the ‘Find” feature, see How to Search for Cases for more information.
Once you have successfully selected a Case, you can update most of the information that was specified when the Case was first created or subsequently updated. Specifically, you can:
- Associate the Case with a different Contact
- Specify a new Category
- Change the Summary and Description
- Change the Status of the Case
- If your Case Office Administrator has enabled it, you may also have the option to send an Email to the Contact upon updating or closing the Case.
- Reset the priority
- Toggle whether the Case should be treated confidentially or not
- Set a new Follow Up Date and Time
- State the Next Steps
- Edit any of the Custom Fields that have been defined by the Case Office Administrator
- Reassign the Case to somebody else in the Case Office
- Change whether the Case is only visible to assigned user(s)
- Choose whether the Case is Marked for Review
- Select a new Opened Date
- Set a new Due Date
- Change the Case Location, and/or the Location’s Description
Using ArcGIS Layers
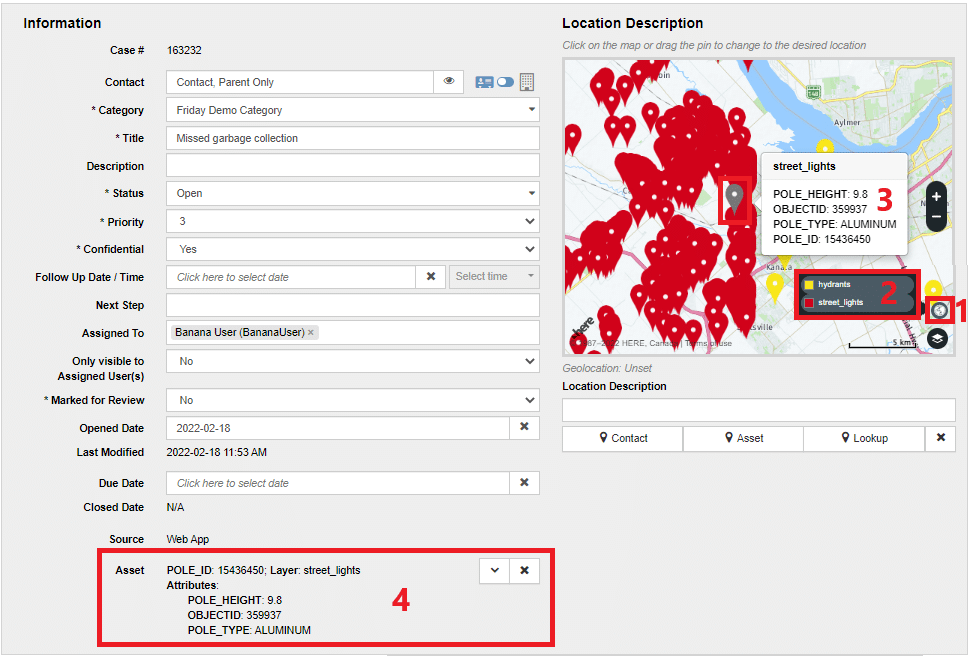
If your Case Office Administrator has configured the option for Esri ArcGIS integration, you will be able to see ArcGIS Layers on the map. To do so:
- Select the Globe icon in the bottom right corner of the map (1).
- Then select which Layers you would like to add to the map from the pop-up that is presented (2).
- You can hover over the pins on the map to see the detailed attributes of the tracked assets (3).
- You can associate the tracked asset to the current Case Details simply by selecting a pin. It will appear as an Asset in the Case Details (4).
Case Notes and Case History
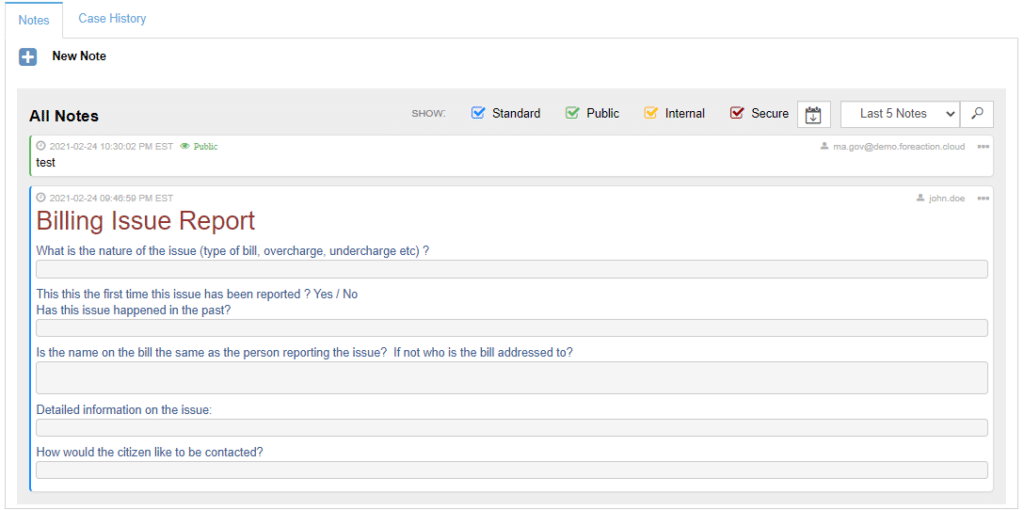
This is where you’ll see all Notes entered for the Case since the time it was created. From here, you can create new Notes, edit existing Notes, and delete Notes that are no longer needed. Be aware that, by default, each Note only shows the first 10 lines of that Note. You can expand a note to view the full contents simply by clicking on it.
Searching Notes within a Case
To search for a Specific Note on the Case you are viewing, click the search icon on the top-right and type in text from the Note you are searching.
By default only the Last 5 Notes are shown, however this can be expanded using the dropdown next to the search icon.
There are three types of Notes: Standard, Internal, and Secure. Use the checkboxes to filter which Notes you’d like to see.
Special Note Types
A Note can optionally be set to Internal and/or Secure.
Internal – As the name suggests, this designation is for notes that are intended to be seen only be internal staff, and not shared in any correspondence with the Contact who raised the Case. When you generate reports on the details of a Case, you can choose to exclude Internal Notes.
Secure – This signifies that there is sensitive information in the Note. Selecting this option ensures that this Note is encrypted in the database. This additional level of security ensures that even if someone could access the database, the information would not be readable to them. If you designate a Note as secure, its contents will not be searchable in the Search Case advanced search page.
Public – If a note on a Case is marked public, it can be seen by the Case’s Contact in the Citizen Portal.
Automated Notes
If a case is modified so that the follow up date/time or next step changes, a standard note will be automatically added. This automated function provides a clear logging of any changes made, as well as the user that made those changes.

Creating / Editing Case Notes
To create a new Note, click the ‘+’ button next to New Note. Then write the Note, choose whether you want to have the Note either be Internal, Secure, both, or neither. To cancel creating the note, click ‘Discard’ on the top right of the New Note. To edit or delete an existing Note, click the ellipses on the right-hand side of a Note and click the desired option. To save any changes, click the Save button at the bottom of the page.
Case History
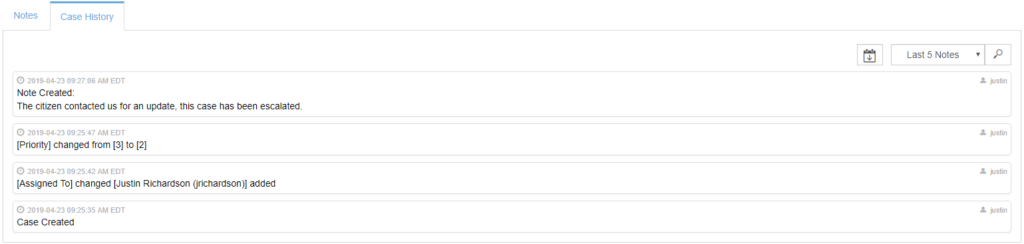
This tab shows the entire history of the Case, from changed information to Note creation and deletion.
Adding Attachments
As is the case for creating a new Case, you have the option to attach new documents such as PDF, Word, excel files or email correspondence related to a Case. Simply click the Add (+) icon in the Attachments table to locate and attach the desired file.
Once you have provided the updated information, click Save and the updated Case will be saved to the application database.
The following file types are allowed to be uploaded, all others will be rejected:
- .png
- .jpg
- .jpeg
- .gif
- .doc
- .docx
- webp
- webm
- hevc
- HEIC
- HEIF
- apng
- .xls
- .xlsx
- .csv
- .zip
- .ppt
- .pptx
- .rar
- AVIF
- .jxr
- .hdp
- .wdp
- .jp2
- .txt
- .msg
- .eml
- .wav
- .mp3
- .mp4
- .wma
- .j2k
- .jpf
- .jpx
- .jpm
- .mj2
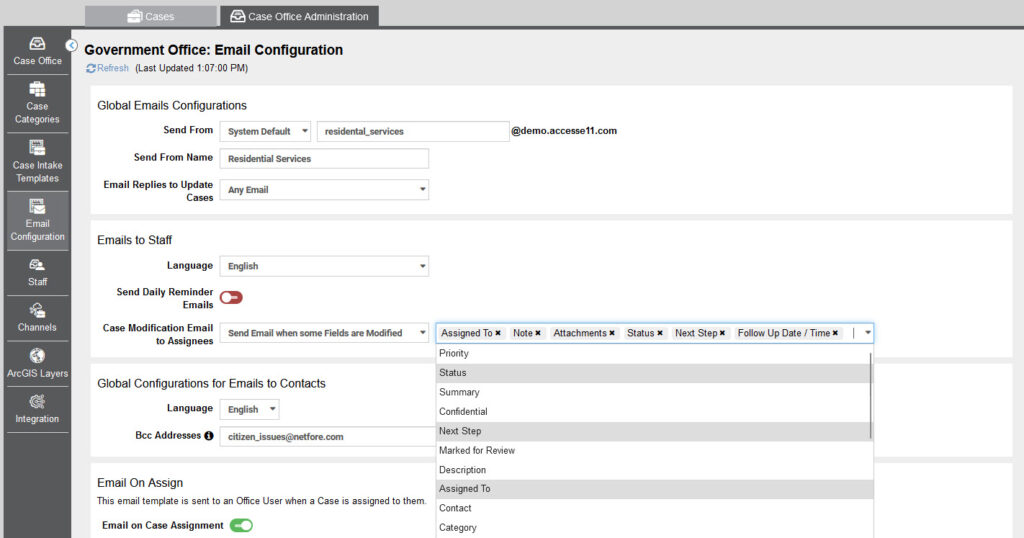
Staff Email Notifications
Email notifications to staff can be auto generated whenever a case is modified, allowing a flexible way of keeping everyone informed of what is happening with each case that is assigned to them.
Reporting On, Moving, or Deleting Cases
At the bottom-left of a Case’s details page, there is an ‘Options’ pop-up menu. Here you can choose to generate a PDF Report, move the Case to another Case Office, or delete the Case.

Generating and Printing a Case Report
Several options are available when generating a Case report:

Any attachments will be bundled together and will be added to a .zip file for the Case.
All reports generated in Case Work will be downloaded automatically through your browser as a PDF file.
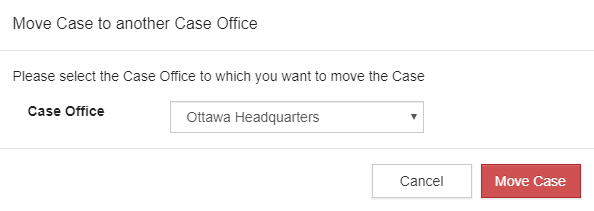
Move to Another Case Office
This option is only available to Office Administrators with access to more than one Case Office. If you select Move to another Case Office, you will be presented with the option to select another Case Office from the list of other Case Offices for which you have administration privileges.
Deleting a Case
If you choose to delete a Case, you will be presented with a dialog where you will be asked to confirm your intention to permanently remove the Case from the application database.